
 If you have ever used an Accuracy International Chassis System (AICS), you already know why I decided to make this change. If you haven’t yet had the opportunity, let me see if I can explain. It is not only a tactical stock, but an advanced chassis system that will provide a stable platform and improve accuracy. The chassis is very sturdy aluminum, it provides a detachable box magazine, mounts for both Harris and AI type bipods (I have a Versa Pod I want to use for this rifle.) It has an adjustable cheek piece and and adjustable butt pad. The sidestocks are polymer, providing a better grip. They are durable and and easy to clean. The main reason I swapped the stocks is to have more options than the factory Remington stock allowed. The AICS stock gave me a magazine, options to adjust the length of pull, an adjustable cheek piece, and the ability to use a Versa Pod. I can really make this rifle mine now.
I was a little unsure if this swap would be beyond my capability, but I am never one to shy away from a challenge. I did have a friend assist me, who not only had the tools I needed, but who was also a fantastic cheerleader! The directions that Accuracy International sent with the stock were very easy to follow:

I watched a couple of YouTube videos to get my mind straight, then I jumped in.

I needed a couple of tools, mainly a 2.5 mm Allen wrench (supplied with the AICS Stock) and a torque wrench that measured inch pounds. We also needed a 3/16″ Allen wrench, which we pulled from the garage.

There were two bolts located on the bottom of the Remington that I had to remove (I used a socket for this), and once I did that, the barrel, action, and trigger easily pulled out of the top of the old stock. I had the Remington stock, the trigger guard, and the bolts left over — I set them aside.

I then took the AICS stock and carefully attempted to place the trigger and action into the new stock. This was a snug fit, I had to take my time and gently work them into place. Inside the stock, forward of the opening for the action, there is a notch to accommodate the recoil lug. I adjusted the action until the recoil lug was seated properly. The directions then said once you have the action in the stock, to push the action back toward the rear of the rifle until the “recoil block” rests firmly against the stock chassis. Wait, I am pretty sure I knew what it was saying, but I did not know what a “recoil block” was, so I had to Google that one. From the research, I determined my recoil block is in the photo below:

I did take the rifle and tap the butt of the stock on the table very firmly (a couple times) to ensure the recoil block was as far back as it would go. Once I had the action in place against the rear of the stock, I laid the rifle on the table and put in both action screws.

I began to tighten the forward screw first to ensure the recoil lug remained in its place, then tightened the rear screw. I used the 3/6″ Allen wrench for this.
I tightened them until they were fully threaded in, but not fully tight. I then used the torque wrench (set at 53.1 in-lbs) to tighten them to specifications.
Next, I tightened the screws and checked the torque (7 in-lbs) on each side of the side stocks, I used the 2.5 mm Allen wrench for this. Voila! I had completed my swap. Or so I thought.
![]()
OK, the directions say to:
Check the bolt: yep, full motion, good to go.
Check the trigger: yes, cycle the bolt, pull the trigger, no issues.
Check the safety: It is on Fire (F), I already knew that was fine, then I tried to move it to Safe (S) and it did not budge, not at all. Dang it!
I had read about this swap prior to undertaking the project myself. One of the most common problems people have with this swap is there is not enough room in the AICS stock for the safety to have full motion. The problem was twofold, I have a Jewel trigger on this rifle, and the lever for the safety, when engaged, pushes forward of the trigger enclosure. We needed to make room in the stock for this forward movement. Also, the rivets that hold the safety lever in place protrude a little too far to starboard for the stock, so we would have to widen the action opening just slightly there as well.

One option to correct the issue is to create more room in the stock. So, we went to work. We put the stock in a vise, padded to avoid damage. At first I used a Dremel tool to do the bulk of the fine grinding. I went slowly, taking out the minimum amount of material possible. We had a few cycles of replacing the action into the stock, and checking the safety, and then back to to the grinding. Eventually, it was enough, and the safety returned to full motion. We cleaned up the work we did with a file to leave a smooth, uniform finish inside the stock.

I repeated the process with the action screws and the torque wrench, the side stocks, and with that – the stock swap was complete. Would I recommend this project to the average gun owner? If I can do it, you can do it! (As long as you have the proper tools.) Now I have a tactical stock that I will adjust to fit me. I will talk about fitting the stock for me in a different post.
I haven’t actually taken it to the range, which will be the ultimate test. I am waiting on the Nightforce Scope my friend is letting me borrow, and once I have that, you will see a video of this rifle in action!
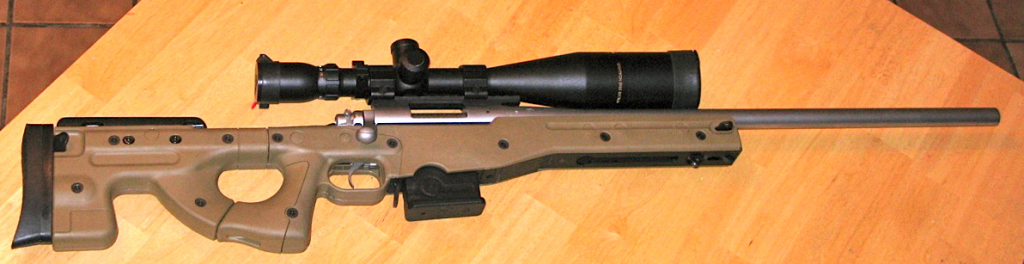
In the meantime, here is the finished product!


You must be logged in to post a comment.