To modify, or not to modify…. that is the question. The M14/M1A series of rifles have a certain sentimental value to me in their original walnut stocks, and OEM parts. My old man served in ‘Nam as a LRRP (Long-Range Reconnaissance Patrol) for multiple tours, using the M14 before it was replaced with the failure prone M16. This is why I refer to it as my “old man’s rifle”. The iconic M14 Still serves today under several designations after being modernized with a new chassis and improvements in accuracy. Keeping this in mind, I decided to drop my Springfield Armory M1A Loaded model into a new chassis. Although I normally would show the install, I am skipping over this process, and recommend you see Jeremy (one of our WLS writers) who has previously assembled it, or the manufacturer’s video.
“Modifying the manufacturer’s design of a firearm may void your warranty. This article is for informational purposes only, and is not meant to be a how-to guide. The purpose of this article is to review a specific product, and to show what may be involved in the installation, function and/or use. You (the reader) are responsible for: knowing your local firearm laws, safe handling, operation, and function of your firearm. You are also liable for any damage, injury, or accidental death that may result from incorrect work you may perform. We Like Shooting (welikeshooting.com), its writers, and staff recommend consulting a competent gunsmith or armorer prior to working on your own firearm.”
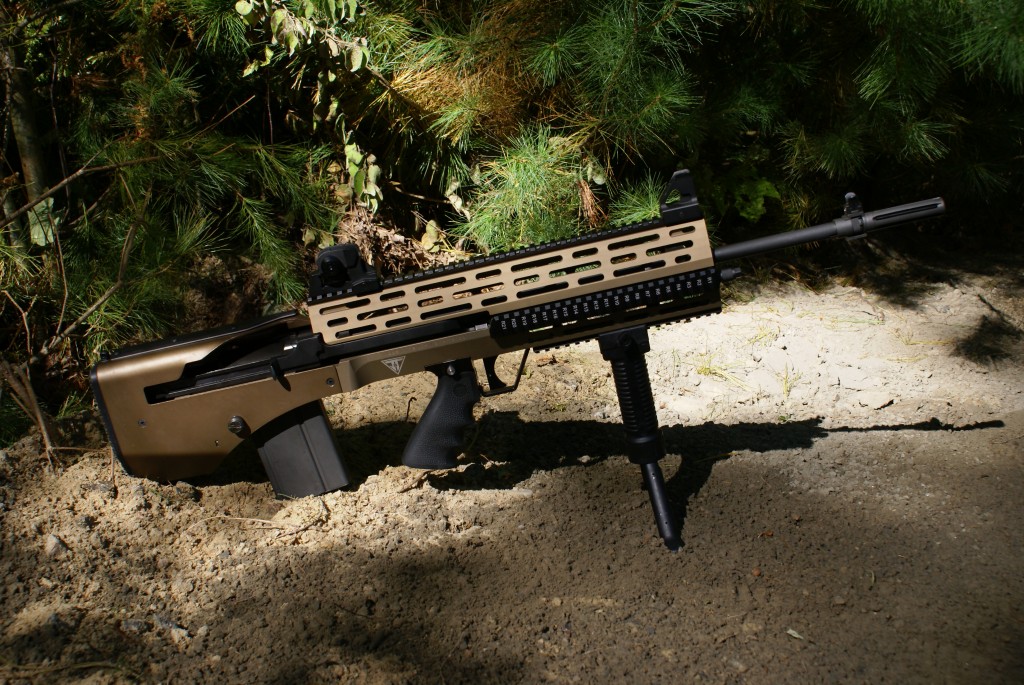
The M14 Rogue Chassis System from Juggernaut Tactical has changed the way I view the M14/M1A rifle. Normally, I would classify it as a medium to medium-long range rifle. The first thing I noticed when opening the box was the design; it’s a bullpup conversion. Now, it falls into a whole new category allowing for close quarter to potentially medium-long range classification. With a total of about 11.75″ taken off the overall length (compared to about 3.7′ with the standard GI stock), the overall feel and balance changed coming in at approx. 2.7′ in length. Although the weight increased from 11.4 lbs. with a walnut stock to 14.2 lbs. (both measured with a fully loaded 20 rnd. steel mag.), the Rogue felt lighter once it was shouldered. The change in the length and balance allows for ease of maneuvering, and I found that it was fast to aim with one hand thanks to the pistol grip.
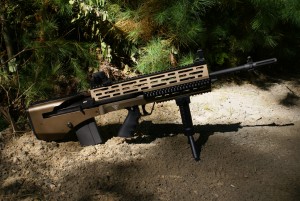
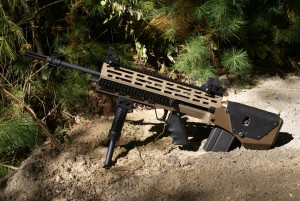
Lets talk about features…. there’s a lot of them.
The biggest one is how the Rogue handles recoil. With the slight addition in weight and its bullpup design, I was able to reacquire targets faster and the perceived recoil was notably less. Down range, I was able to shoot until I ran out of ammo, vs. 50-75 rounds with the walnut stock and steel butt hardware. Holy rails! With about 39″ of 1913 Picatinny located on the top, bottom, left, and right of the chassis at your disposal, you’re able to add sights, lights, lasers, grips, or anything else you desire to make it the ultimate tacti-cool rifle in your collection. They are also laser indexed for quick reference. The grip is comfortable with an ergonomic grip angle, finger groves, and rubberized coating. With the trigger group’s safety left in the “off” position for proper function, the chassis has a cross-bolt style that is located above the grip. Seems like a strange place for it? It actually works well, being easily manipulated by the thumb and trigger finger. Push from left to right for safe, and right to left to disengage. There is also a red band on the left side that is visible from shooting position (for right handed shooters). Wearing gloves? No problem. The long trigger with its curved face and angled trigger guard allows plenty of clearance, even if you have sausages for fingers. While the M1A’s receiver retains its original operating rod and handle, the Rogue includes a left-sided charging handle that connects to the op. rod and allows you to reload/charge the rifle with your support hand, keeping you on-target during the process.
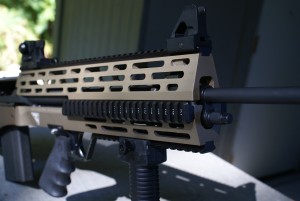

To increase accuracy and allow for the rifle’s variances in tolerance (differ from manufacturer to manufacturer), the upper half of the chassis is installed on the receiver and barrel using the included hardware. Since it is a solid mount to the actual firearm, accuracy is retained whether optics or iron sights are used. When assembled, the receiver is locked into place in the lower half by the trigger group (as it is in the standard stock), and the attached upper half sits on neoprene studs essentially creating a (as close as you can get) free floating barrel that also helps accuracy. To aid in seating the action, there is a grove in both sides of the lower half where the trigger group locks into place. This allows for tolerance differences. You’ll notice there are numerous slots milled into the upper and lower components, and they help shed excess heat as well as lighten the overall weight.
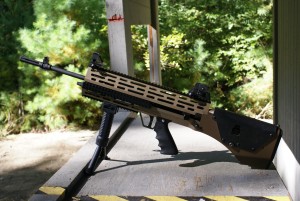
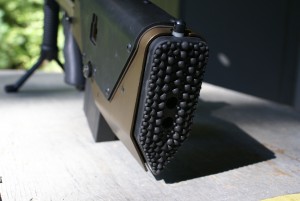
The butt of the chassis system is essentially a slip-on cover that encases the action with two bolts on either side to secure it. It has a rubber cheek pad on the top and right side that absorbs some of the shock as the rifle is fired. Also on the right is access to the bolt hold. On the bottom, the sides are angled inward providing an anti-snag design. The recoil pad is rubber with different sized nubs that grip the shoulder well, and absorbs some felt recoil. One of my favorite features is the ability to load single rounds into the magazine (without a stripper clip) through the action as you could when the M1A is in its original stock. In my opinion, this makes it perfect for loading individual special purpose rounds or for hunting. Hunting?! Well…. you may look crazy, but it’ll make for one hell of a conversation piece (with the legal hunting magazine size of course). There are two sling attachment points; one above the butt pad, and another on the left side just in front of the rear cover.

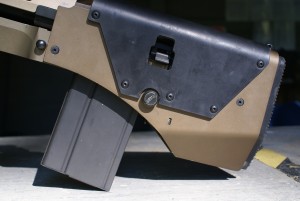
The bolt hold is still accessible through the left side of the action cover.

There are many positive attributes provided by the Rogue Chassis System. However (in my opinion), there are some negatives too. Your experience of course, may be different.
The first is a user-correctable issue. Changing magazines (for me) was slower than when the M1A was in its original walnut stock. Normally, I would use a loaded mag to flip the empty one out of the rifle (similar to an AK platform), and rock the fresh one into place. Since the Rogue is a bullpup style chassis (which I do not have a lot of experience shooting), the magazine is in the bottom at the rear. This made it a little awkward feeling to release and remove the magazine, and then replace it. I also noticed that it was much easier with the longer 20 round vs. the short 10 round that comes with the rifle from Springfield Armory. I’m sure that with time and training it would become second nature, and I have seen a review video including a comparison of the Rogue reloading speed to an AR-15. Both were run empty, and back in battery in about the same time. If you decided to use the Rogue for hunting (yes, I said it again) with a 5 round or flush fit mag., perhaps it may be better to top it off with ammunition from the top rather than try to insert or swap magazines (check your local laws regarding having a magazine in place and/or loaded while traveling and hunting).
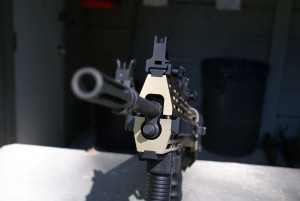
The next thing I noticed was the increase of the sight’s height (in comparison to the barrel mounted front sight) and the reduction in sight length, since the factory irons aren’t useable. The height increase from the bore axis made it difficult to adjust for longer distances (since the sights are raised a couple of inches more above the stock ones). As for the sight radius, well…. let’s just say it’s shorter. About half the length of the original irons (on the full length versions of the M1A). This could be mitigated by installing an optic, but I personally always fall back to good old-fashioned marksmanship. On a side note, My M1A was equipped with national match sights from Springfield Armory. The detachable sights used on the Rogue were a standard A3/A4 style with a larger rear aperture(s) and wider front post.
Thirdly, was the gas ejected through the breech when fired. If I was shooting in a slow-fire capacity, there wasn’t an issue. But, when firing multiple rounds quickly, a cloud of expelled gas from the ejecting brass would form at the breech…. right where my face was. Ask our very own Jeremy. He’ll concur. This issue may be resolved by simply adding a 2″ spacer (available from Juggernaut Tactical for $70) to increase the length of pull and also increases comfort for taller shooters, but I haven’t tried it.
Lastly was the trigger. It’s connected to the M1A’s trigger group by a long rod with a couple of angles in it and a rubber pad/retention strap. The trigger job I gave my M1A resulted in a 4.1 lbs. pull (+/- an ounce or two). Properly installed in the Rogue, it increased to 5.4 lbs. pull. The feeling changed too. Instead of a smooth and crisp break, I ended up with a pull that I can best describe as being similar to a SKS.
In my opinion, the changes in sight’s height/radius and the trigger aren’t bad for close-quarters or minute of man accuracy at 100 yds. You’ll hit your target without a problem. However, (comparing with iron sights) I’ve shot close to 1″ groups at 100 yds. with my M1A Loaded in it’s stock configuration. The best I could do with the Rogue was about 5.5″, though I will admit that a quality optic or sights closer to national match specs. would probably close that gap significantly.
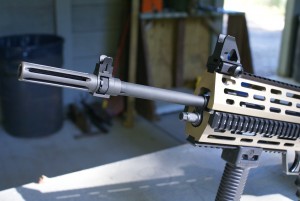



Overall, I was pleased with the Rogue Chassis System from Juggernaut Tactical. It definitely serves a purpose, and is a quality product. From a machinist’s point of view, there is minimal tool marking, and the surfaces are well blended. If you’re curious about the $875 price tag, or the price of the spacer or front mount, I can tell you they are fair. It takes time and money to design, program, setup tooling, proof, manufacture, and finish coat these products. You also need to figure in price of stock (chunk of metal that these products are machined out of). In my honest opinion, I would be more likely to recommend this product for a shorter barrel model of the M1A such as the Scout Squad or better yet, the SOCOM 16. In fact, although I have returned my M1A Loaded Model to its original walnut stock, I plan on using the Rogue with a M1A SOCOM 16…..hopefully, in the not too distant future.
Thanks for reading and visiting We Like Shooting,
-Rhody

You must be logged in to post a comment.