Apex Tactical Specialties; Forward Set Sear & Trigger Kit

Smith & Wesson M&P Pro 9mm trigger job

The Smith and Wesson M&P9 Pro has become my favorite sidearm. It handles well, has great accuracy, and has great ergonomics. The only issue I have with it is the trigger. I have never been a fan of a hinged trigger safety design and I feel that it gives a mushy feeling as the safety is disengaged, followed by a long take up. Apex Tactical Specialties has come through again with an innovative product that not only makes a major improvement to the trigger, but to the action and safety as well. Up for review in this article is their Forward Set Sear & Trigger Kit.

Before I get into the installation, I want to mention a few things about Apex Tactical Specialties, and my experience with them. Apex Tactical Specialties has continuously impressed me with their innovative ideas and products. I currently use the Polymer Armorer Block and the Reset Assist Mechanism (RAM) in my M&P9 Pro, and both products are outstanding. The customer service is excellent, with clear lines of communication to help with general questions and technical support. In my opinion, this company combines superior products and great consumer support to provide a company image and reputation that sets the bar as to what a company model should look like. An interesting fact is that their products aren’t just used by responsible firearm owners and competition shooters. Many law enforcement agencies (around 20) also use the products they manufacture, including the Clackamas County Sheriffs Office and the Pittsburgh Port Authority.

-DISCLAIMER-

“Modifying the manufacture’s design of a firearm may void your warranty. This article is for informational purposes only, and is not meant to be a how-to guide. The purpose of this article is to review a specific product, and to show what may be involved during installation and function. You (the reader) are responsible for the safe handling, operation, and function of your firearm. You are also liable for any damage, injury, or accidental death that may result from incorrect work you may perform. WeLikeShooting.com, its writers, and staff recommend consulting a competent gunsmith or armorer prior to working on your own firearm.”

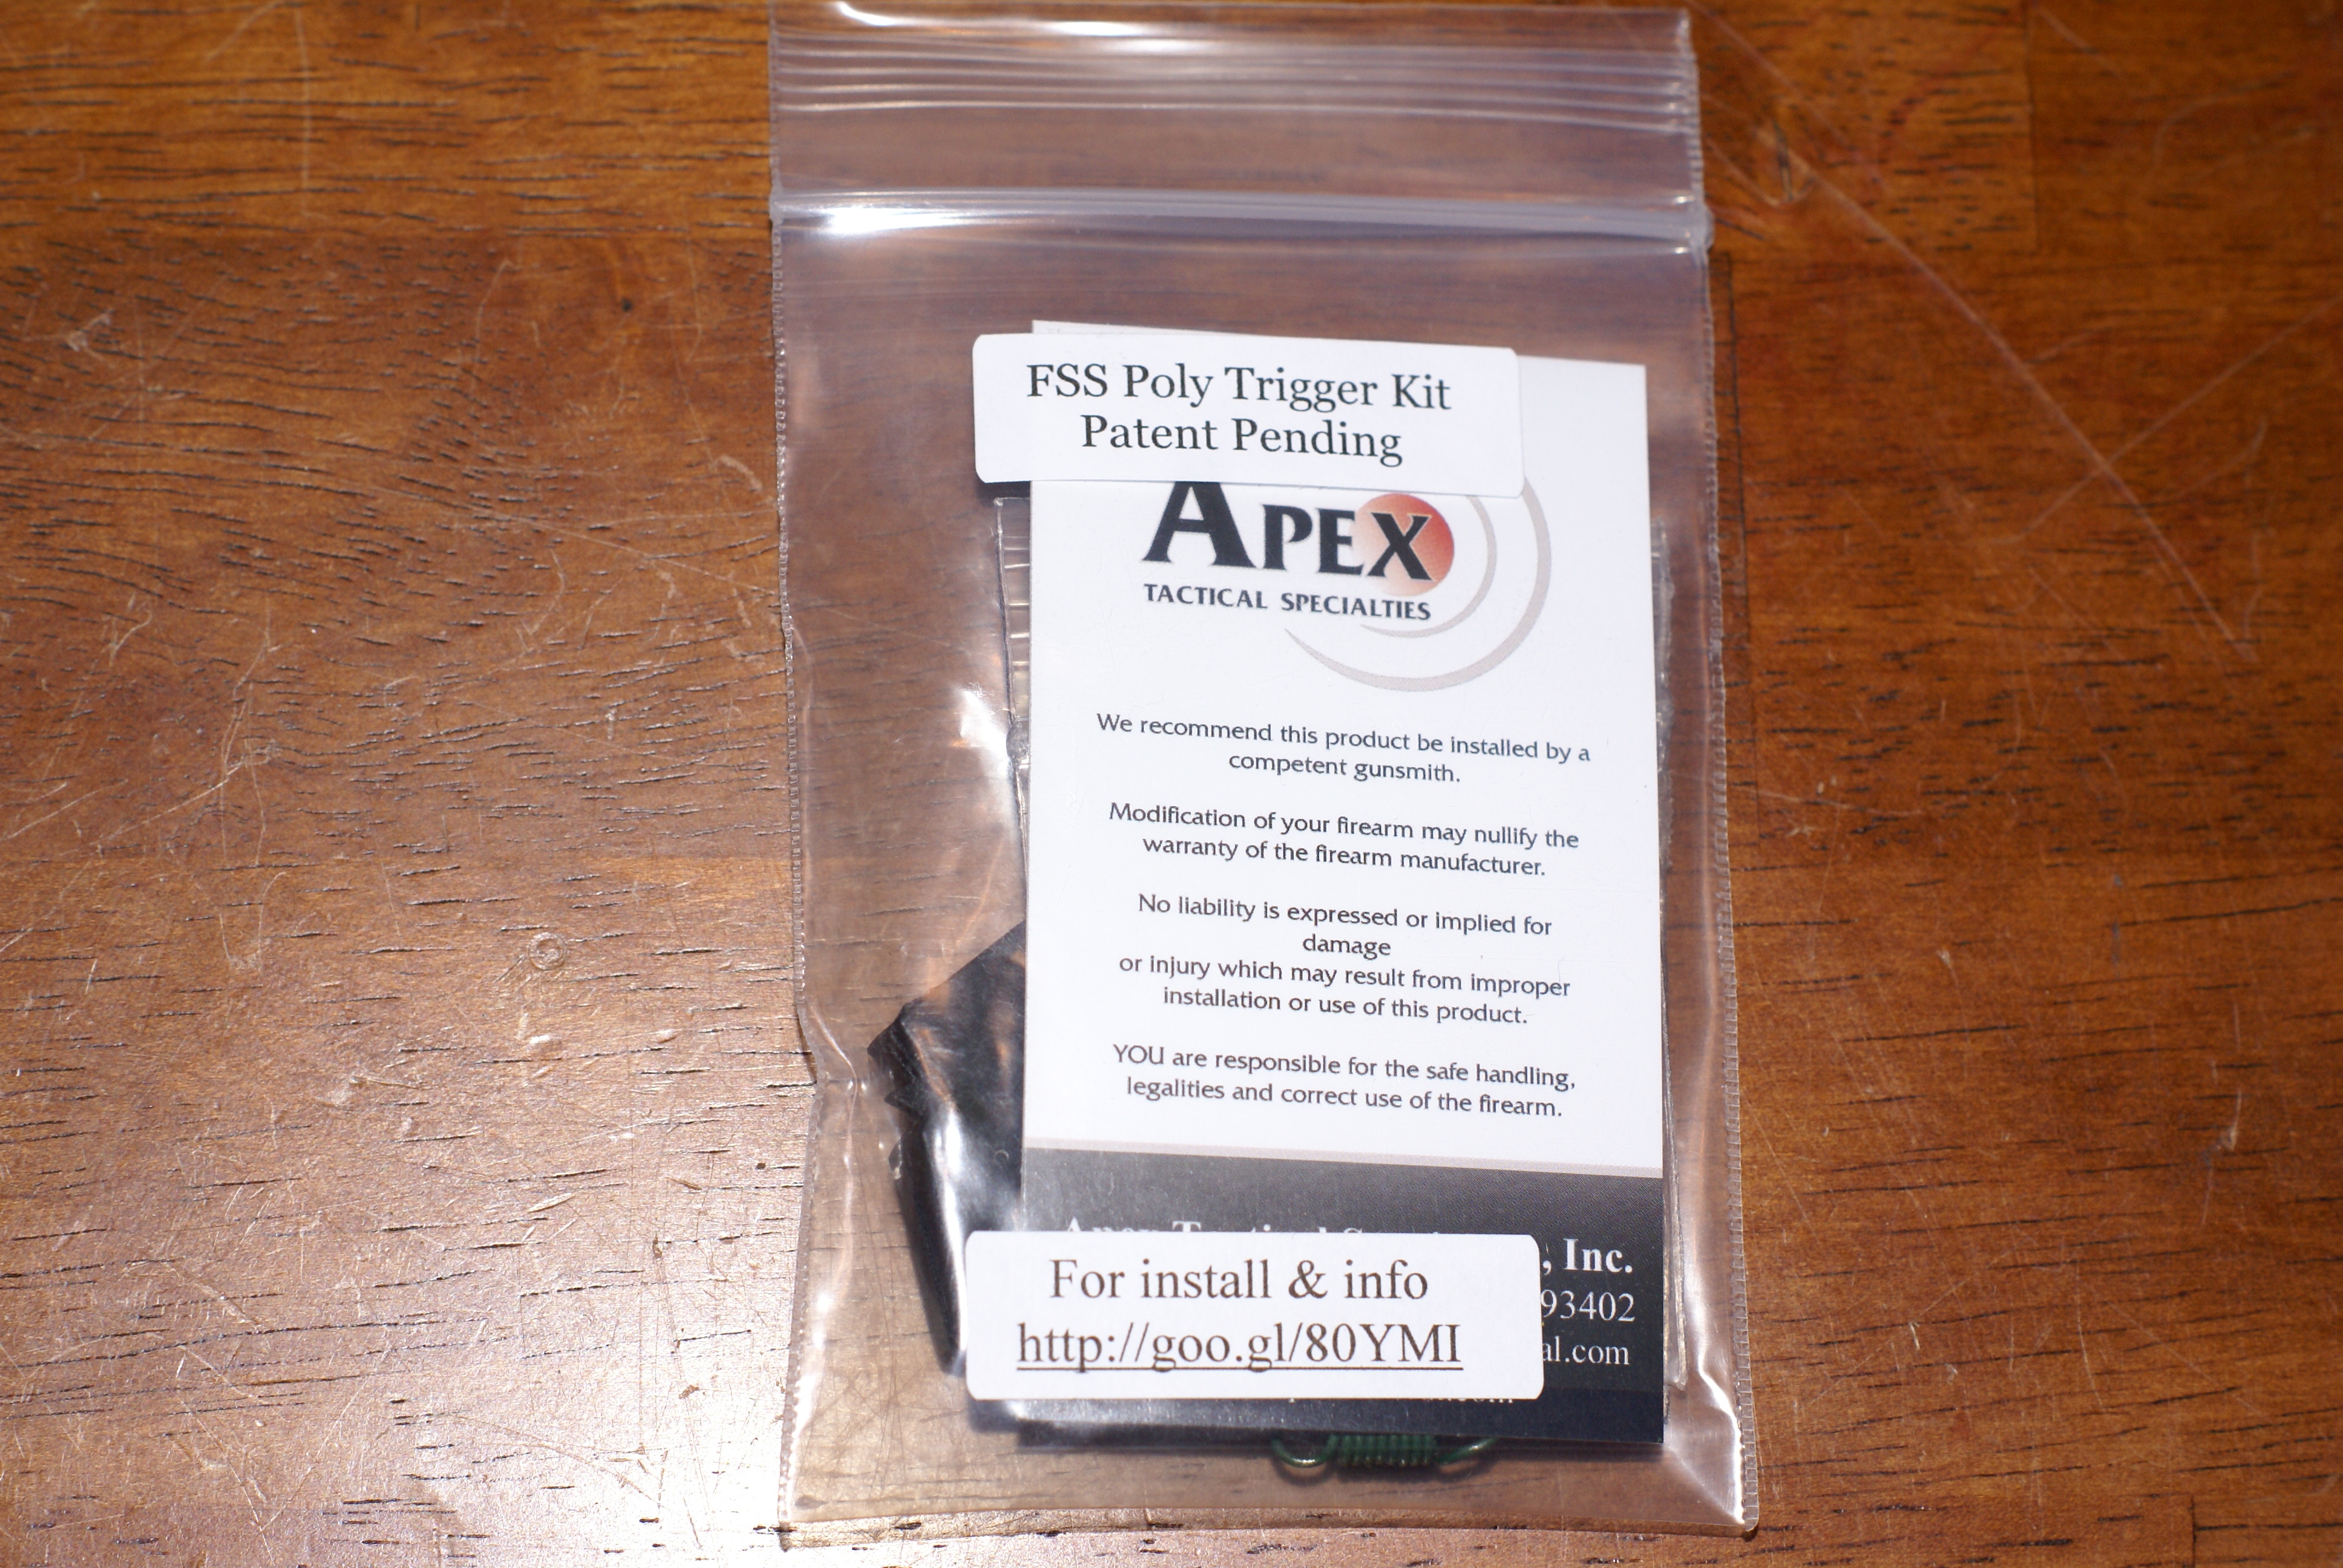
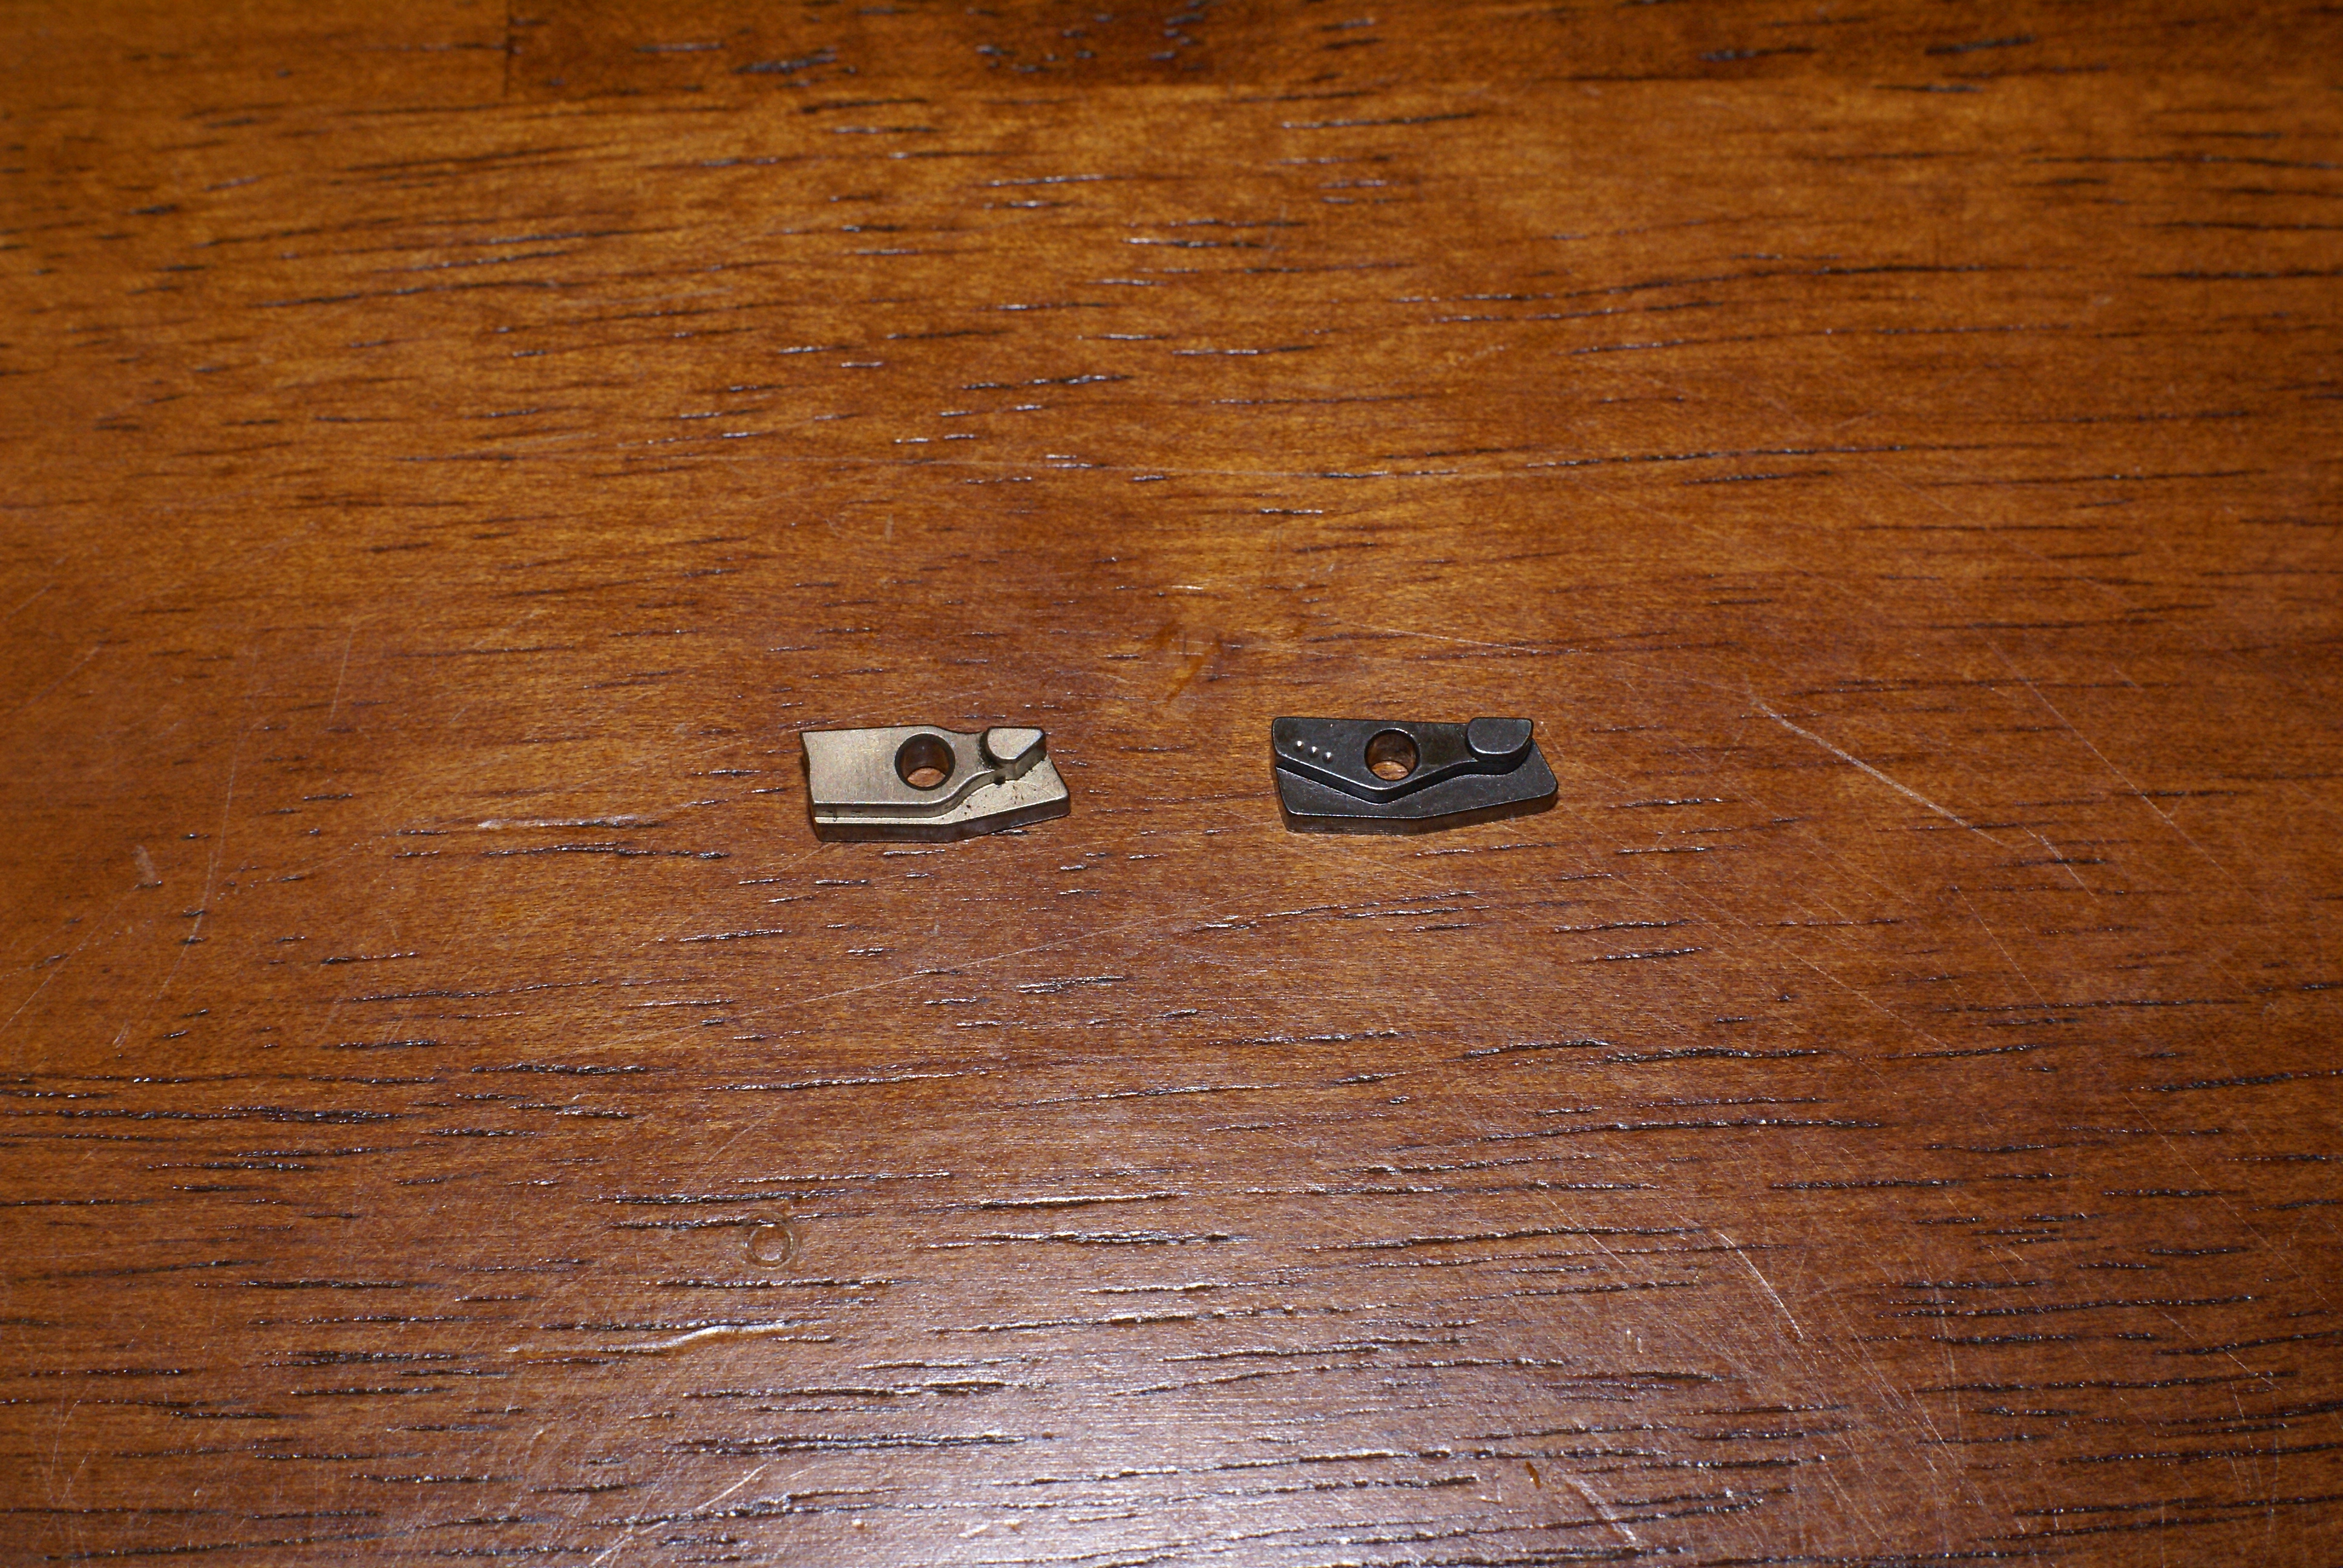
The Forward Set Sear and Trigger kit is available in polymer (as tested) for $129.95, and a hard anodized aluminum for $164.95. These kits function similarly to the S&W OEM parts and are designed to; provide a smoother trigger pull, reduce the amount of pre-travel and over-travel, and improve safety by removing the hinged trigger safety design and replacing it with a centrally located blade inside of the trigger. The caming surface on the sear is set forward, which advances the timing and provides a crisper break similar to a 1911. These kits will work in all caliber models of the M&P pistol (9mm, .40 S&W, .357 SIG, .45 ACP) except for the Shield. If you’re in the market for an improvement in the Shield’s trigger function, I would recommend the Shield Carry Kit.

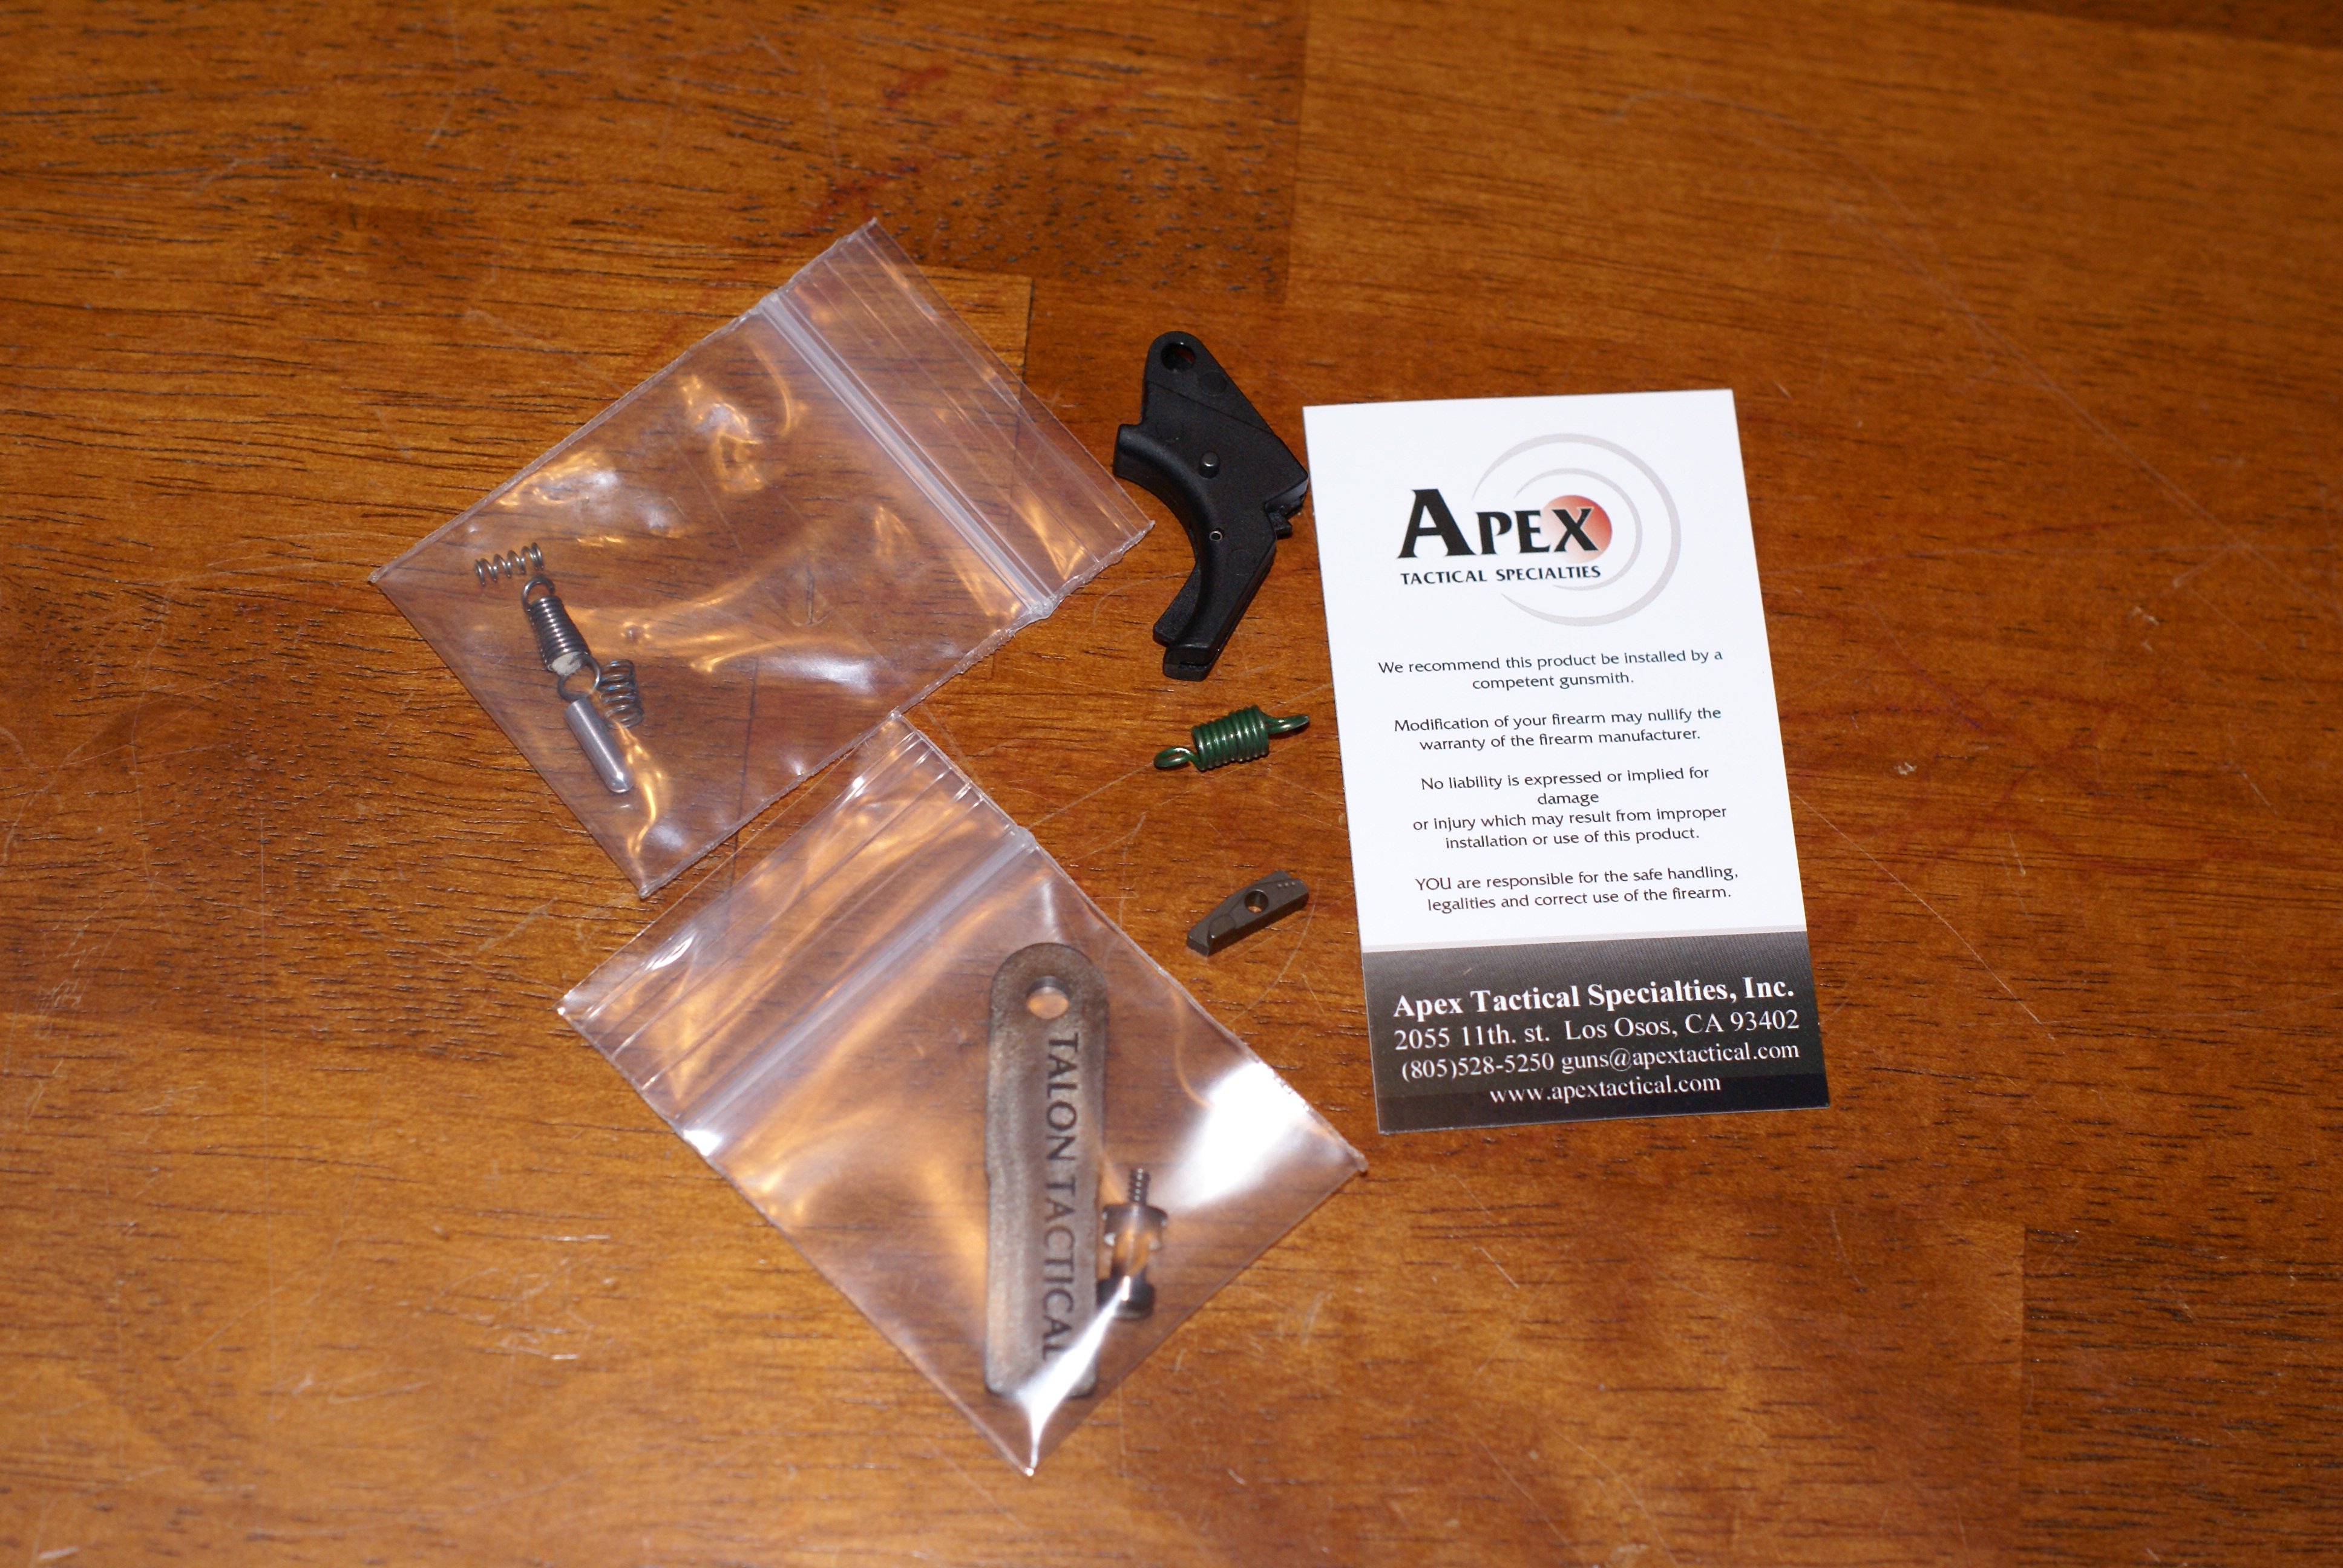
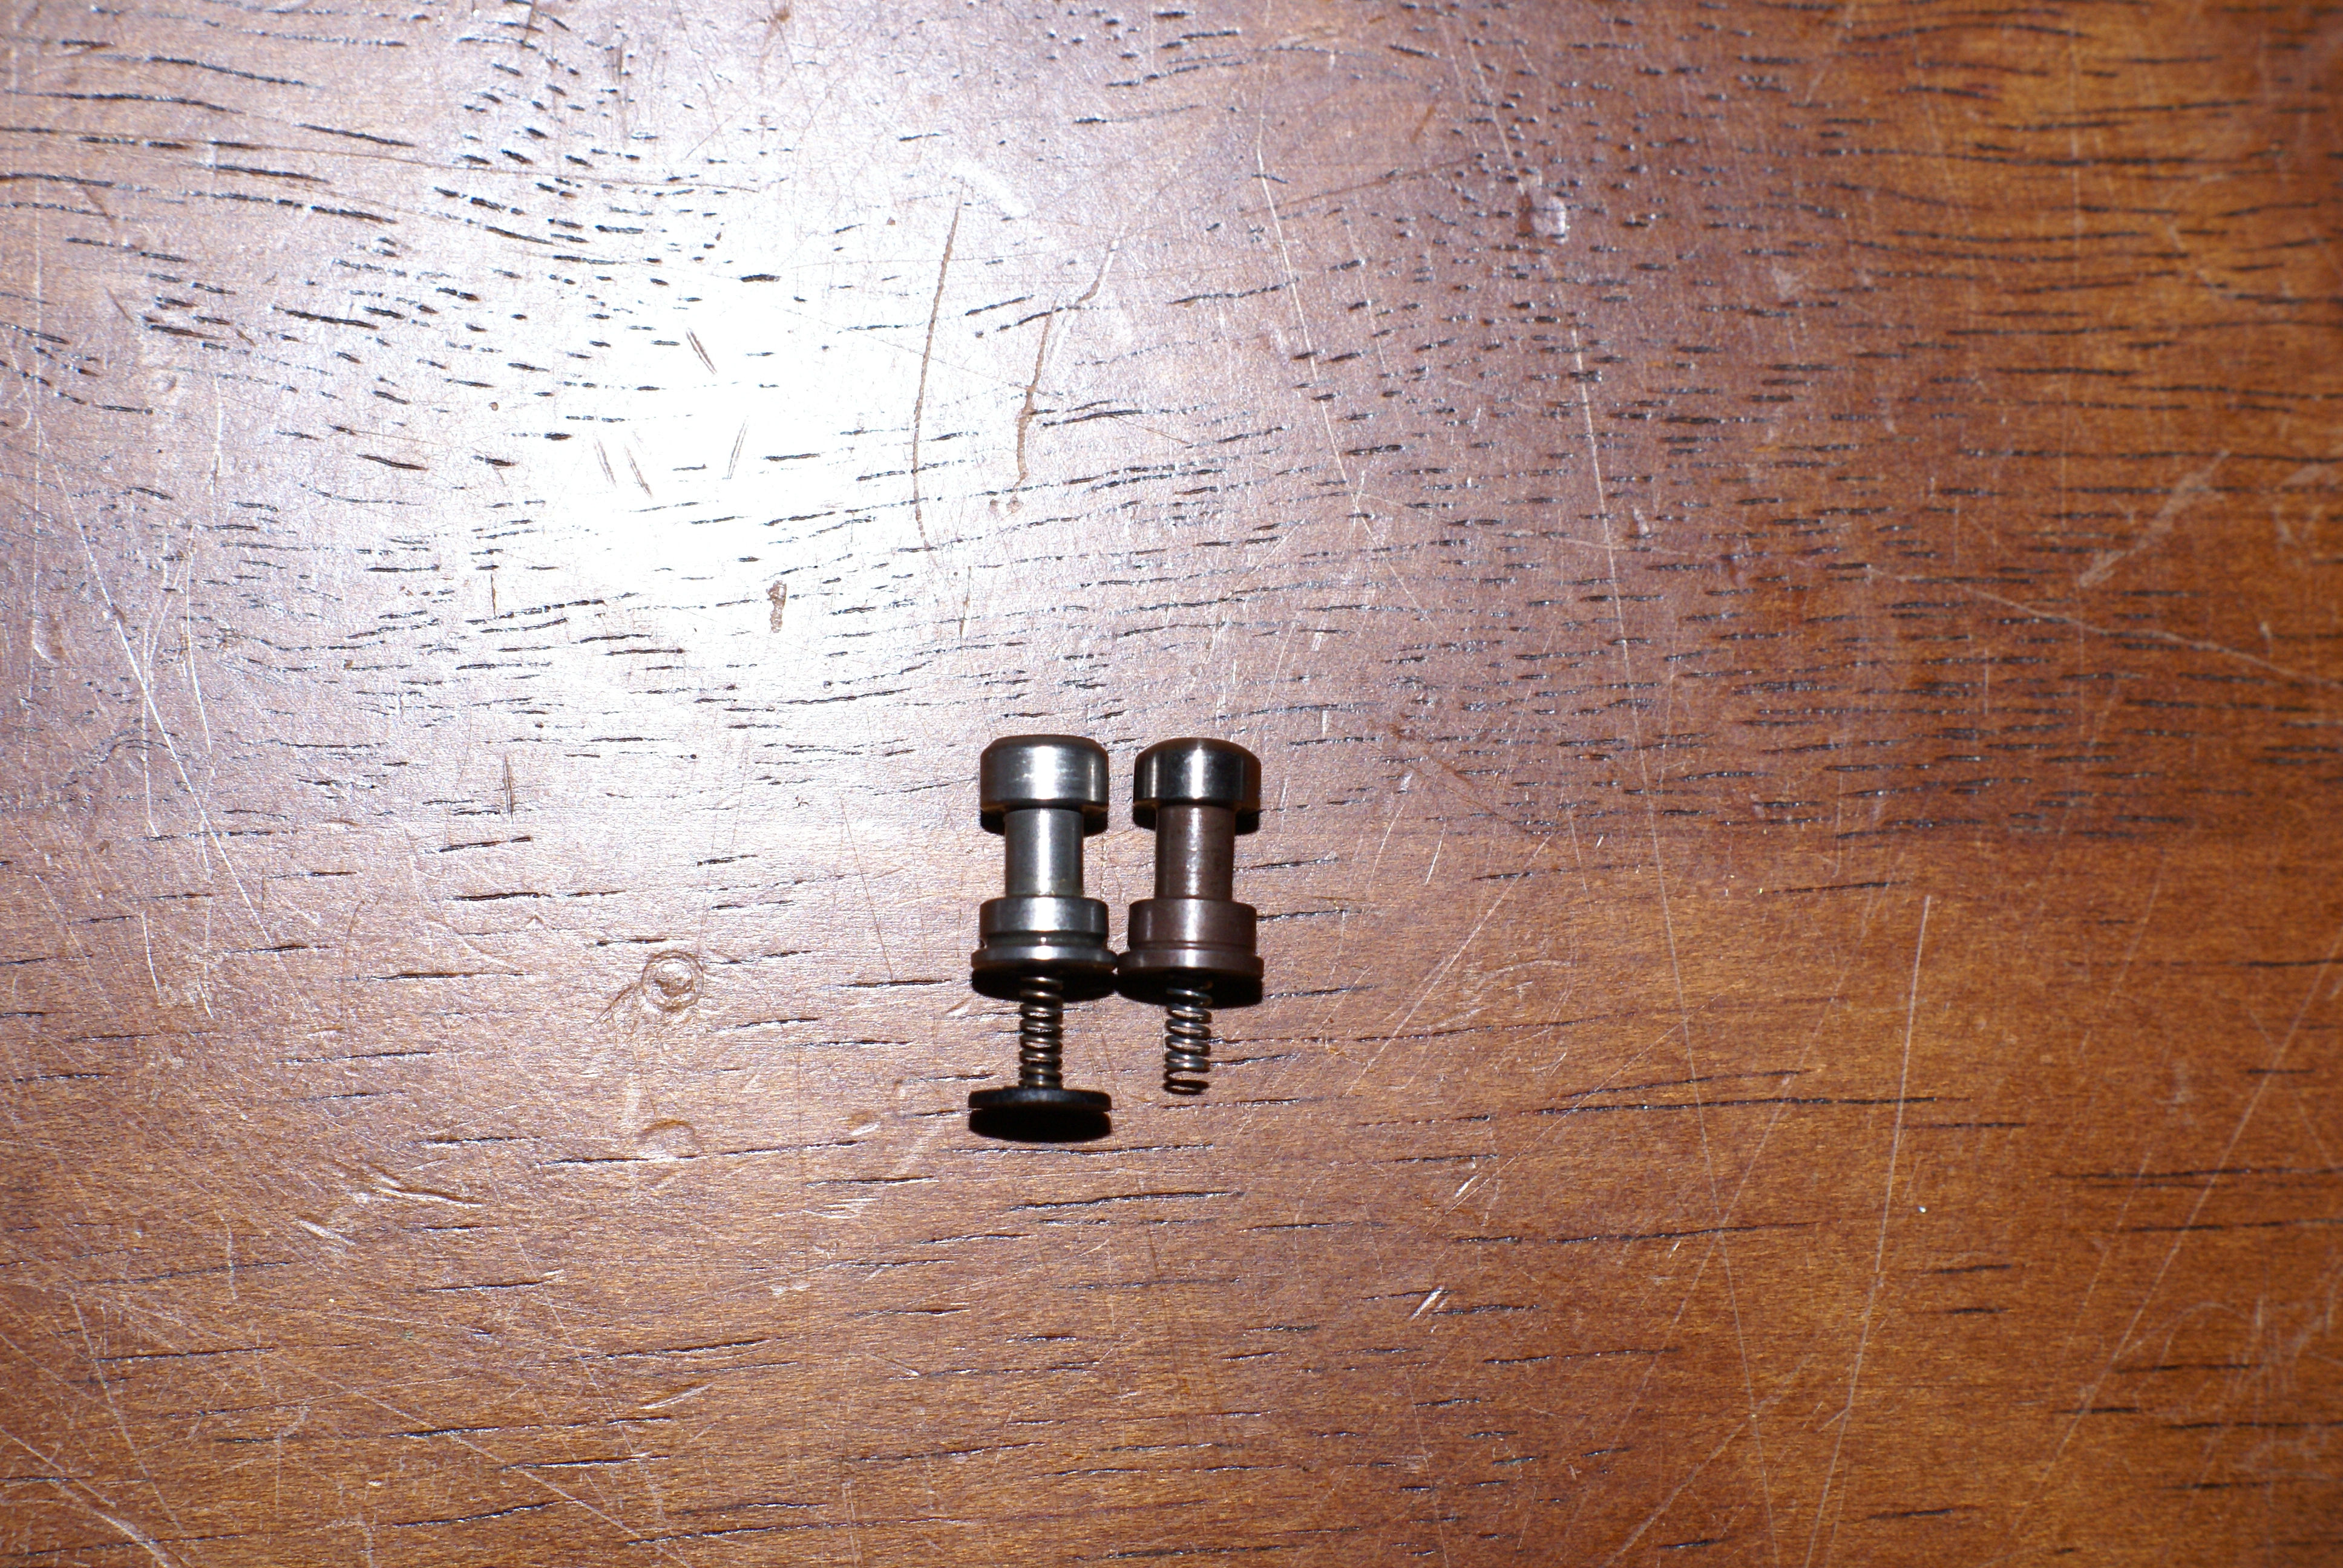
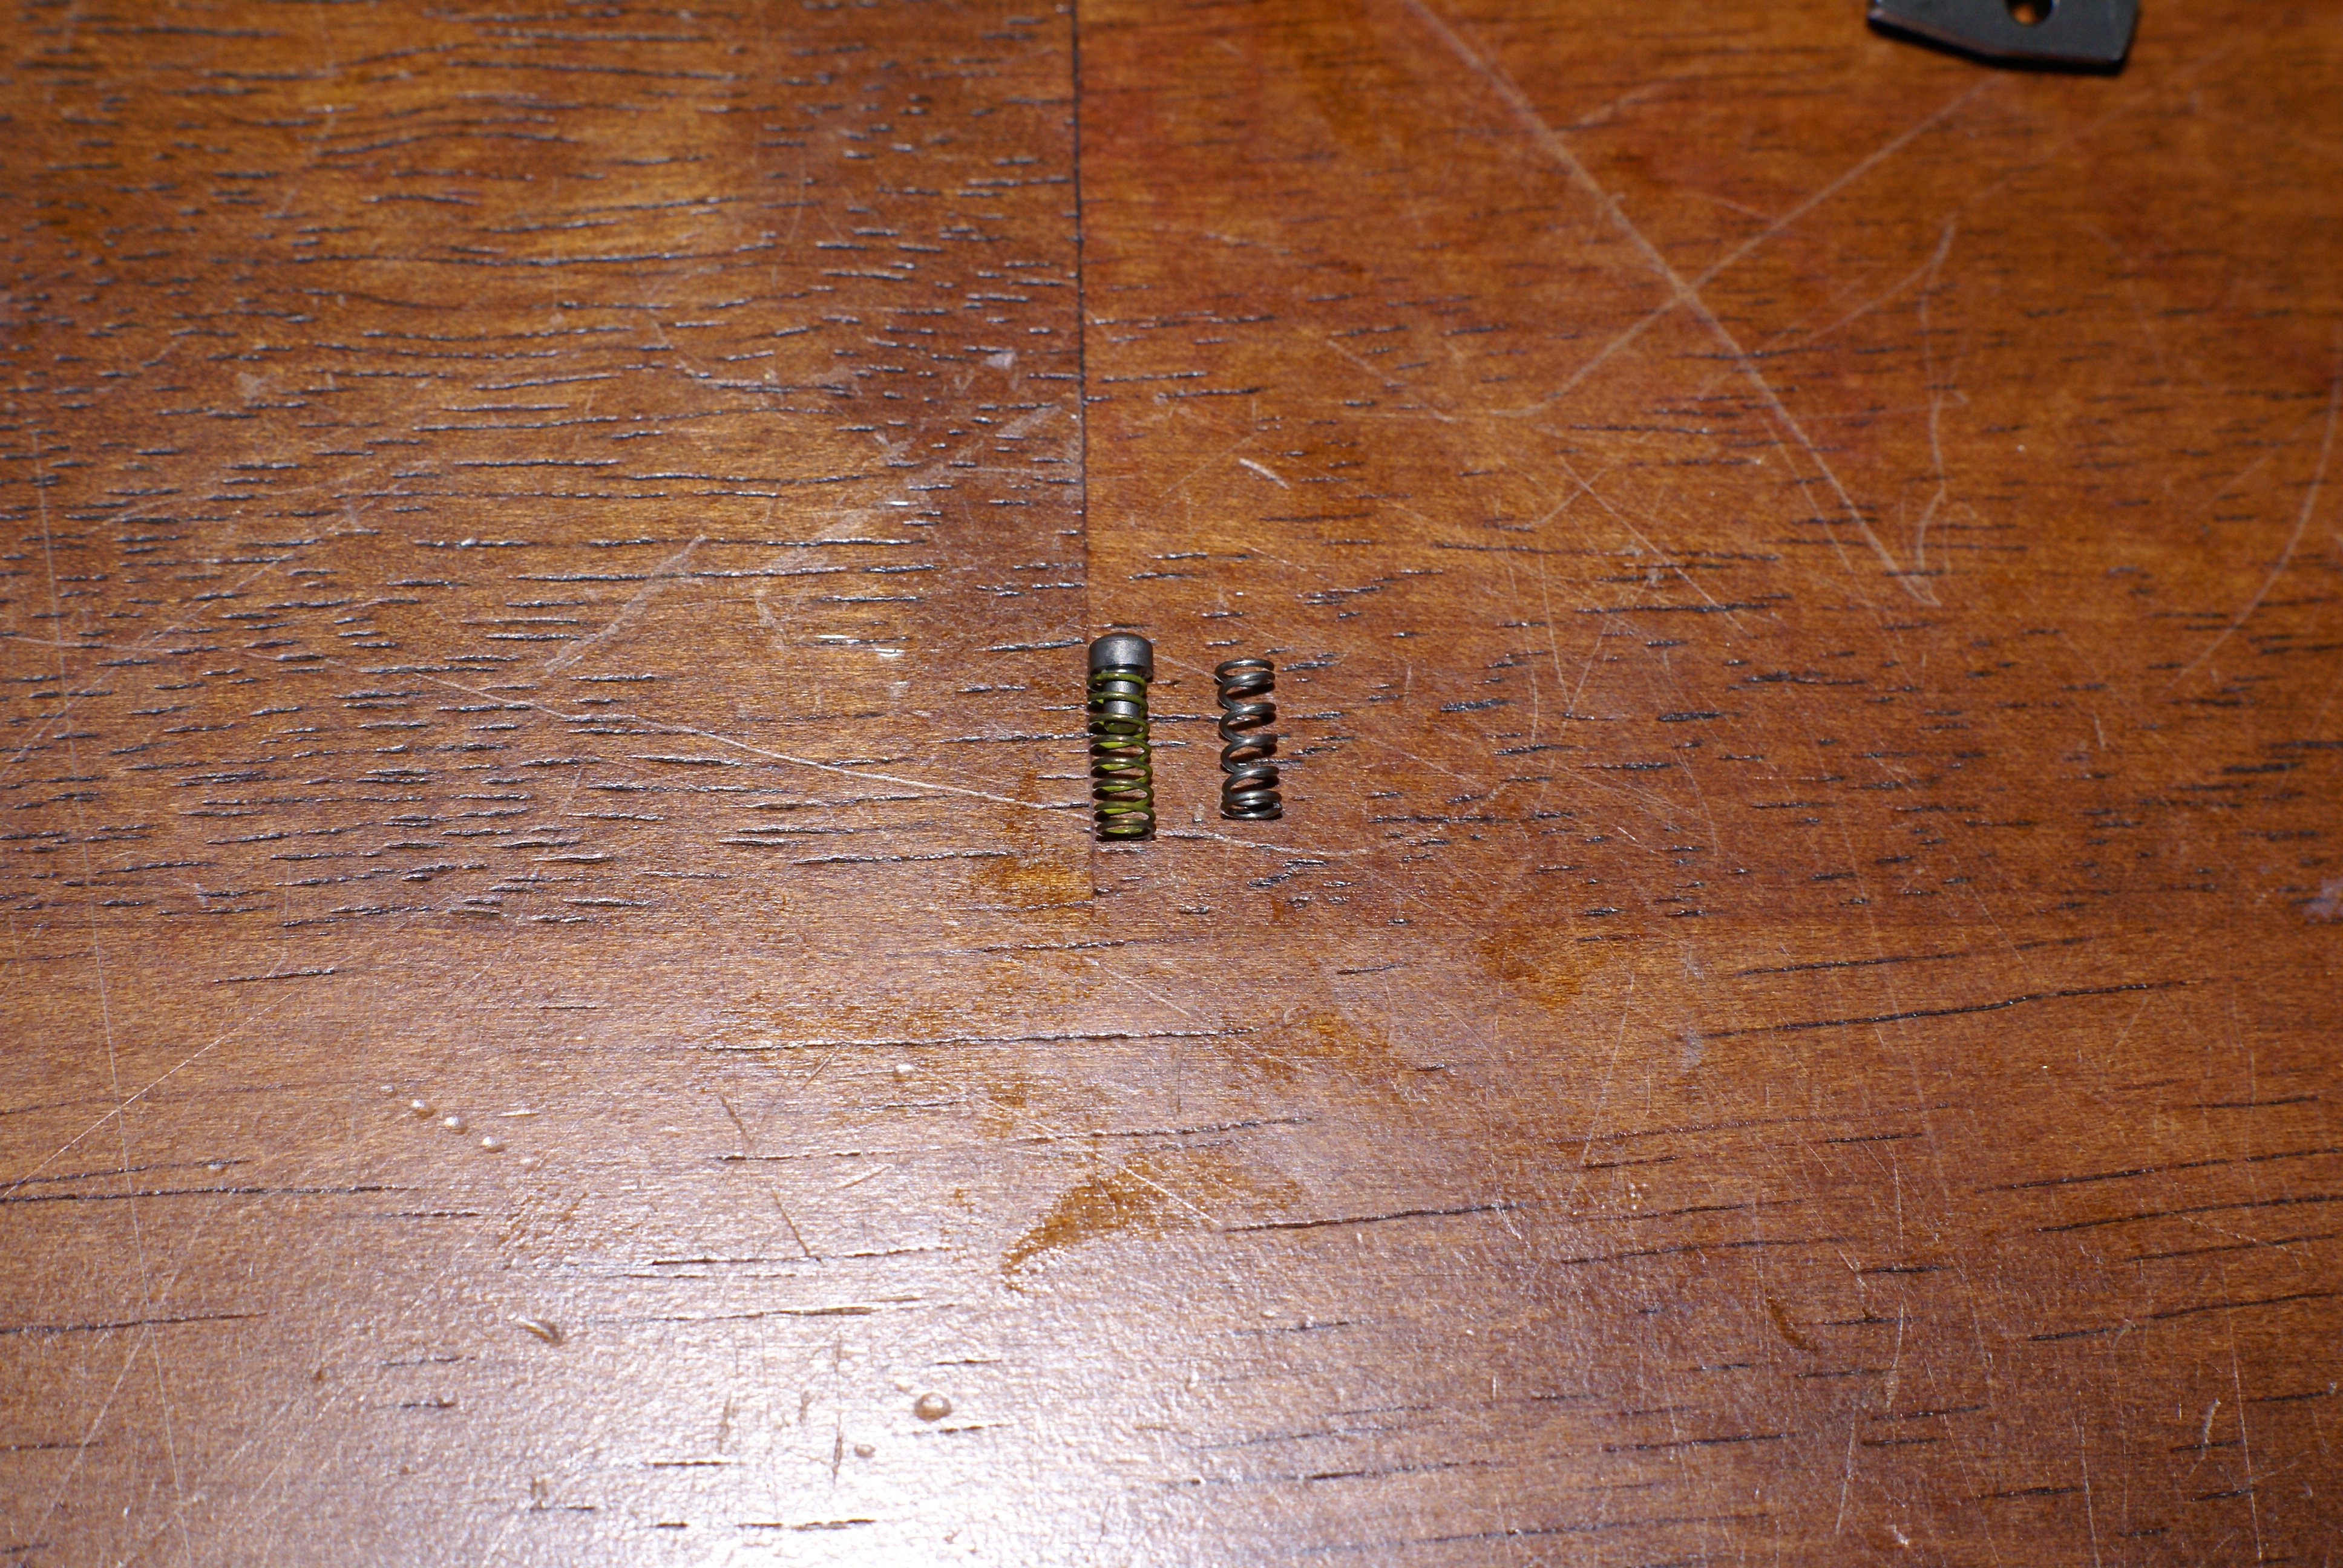
The kit contains a number of parts and a tool to assist in the re-installation of the rear sight. The included items are; trigger, sear, sear spring, striker block, striker block spring, Talon Tactical Tool (for re-installing the rear sight), slave pin, 4 lb. trigger return spring, 5.5 lb. trigger return spring (green), and a new spring for the RAM (if installed).

The kit comes nicely packaged with the product name and an install / info website tagged on the exterior.
Inside the packaging is an informational card and parts that are separated by smaller bags.
Here, you can see all of the parts that are included.


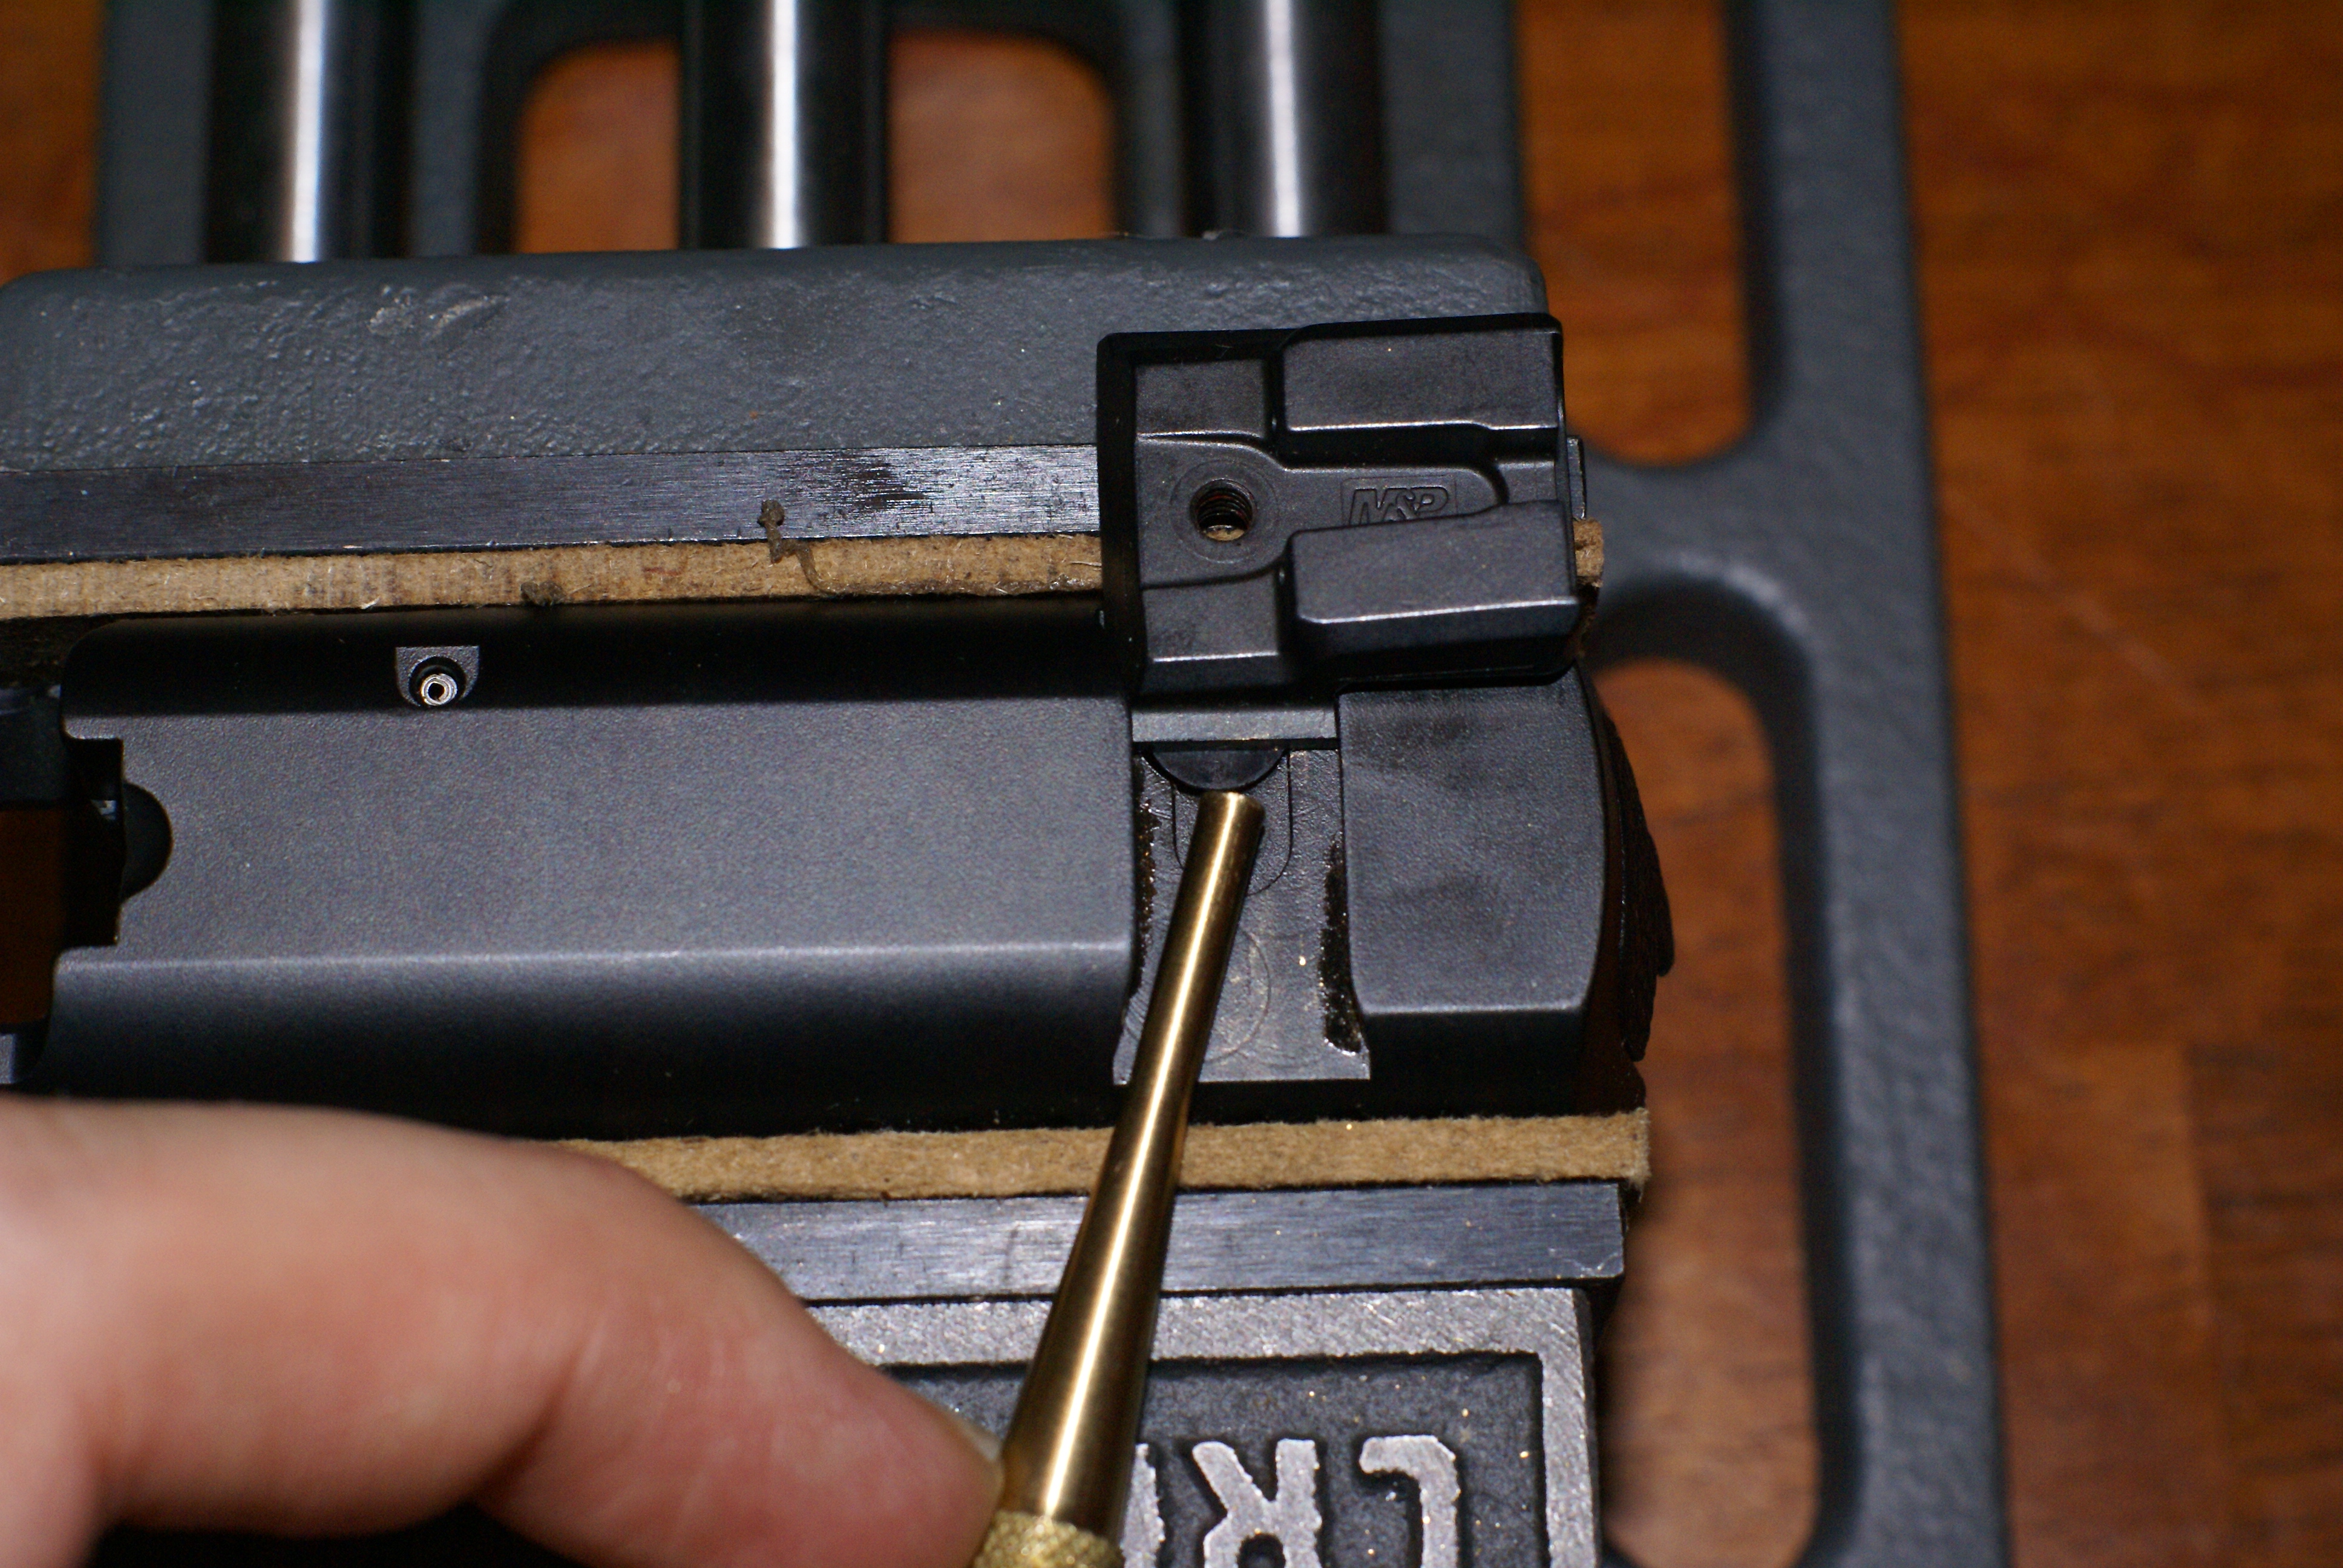
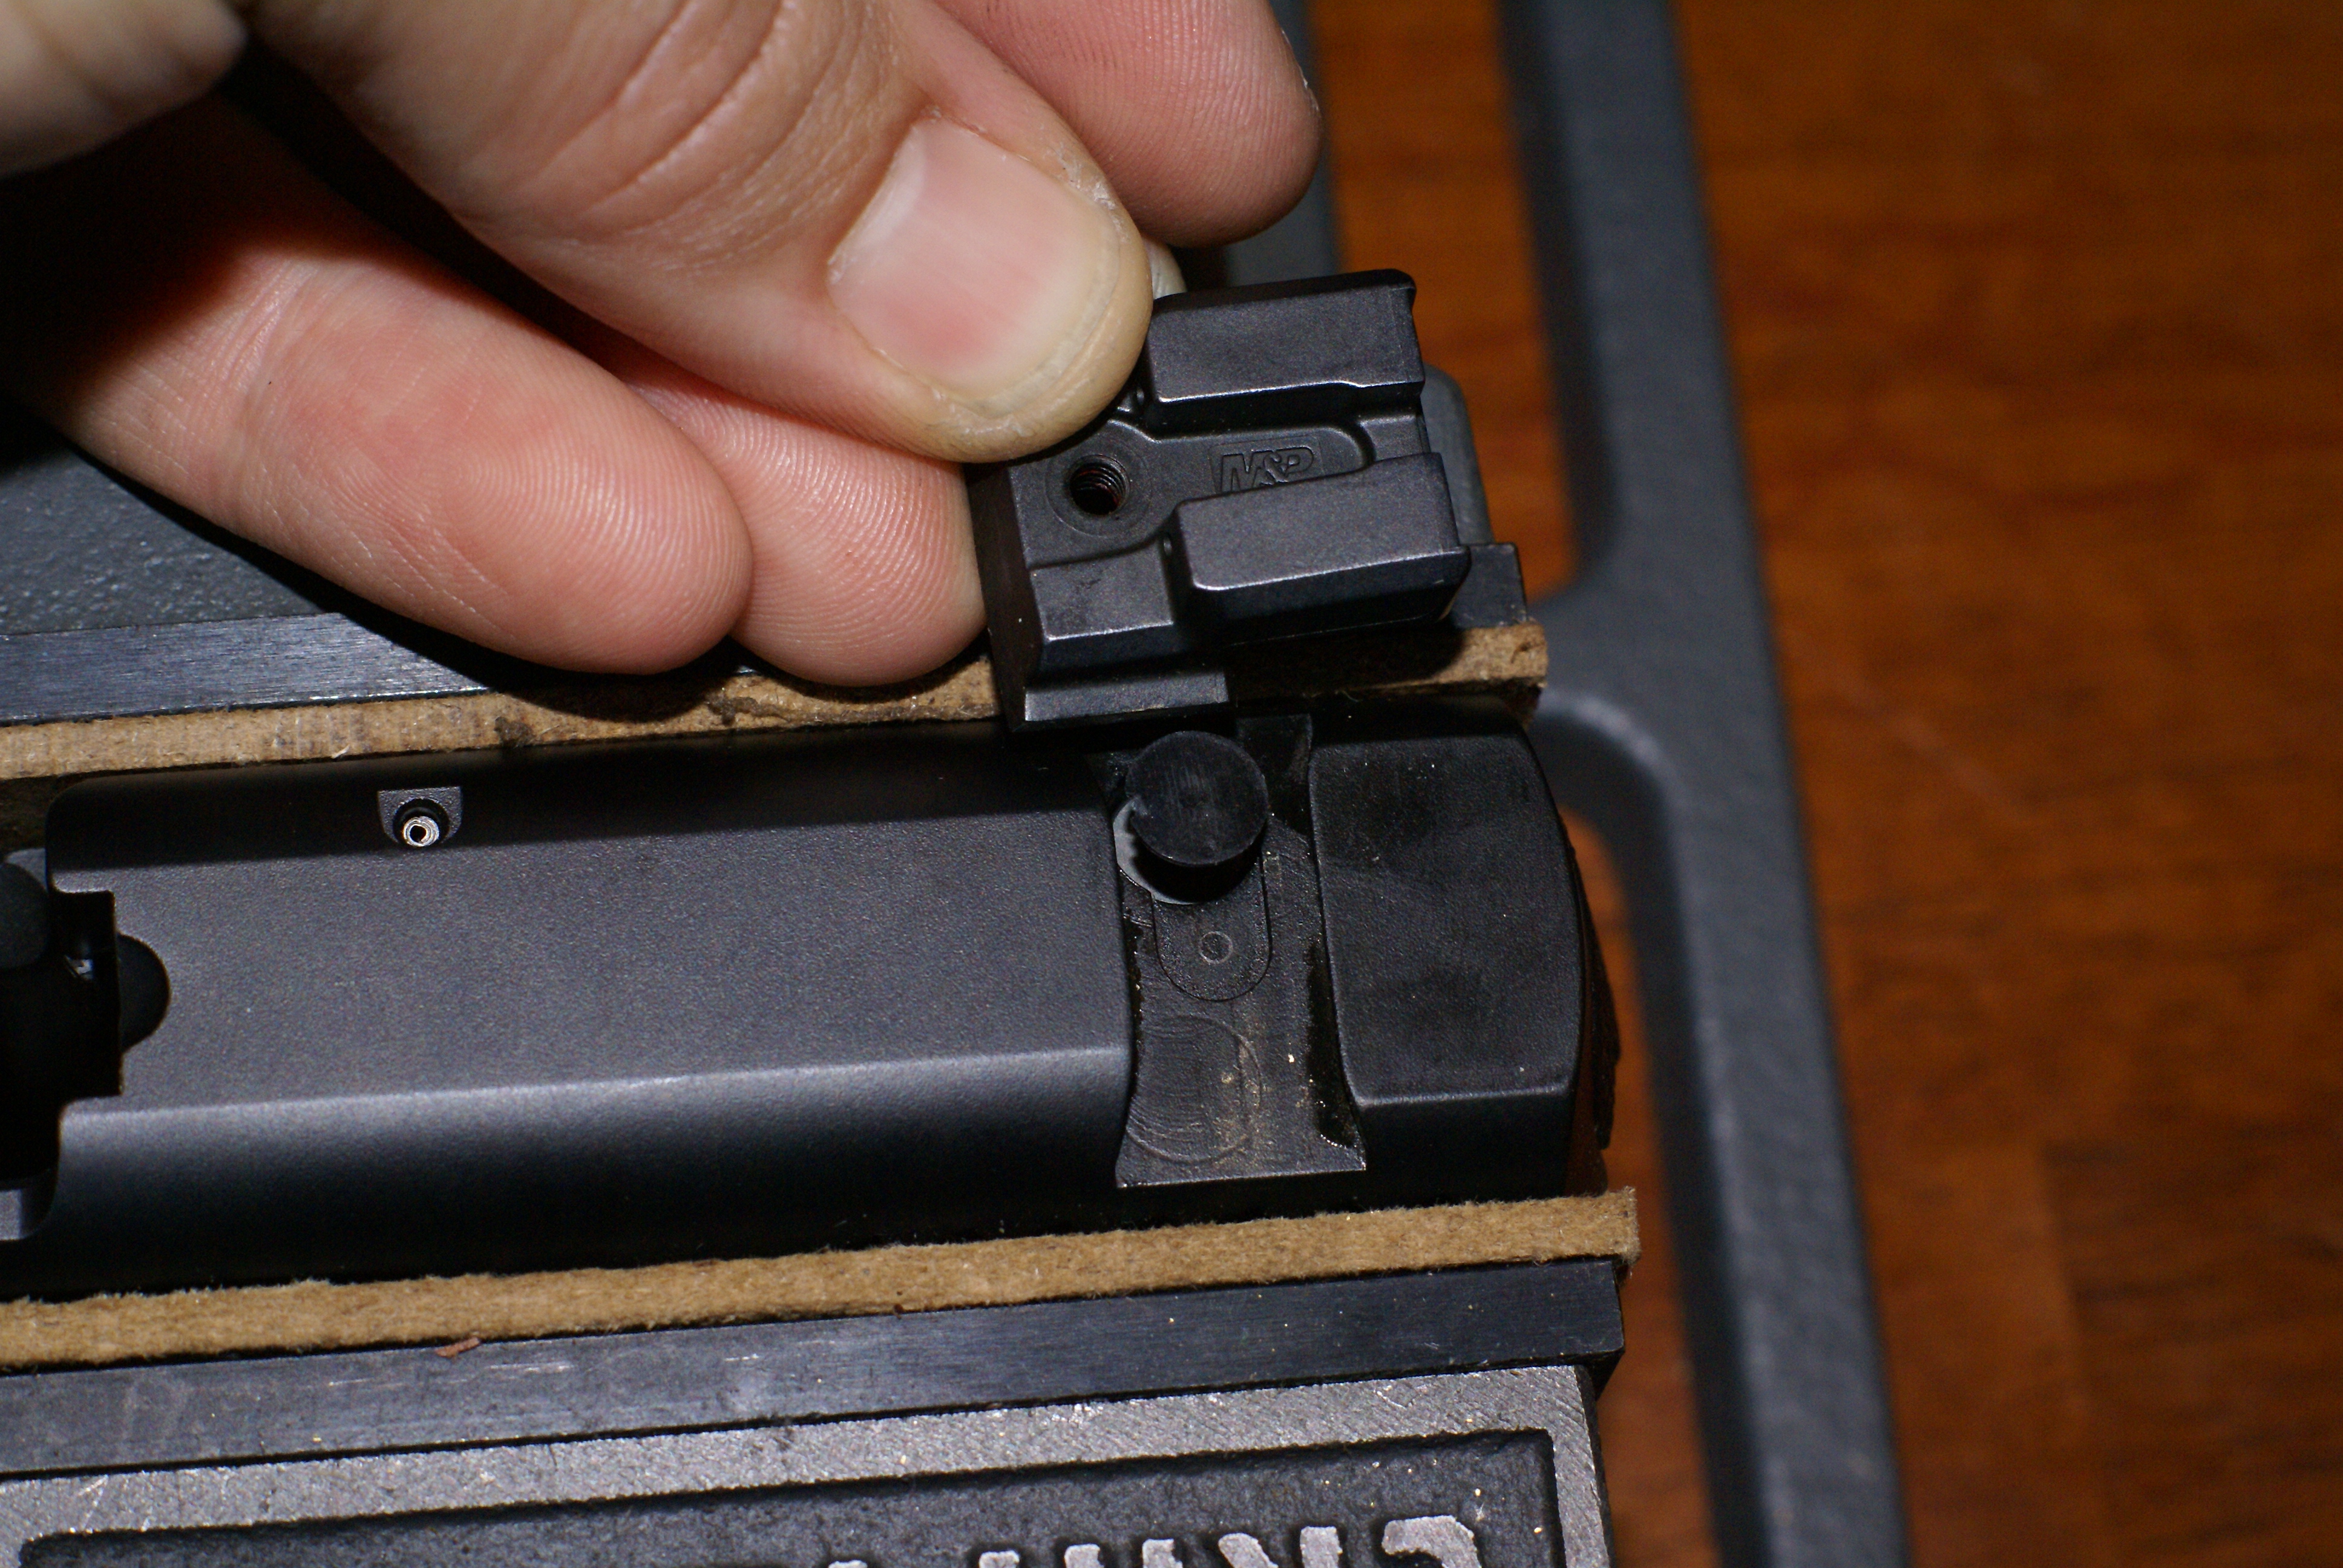
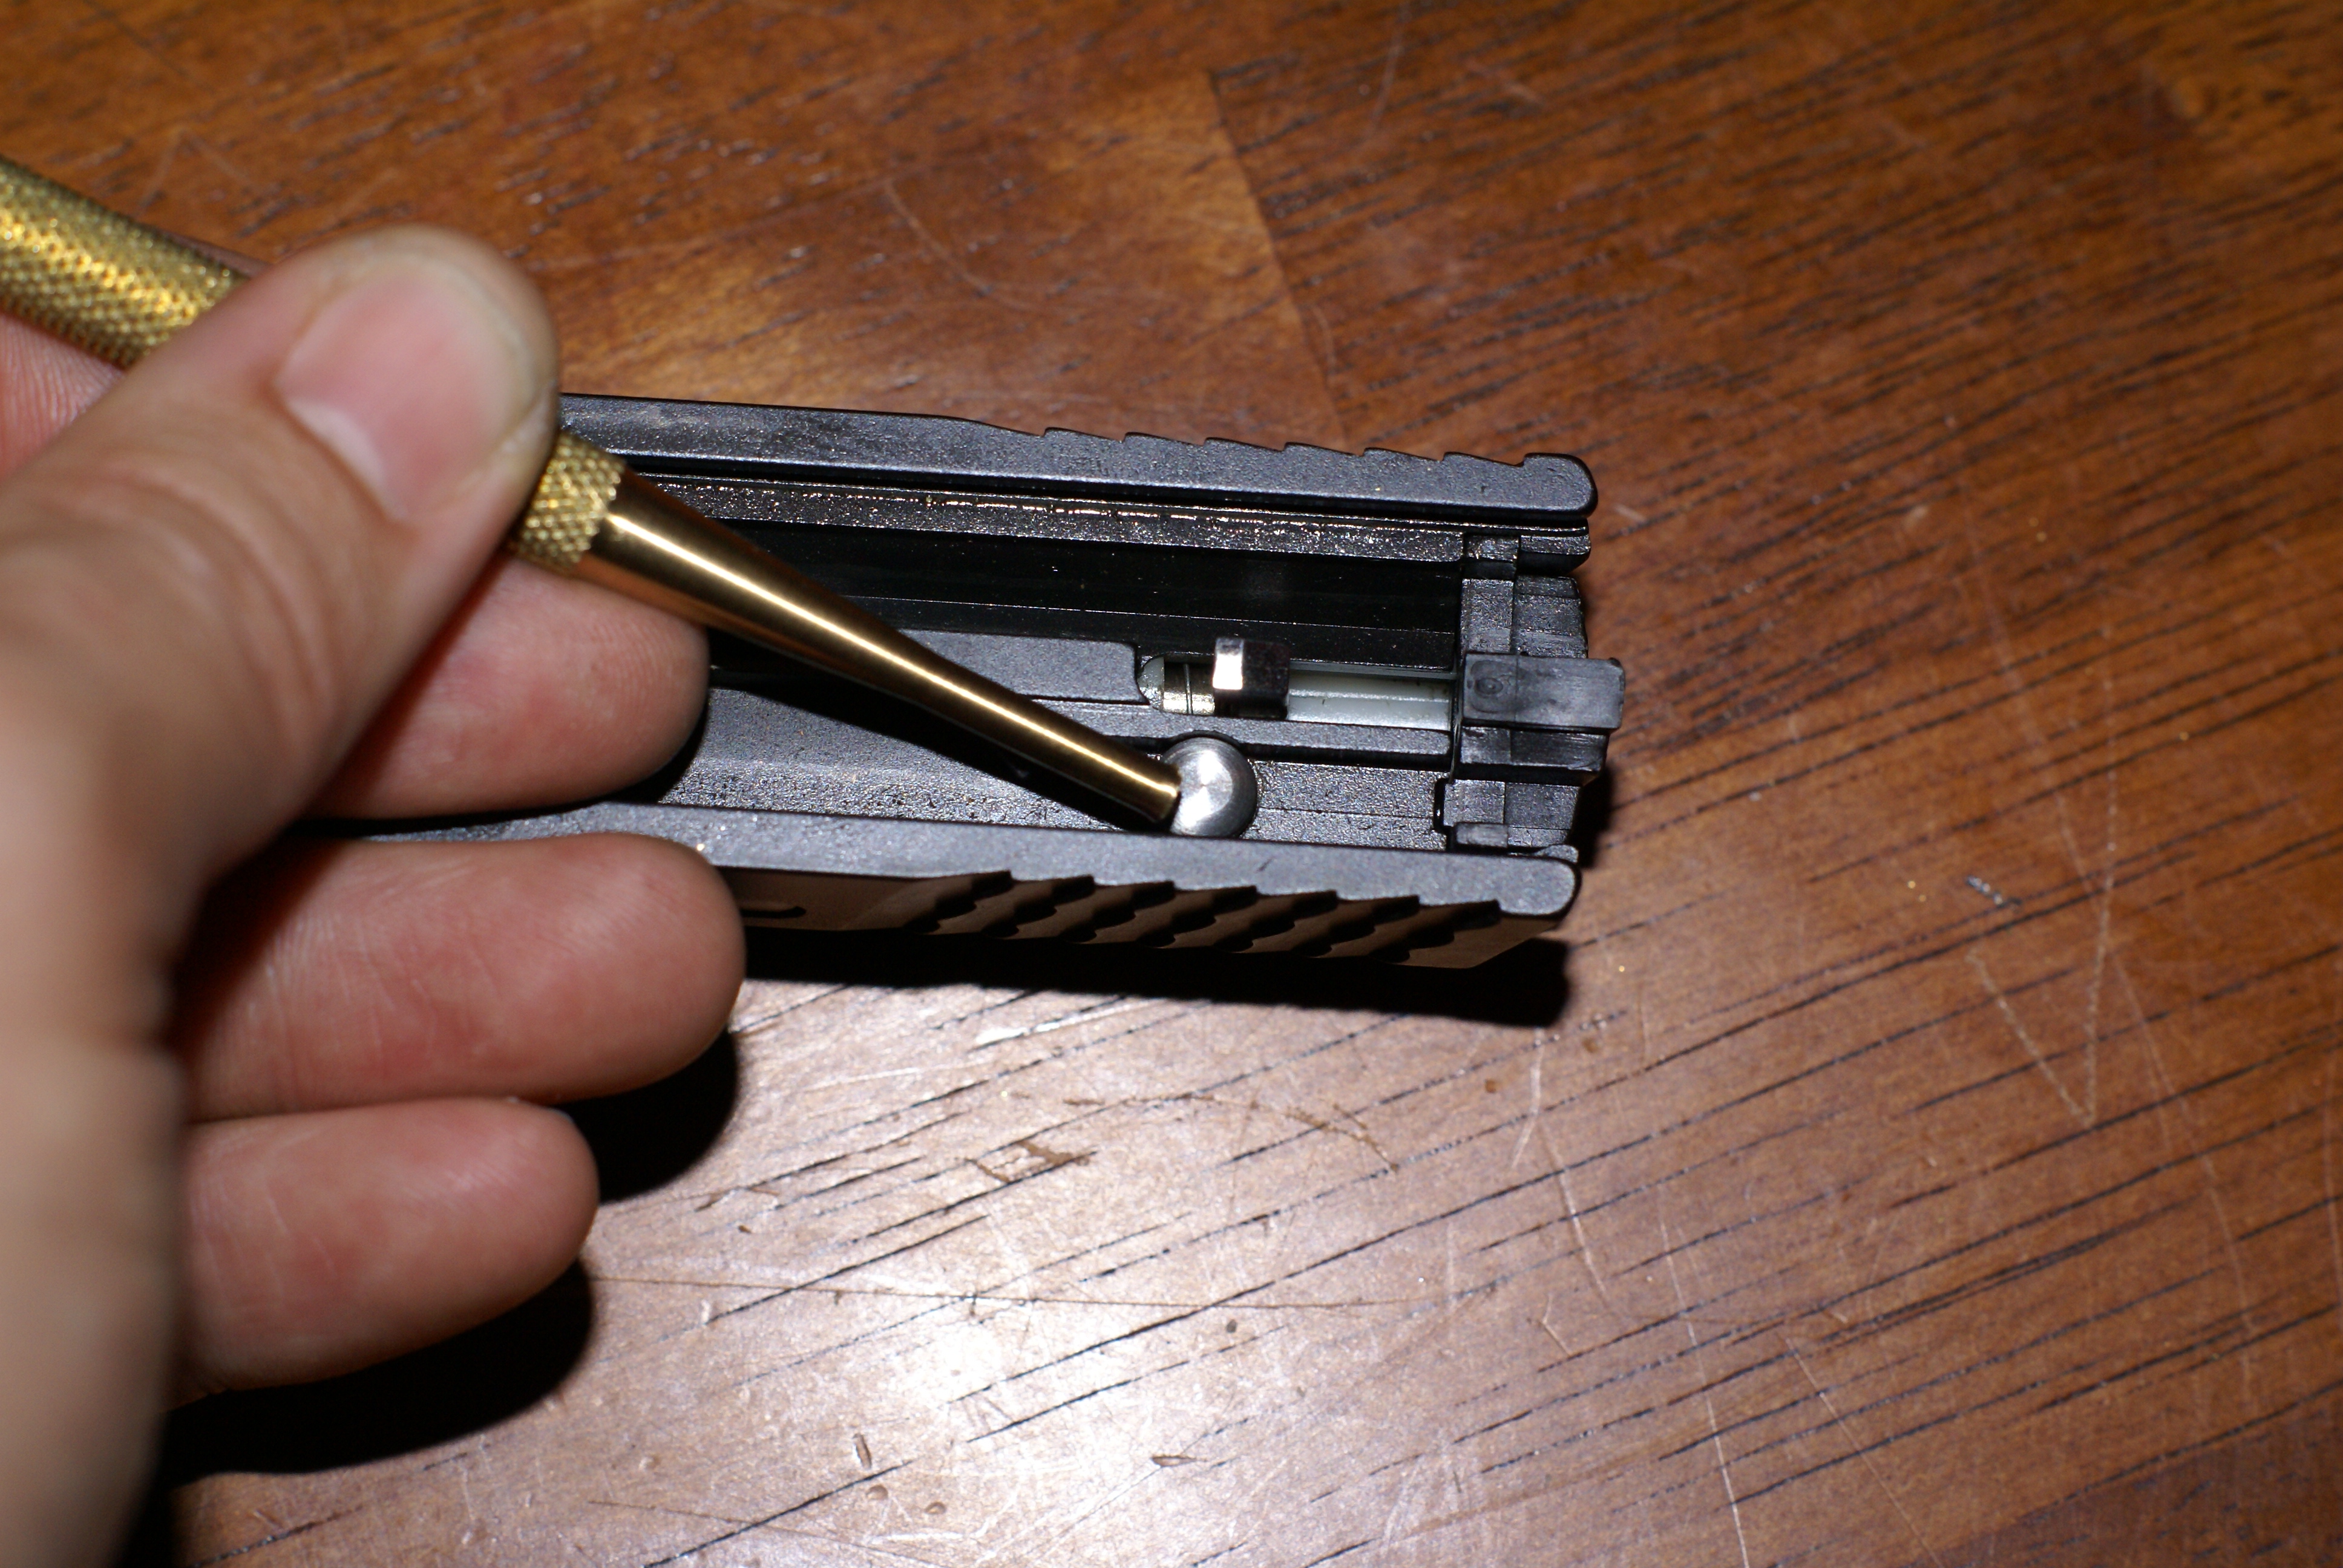
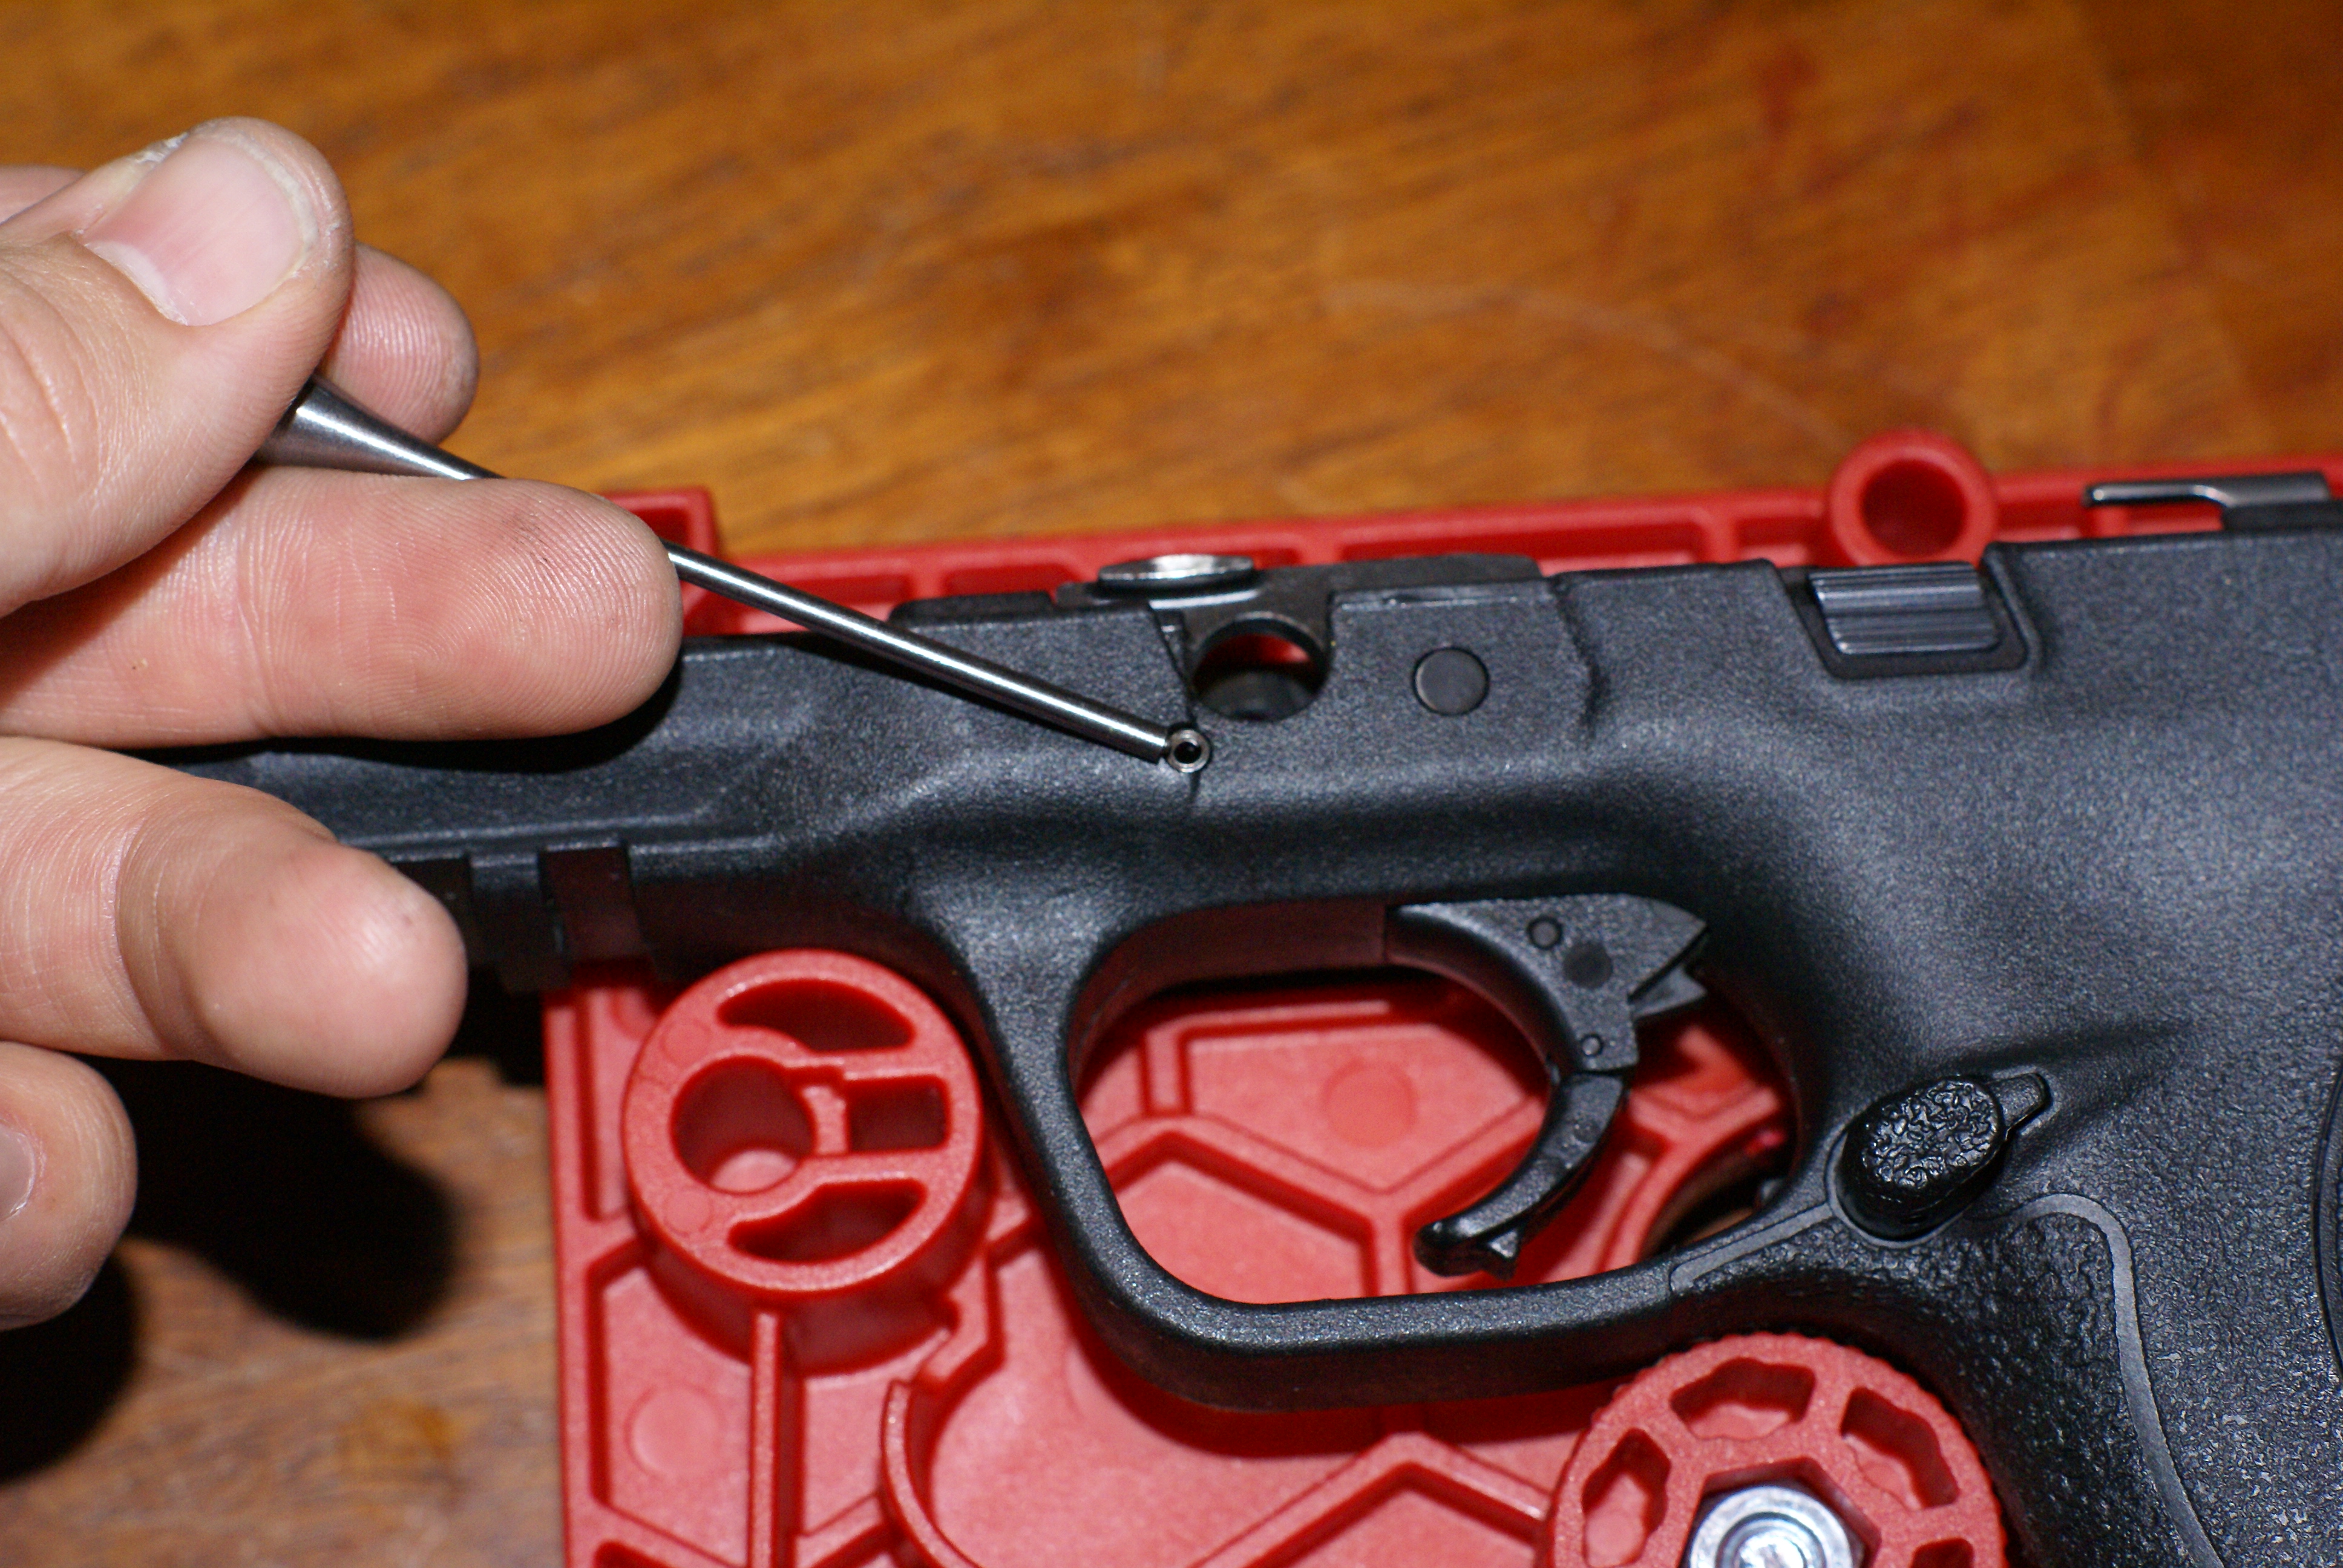
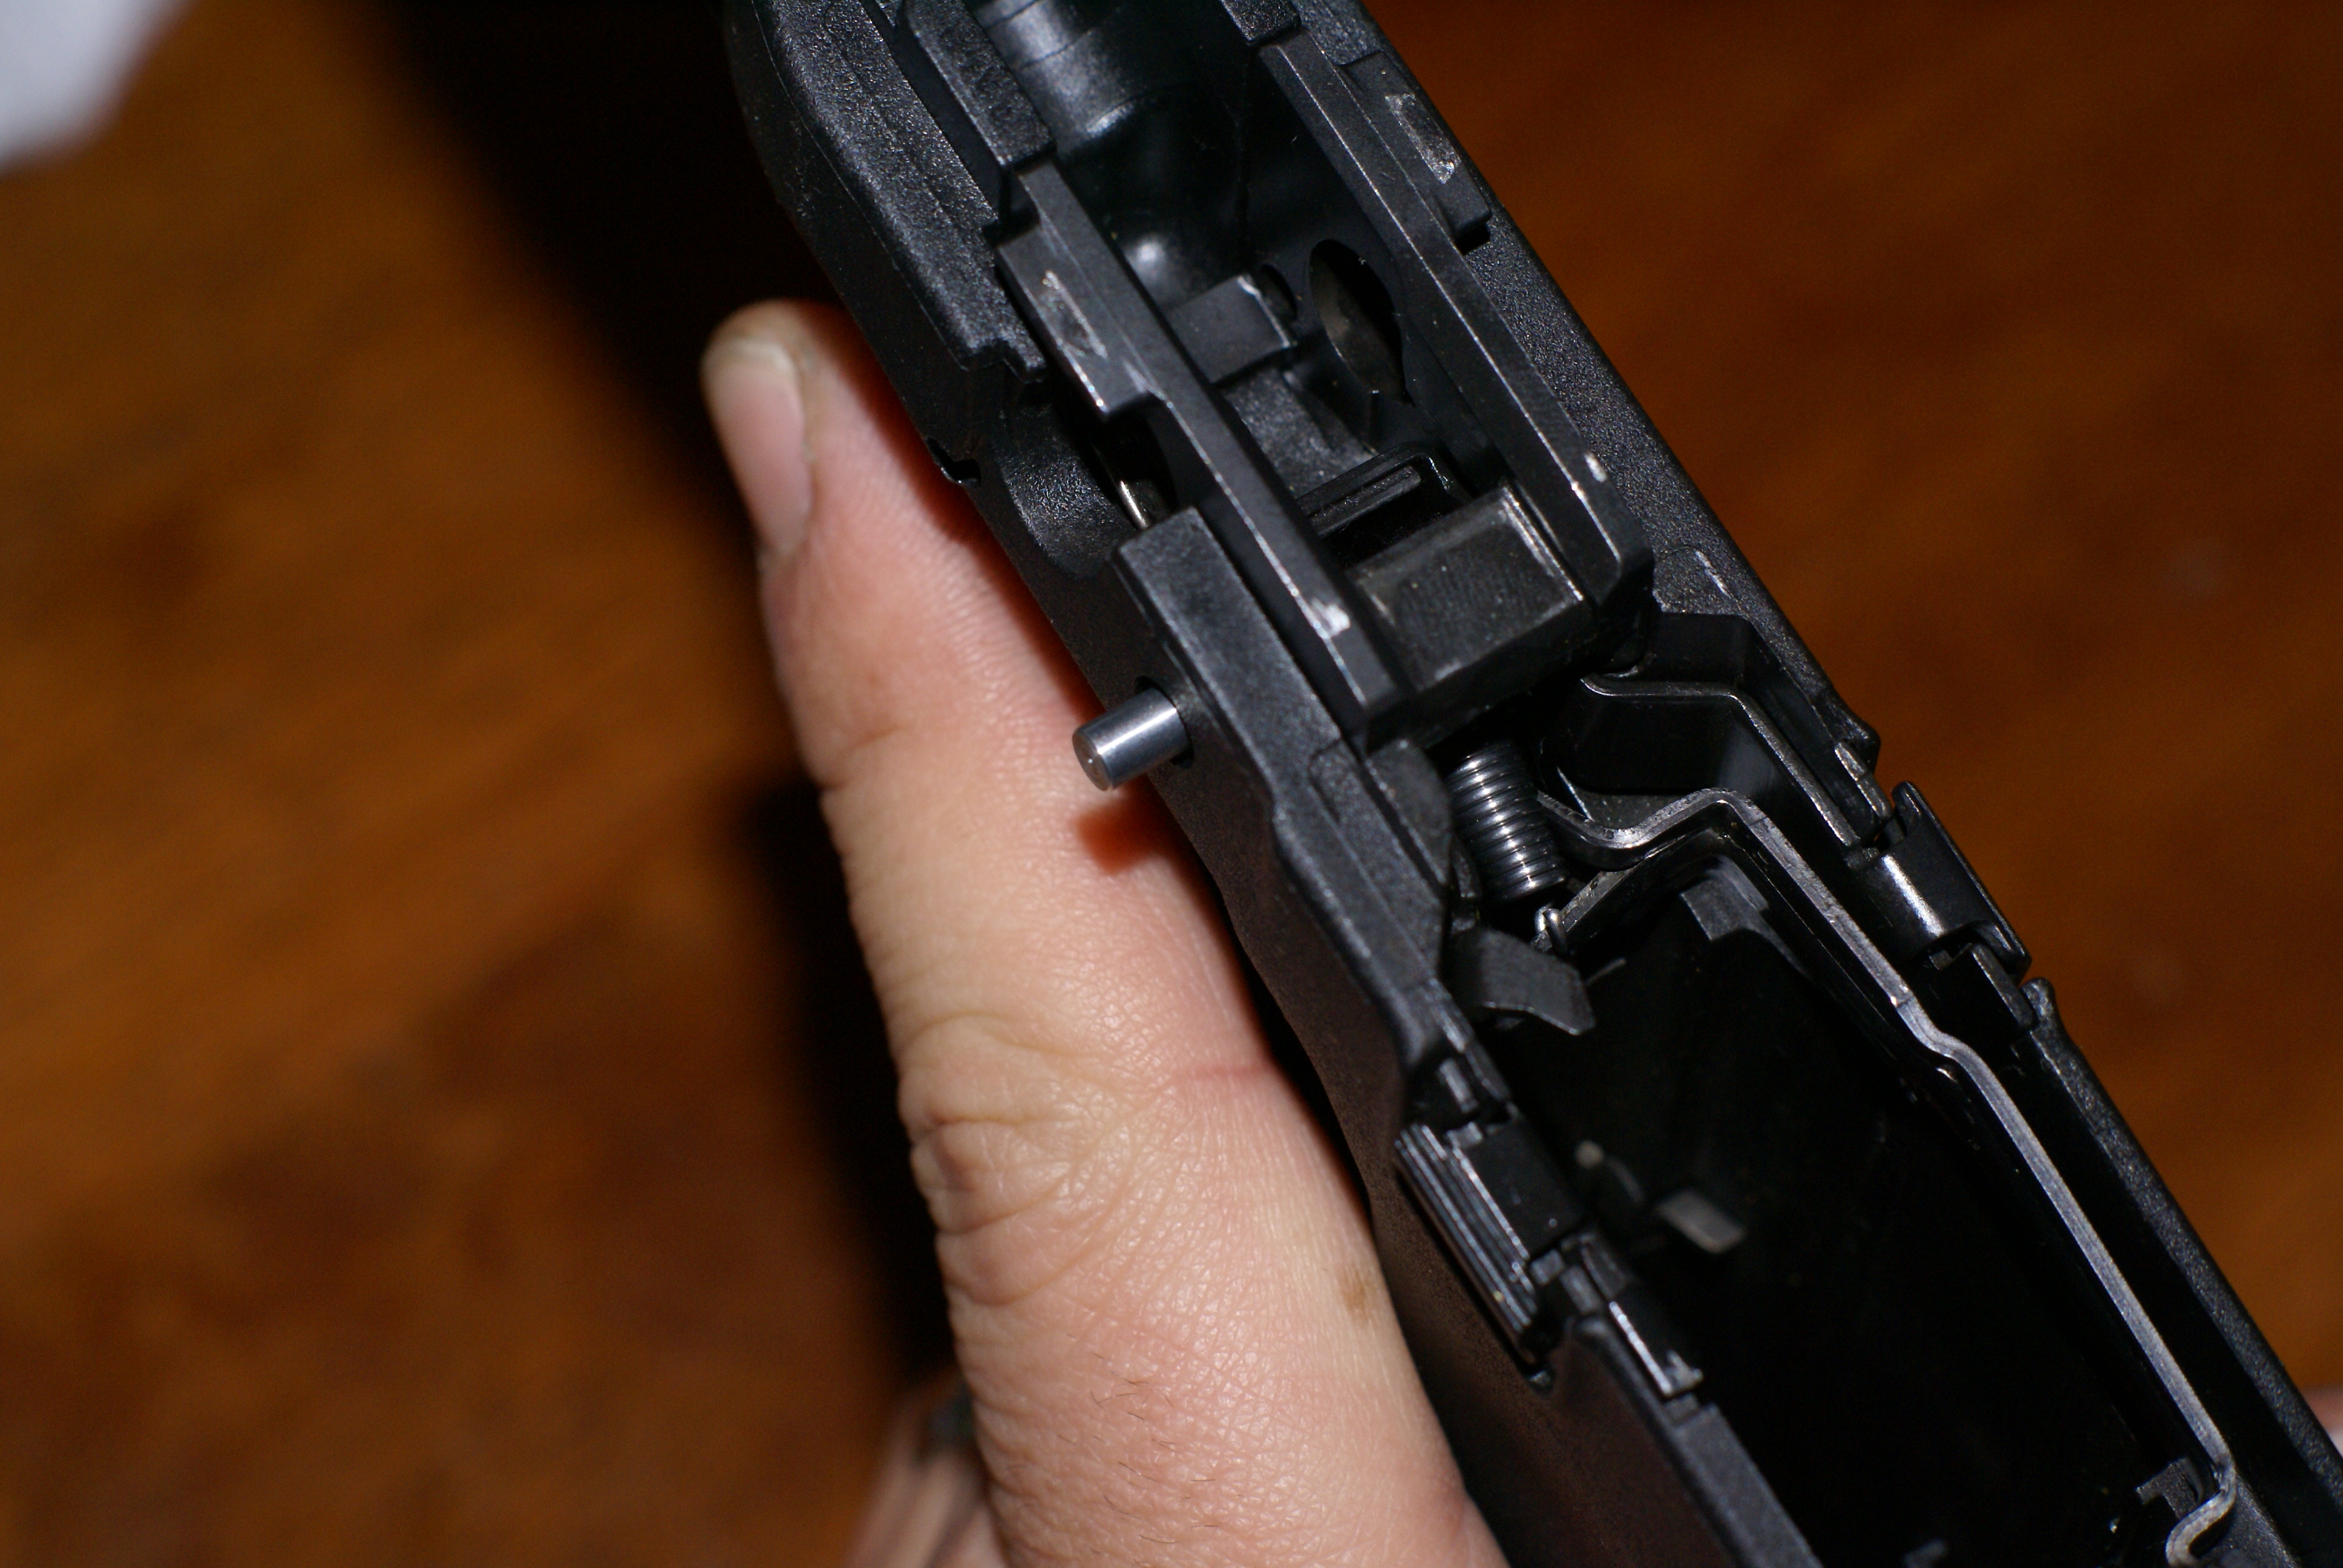
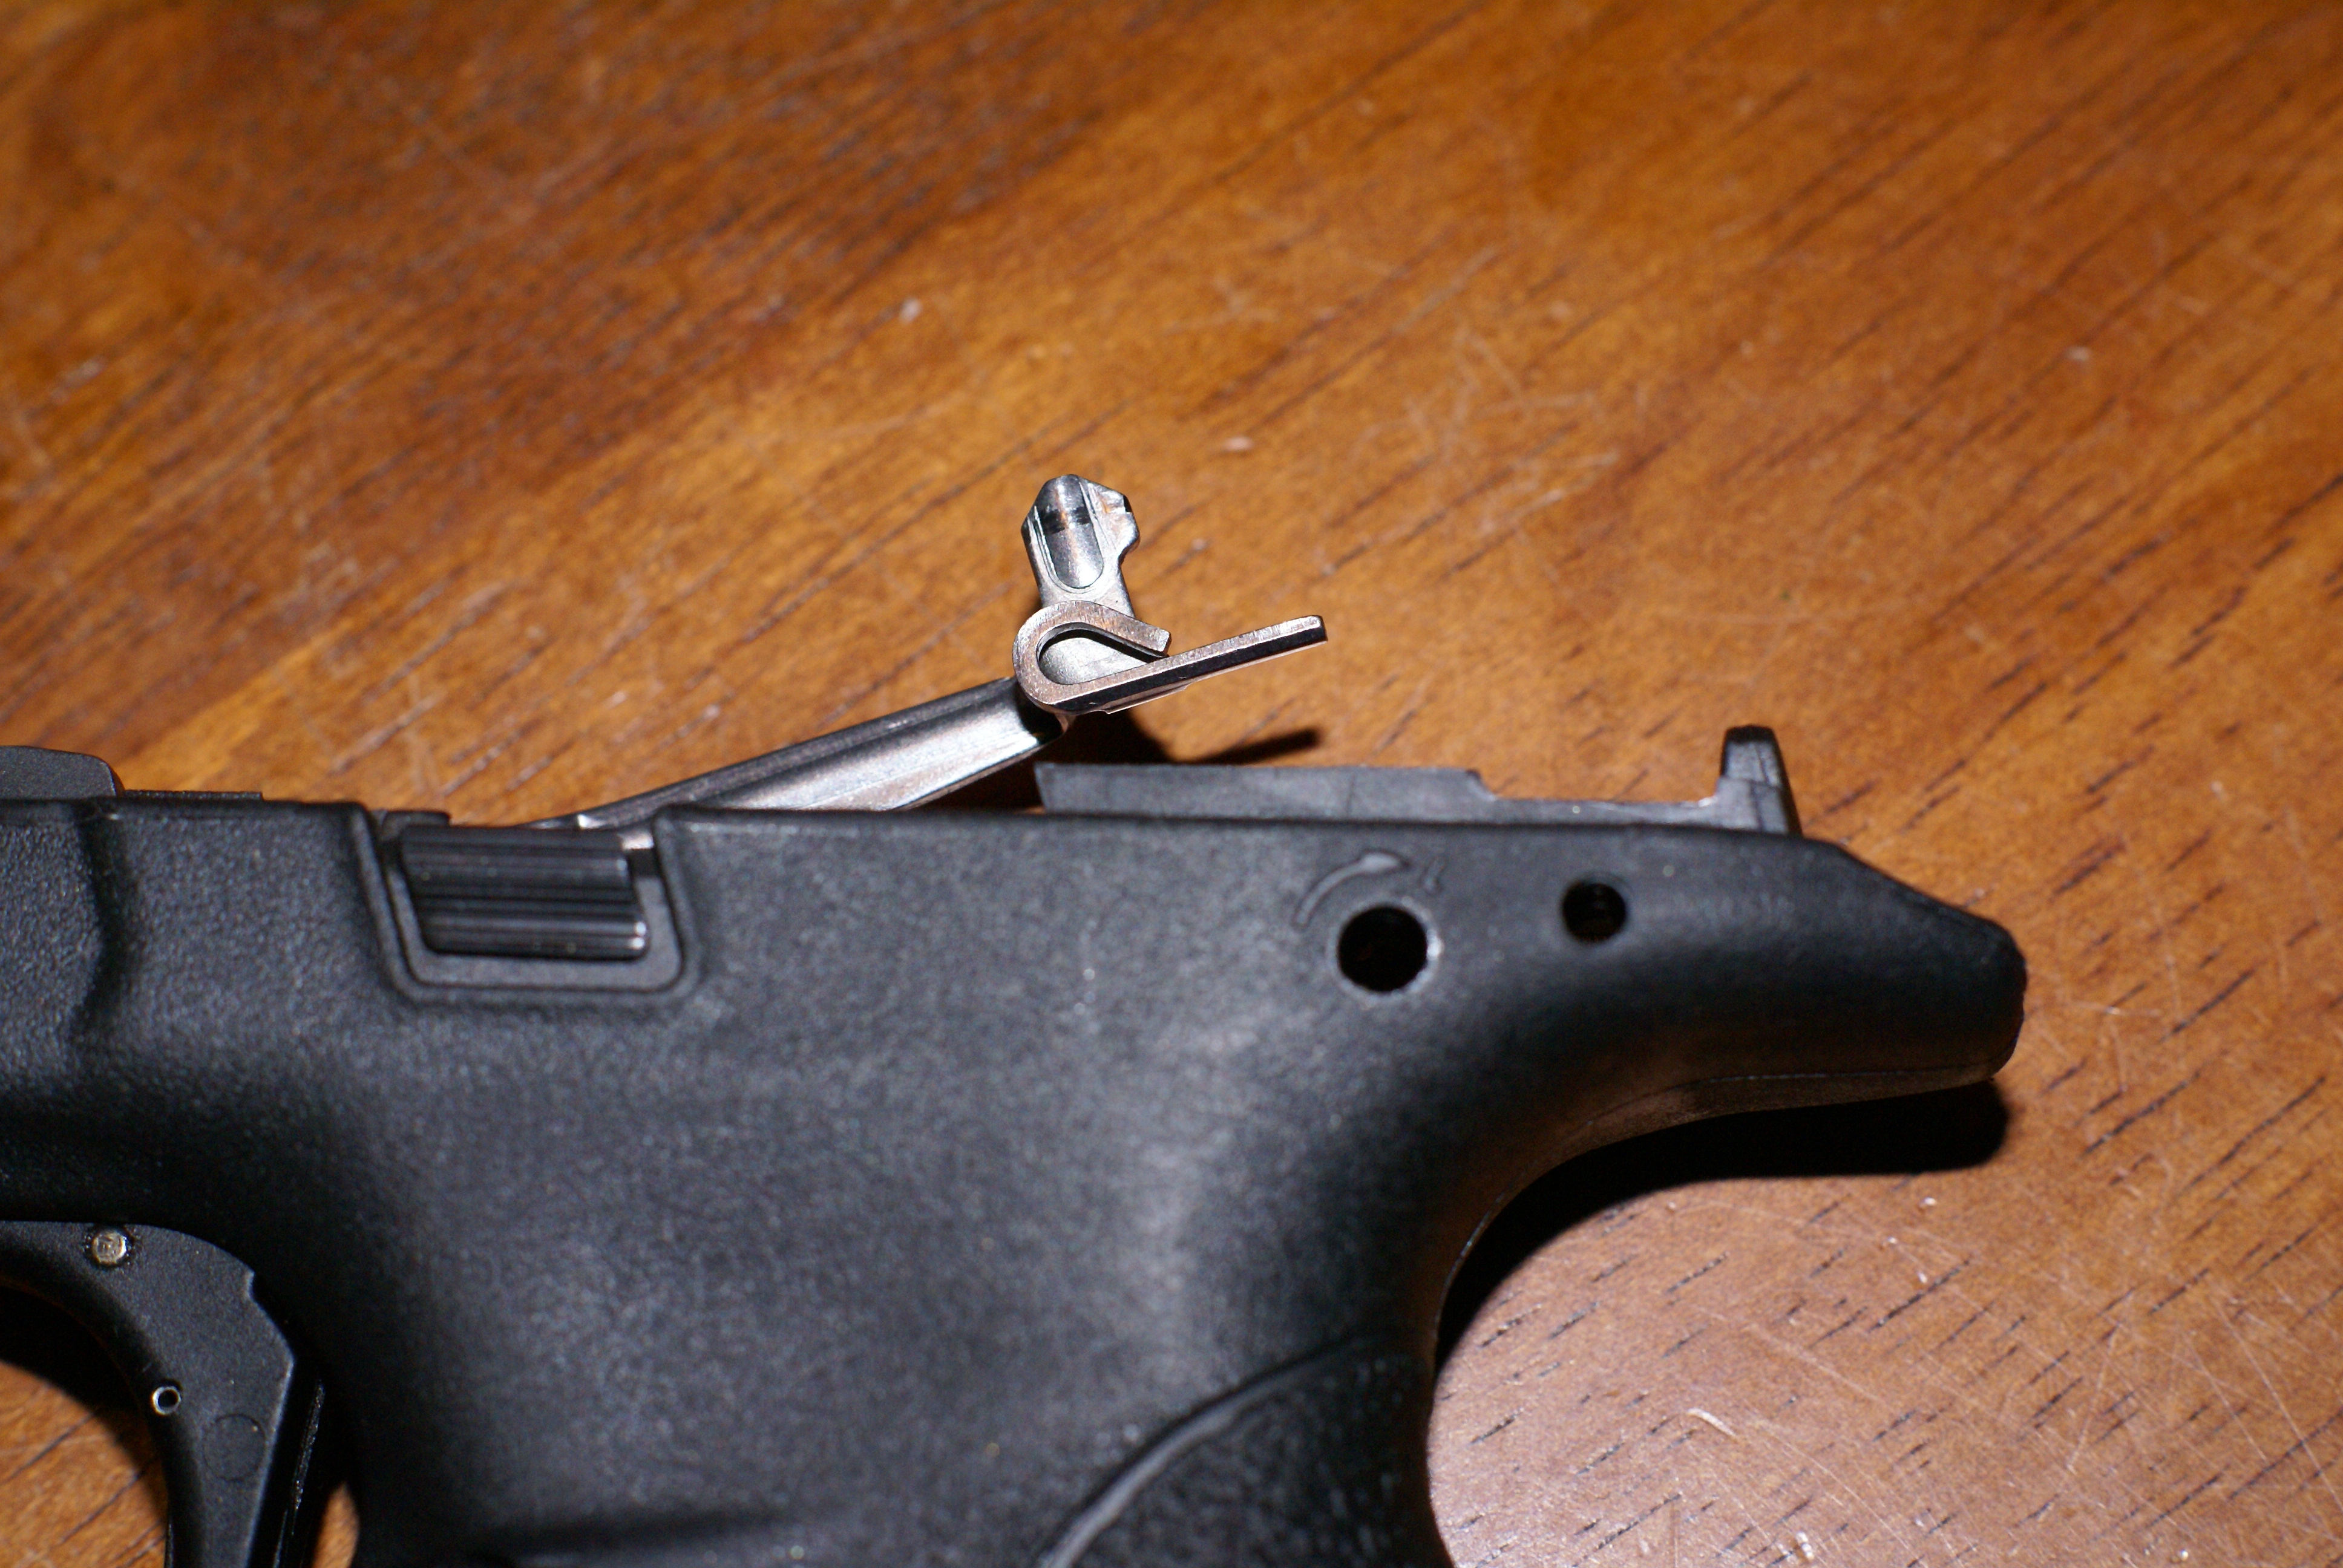
To begin, the M&P pistol was disassembled like it would be for cleaning. Always ensure the firearm is unloaded prior to take down, and any work is performed. The first parts replacement I did was the striker block. The new one in the kit is required for proper function since the timing is changed by the forward set sear. To do this, I used a small vice with 3″ jaws and soft inserts to protect the slide from getting marred. The slide was clamped, and the rear sight position was noted using a digital caliper (for exact replacement). The rear sight screw was removed, and the sight was driven out with a brass punch (non-marring) from left to right. As this was done, I was careful not to hit the cap on top of the striker block spring. After that, the spring and striker block were removed, and replaced with the new ones in the kit. The black spring cap was re-used, and held down by the Talon Tactical Tool while drifting the sight back into place. To complete this process, a function check was done several times by pushing forward on the striker (making sure it didn’t advance forward), and then depressing the striker block and pushing forward on the striker (to ensure that the striker will move freely).

The sight screw is removed using a 1/16″ hexagonal driver bit.
A 1/8″ brass punch was used to drift the sight out from left to right, being careful not to strike the black striker block spring cap.
Holding down the cap, the sight is removed, and the cap is slowly released.


On the left is the S&W striker block and spring, and the right is Apex Tactical Specialties. Note the difference in shape.
Using the Talon Tactical sight tool to compress the striker block spring, the sight is reinstalled.
The final step for this part of the kit install was a function check to ensure the proper operation of the striker block.


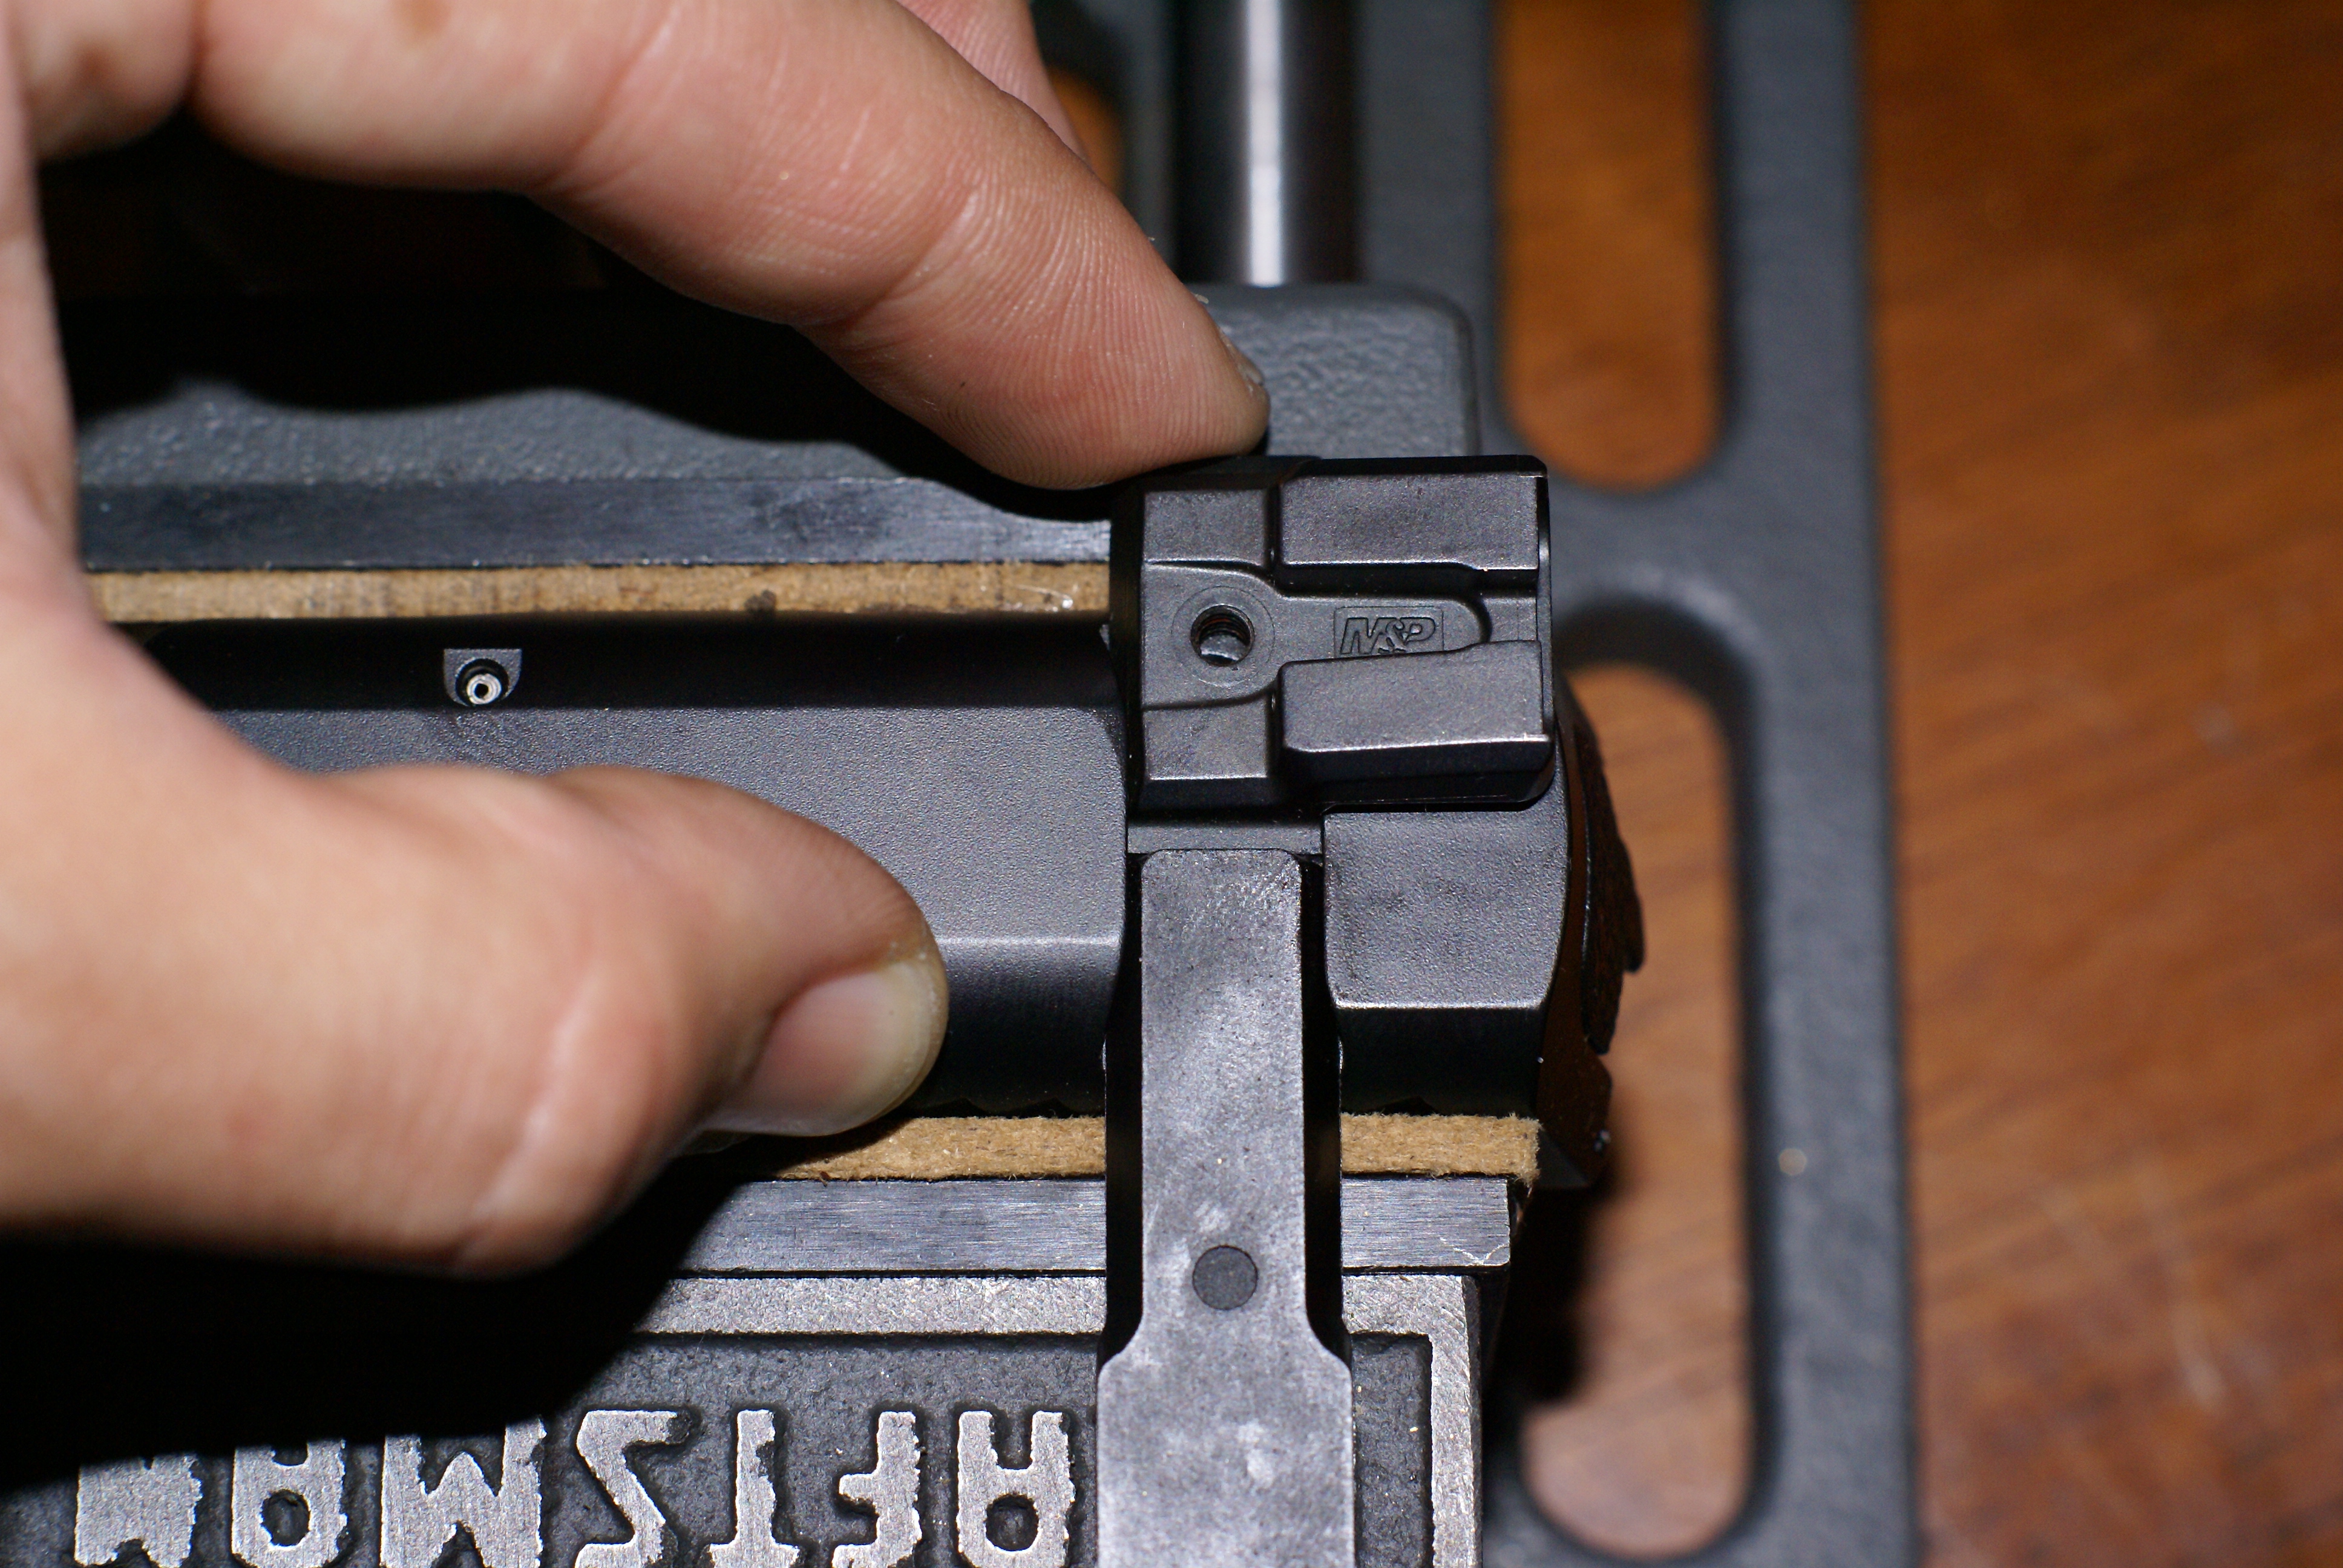
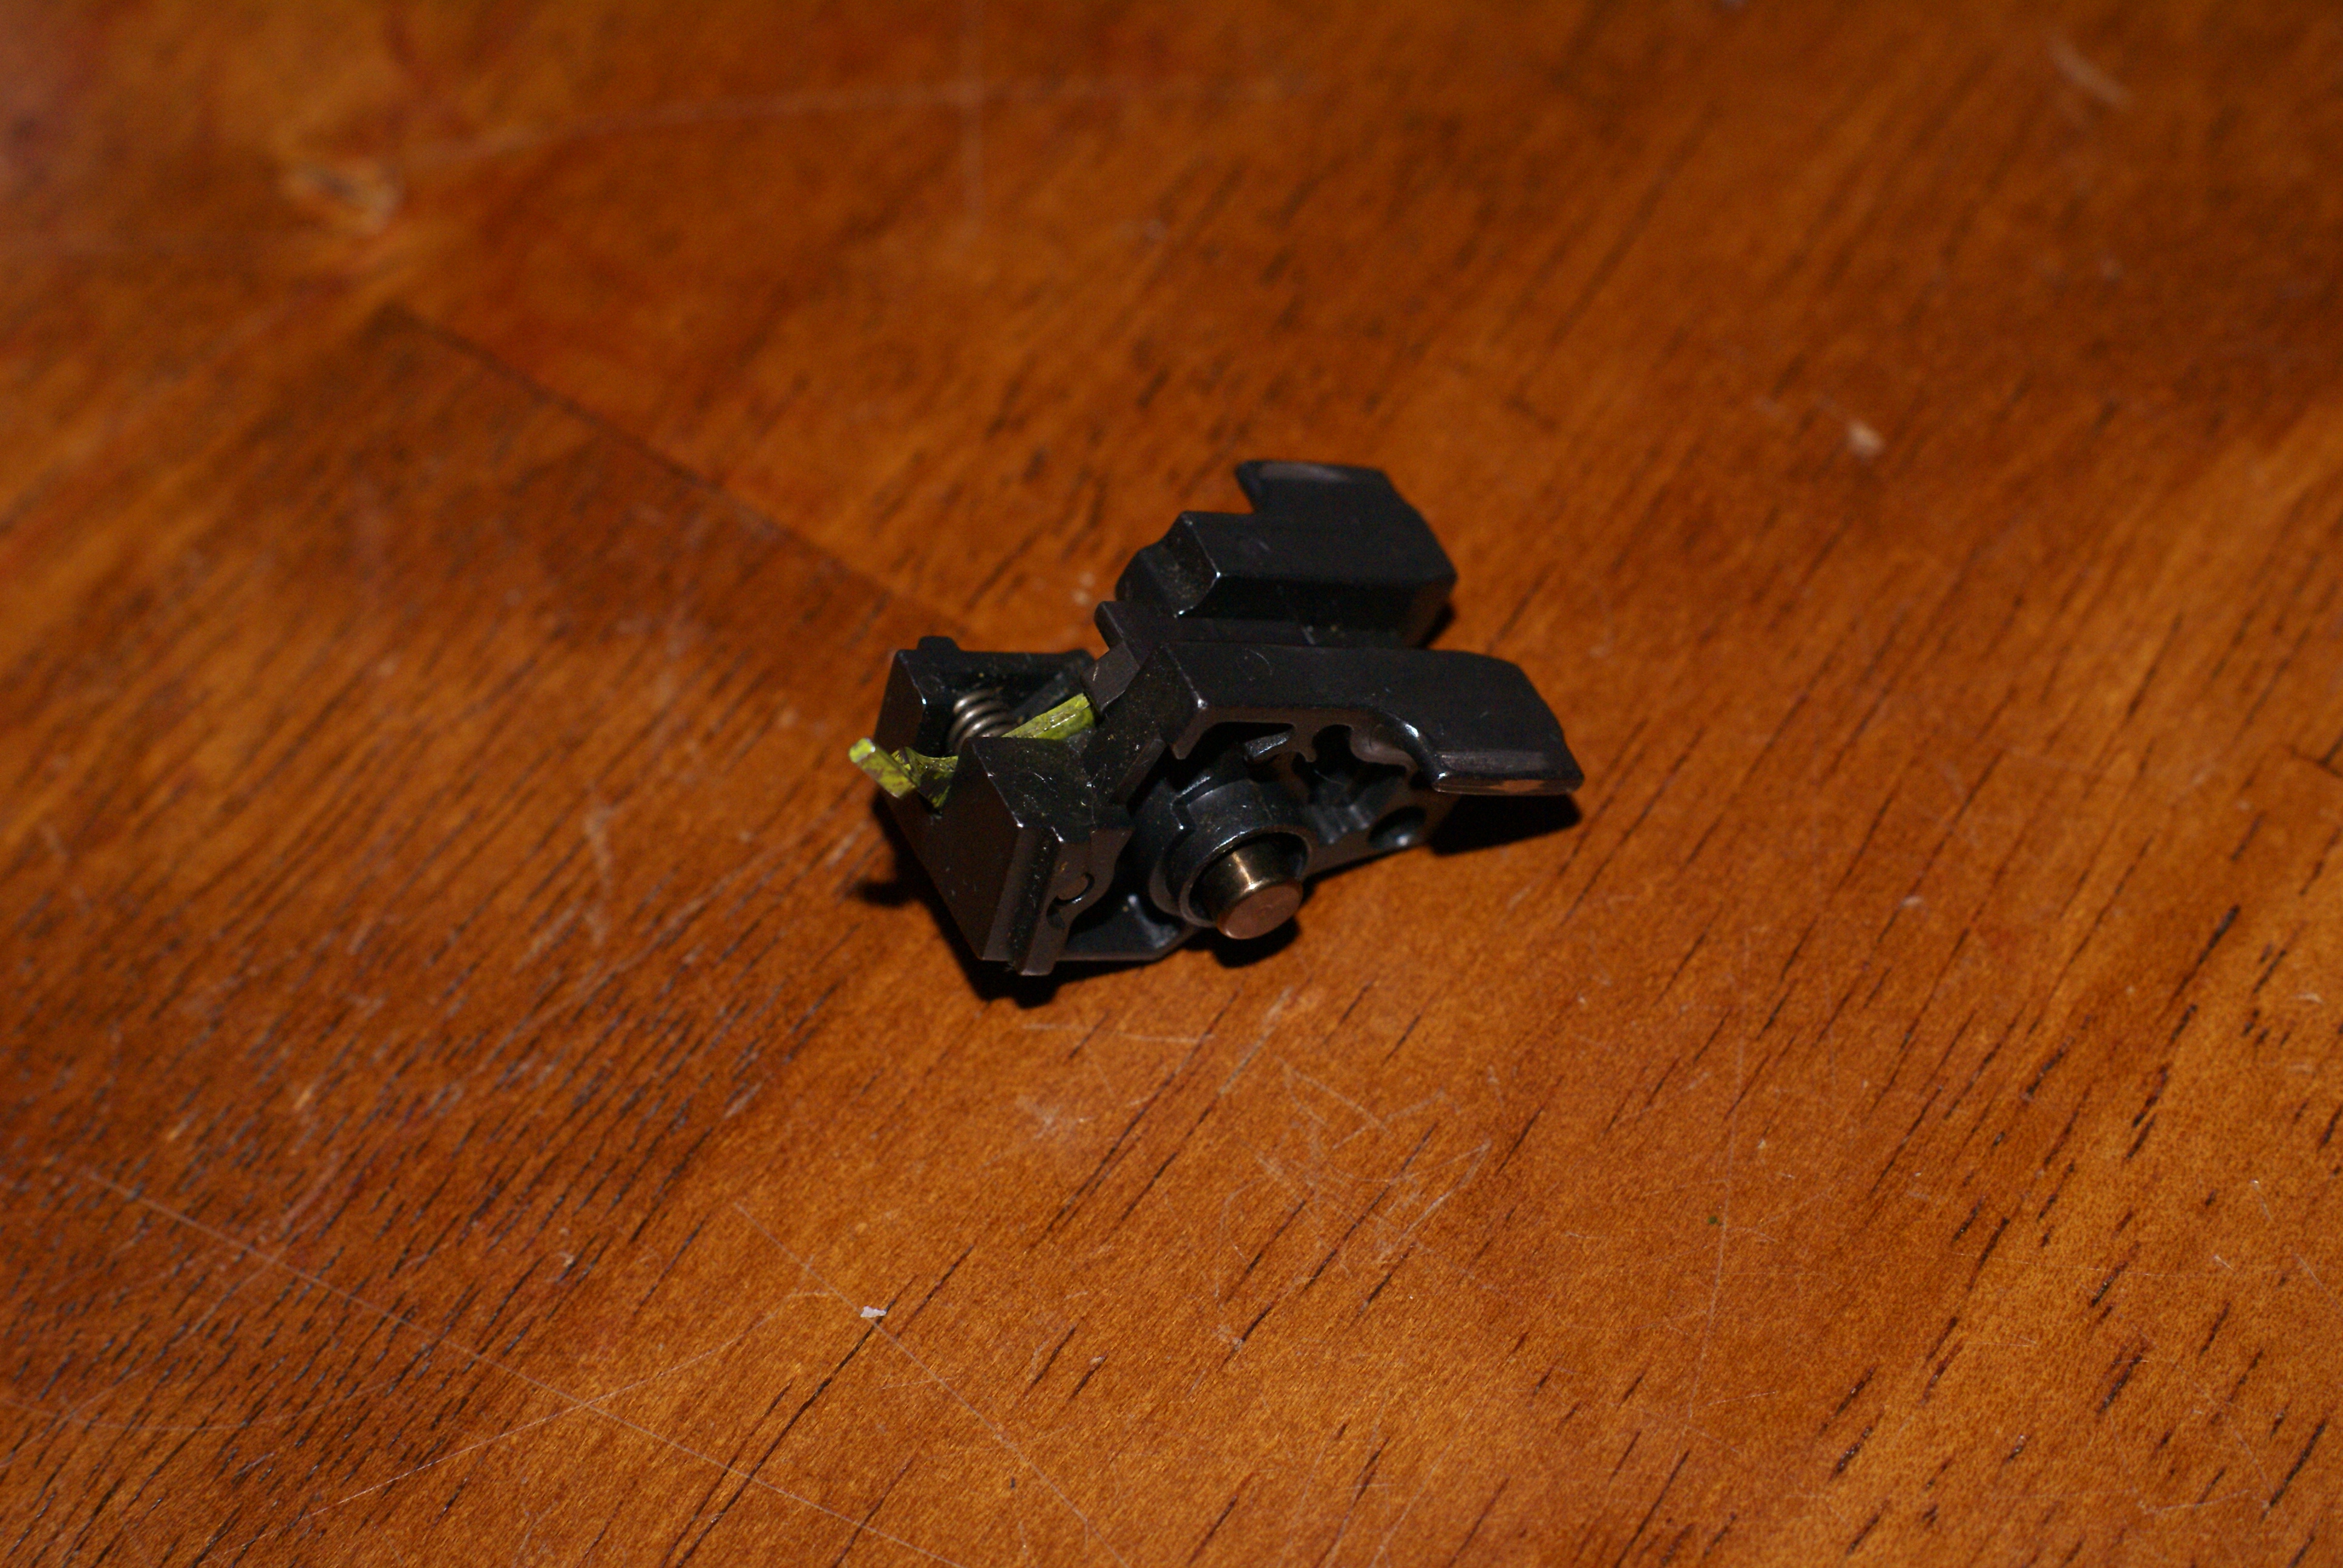
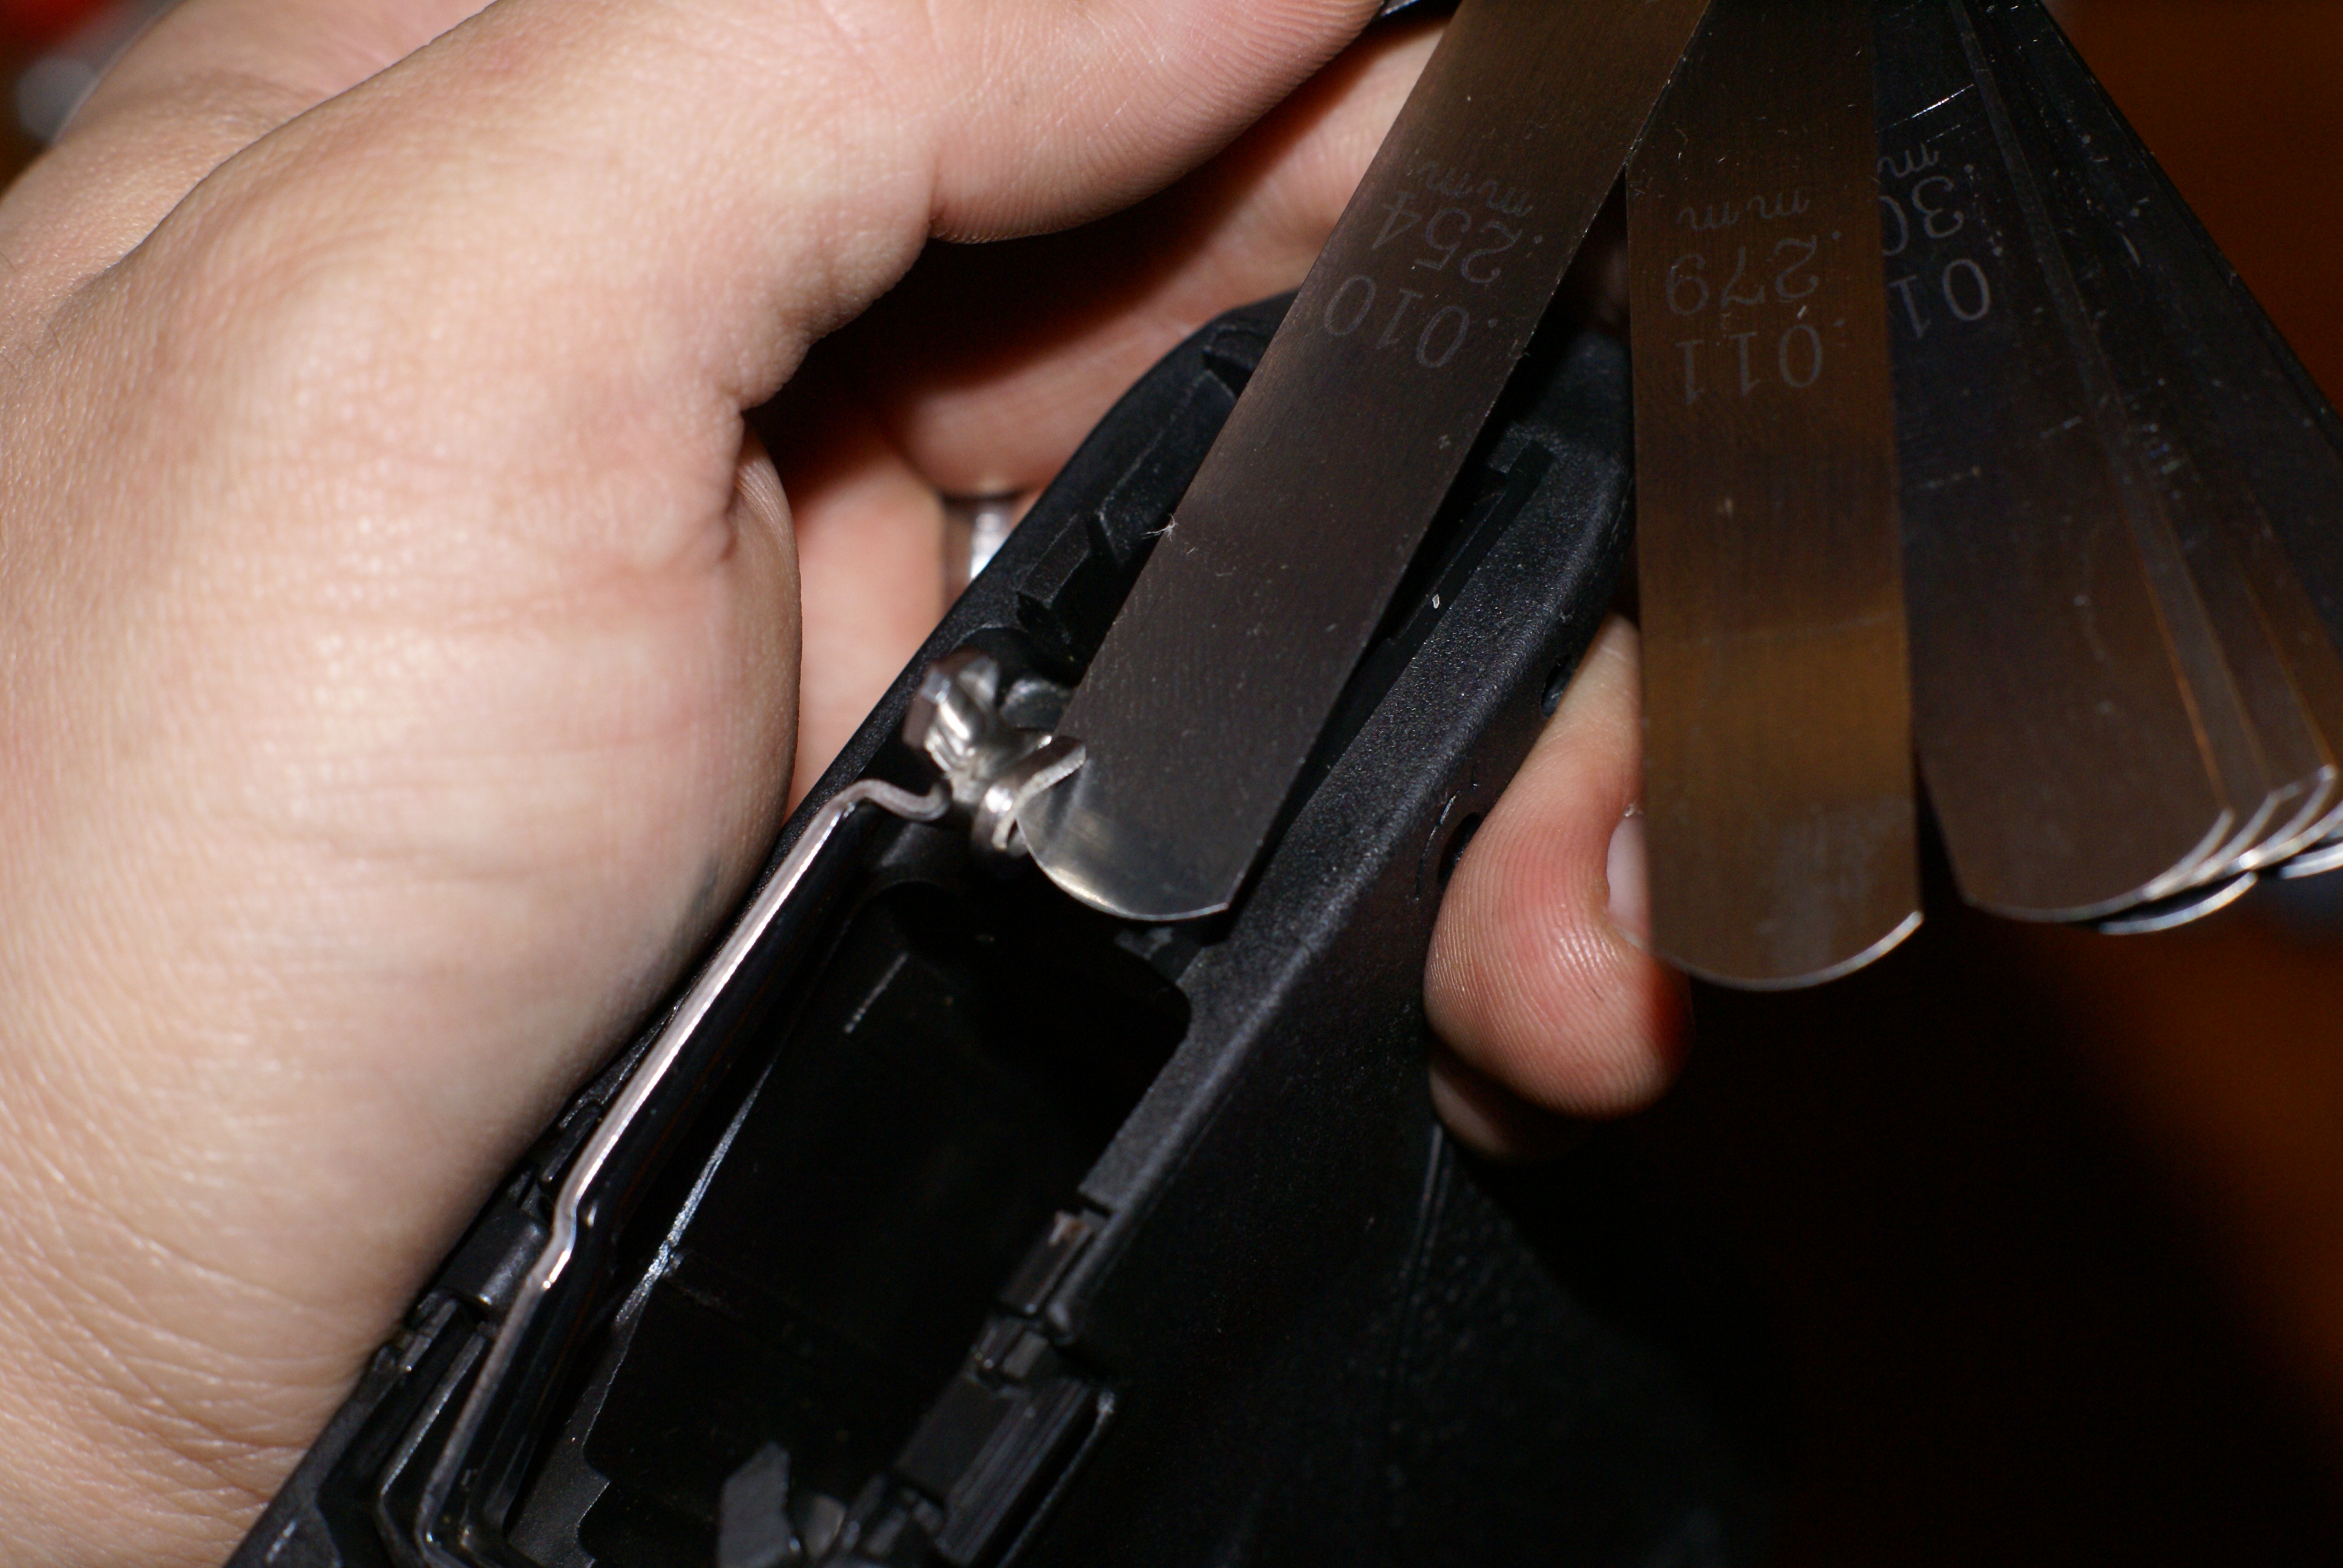
The next part of the install is a little more involved, but straight forward. First, the take-down lever was removed by rotating it up and pulling out, then I removed the roll pins holding the trigger housing block and the sear housing block in place using the polymer armorer block. At this point, I believe it’s better to show you than explain this part of the kit installation. Here’s a look at what the process involved, and how it was done:

The take-down lever is removed by rotating up, and pulling it out.
The roll pin holding the trigger housing block was removed with a 1/8″ roll pin punch. I prefer to use a light hammer (4 oz.), and rapid light strikes to remove pins. This reduces the chances of galling and pin deformation.
The sear housing pin is removed as well. Be careful not to hit the ILS plug, as it’s made of aluminum and will break. The sear housing block was the first component lifted out of the frame.


Using a brass 1/8″ punch, the trigger pivot in was removed from right to left (note the positive head on the pin). The punch is then slowly removed to prevent the trigger return spring from popping out.
The trigger assembly is removed by pulling up on the slide release.
Be careful not to lose this small spring. It holds the take-down lever in place.


Here is the trigger assembly after it was removed.
Using a 1/16″ brass punch, the trigger connector bar pin was removed.
Using a 1/8″ brass punch I installed the new trigger onto the connector bar. Here you can see the pin that is partially installed from Apex Tactical Specialties. The pin was driven down until it was just about flush. A drop of oil helps this process, and is especially important with the aluminum model to prevent galling.


Using the 1/16″ brass punch, the pin was set just below the surface on both sides of the trigger.
Here is the completed assembly with the new trigger, and new return spring (4 lb.).
The assembly was dropped into place with the trigger return spring in line with the middle of the track.


The housing block was dropped back into place, and the slave pin (included in the kit) is inserted nose-first to help align the return spring when the pivot pin is reinstalled.
A punch or pick is helpful when trying to get the return spring in place. The pivot pin is reinstalled from left to right, and took a little manipulation to seat correctly. The trigger is pulled a few times to ensure that there was no binding, and that it functioned smoothly.


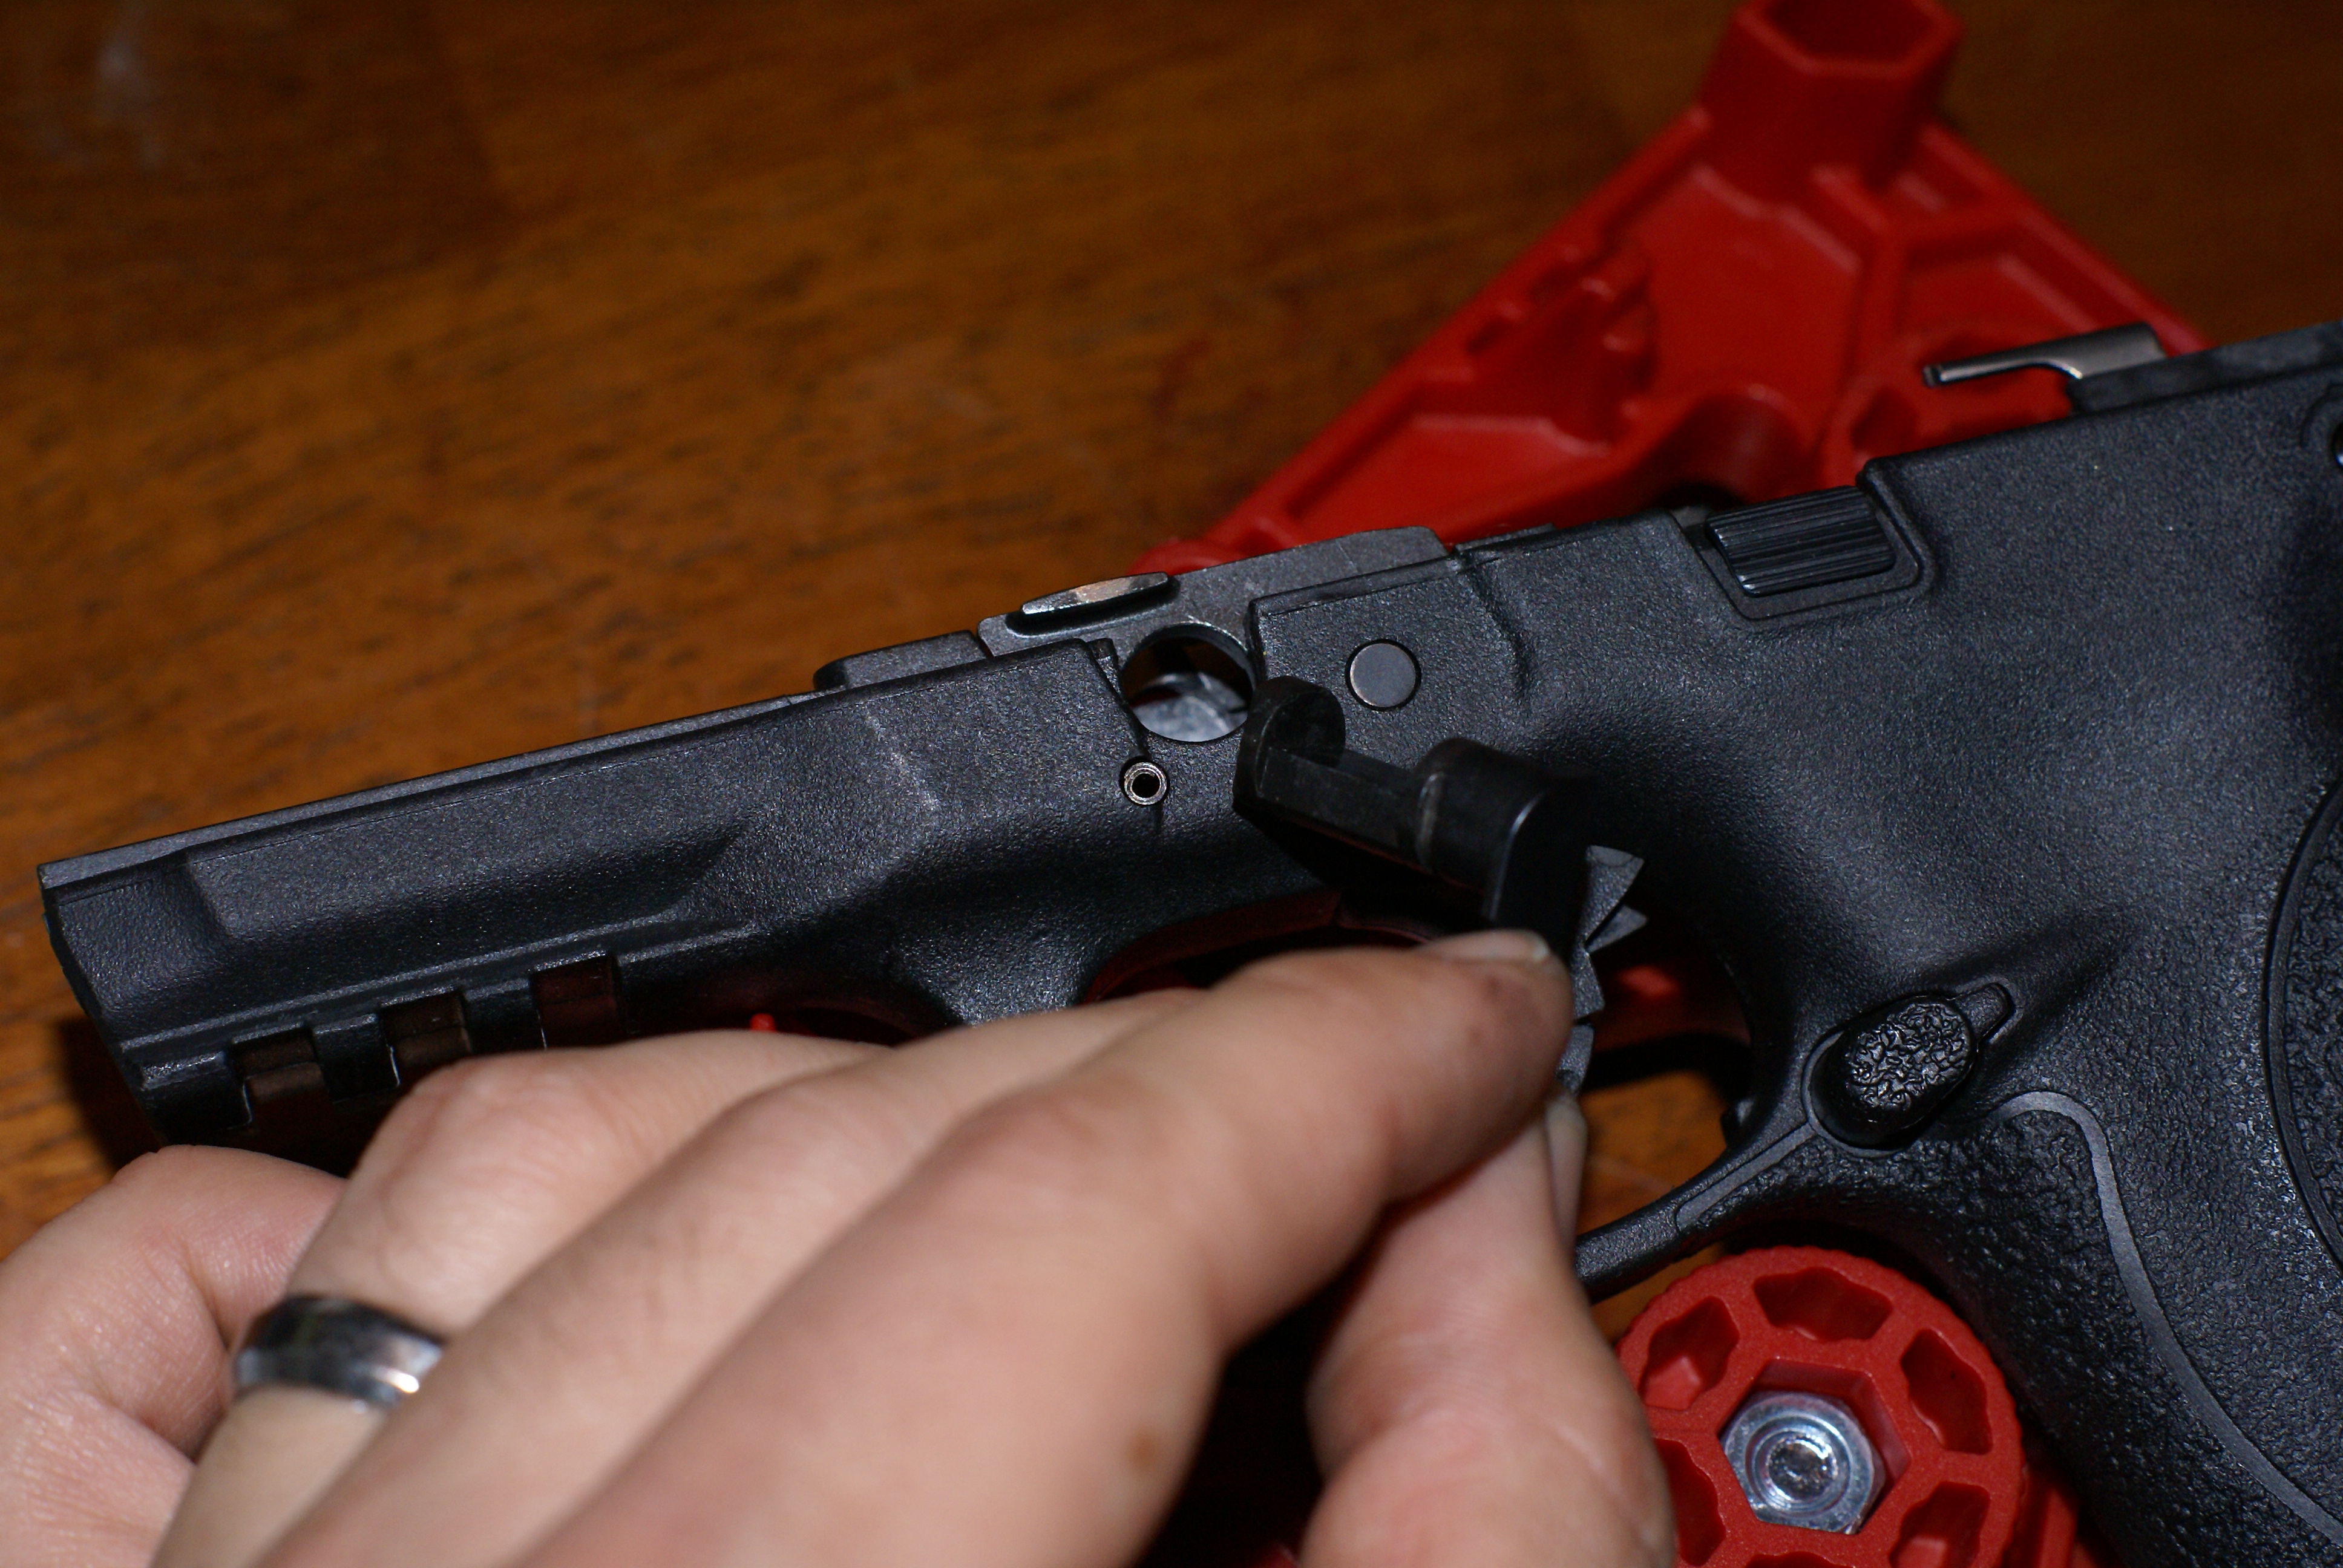
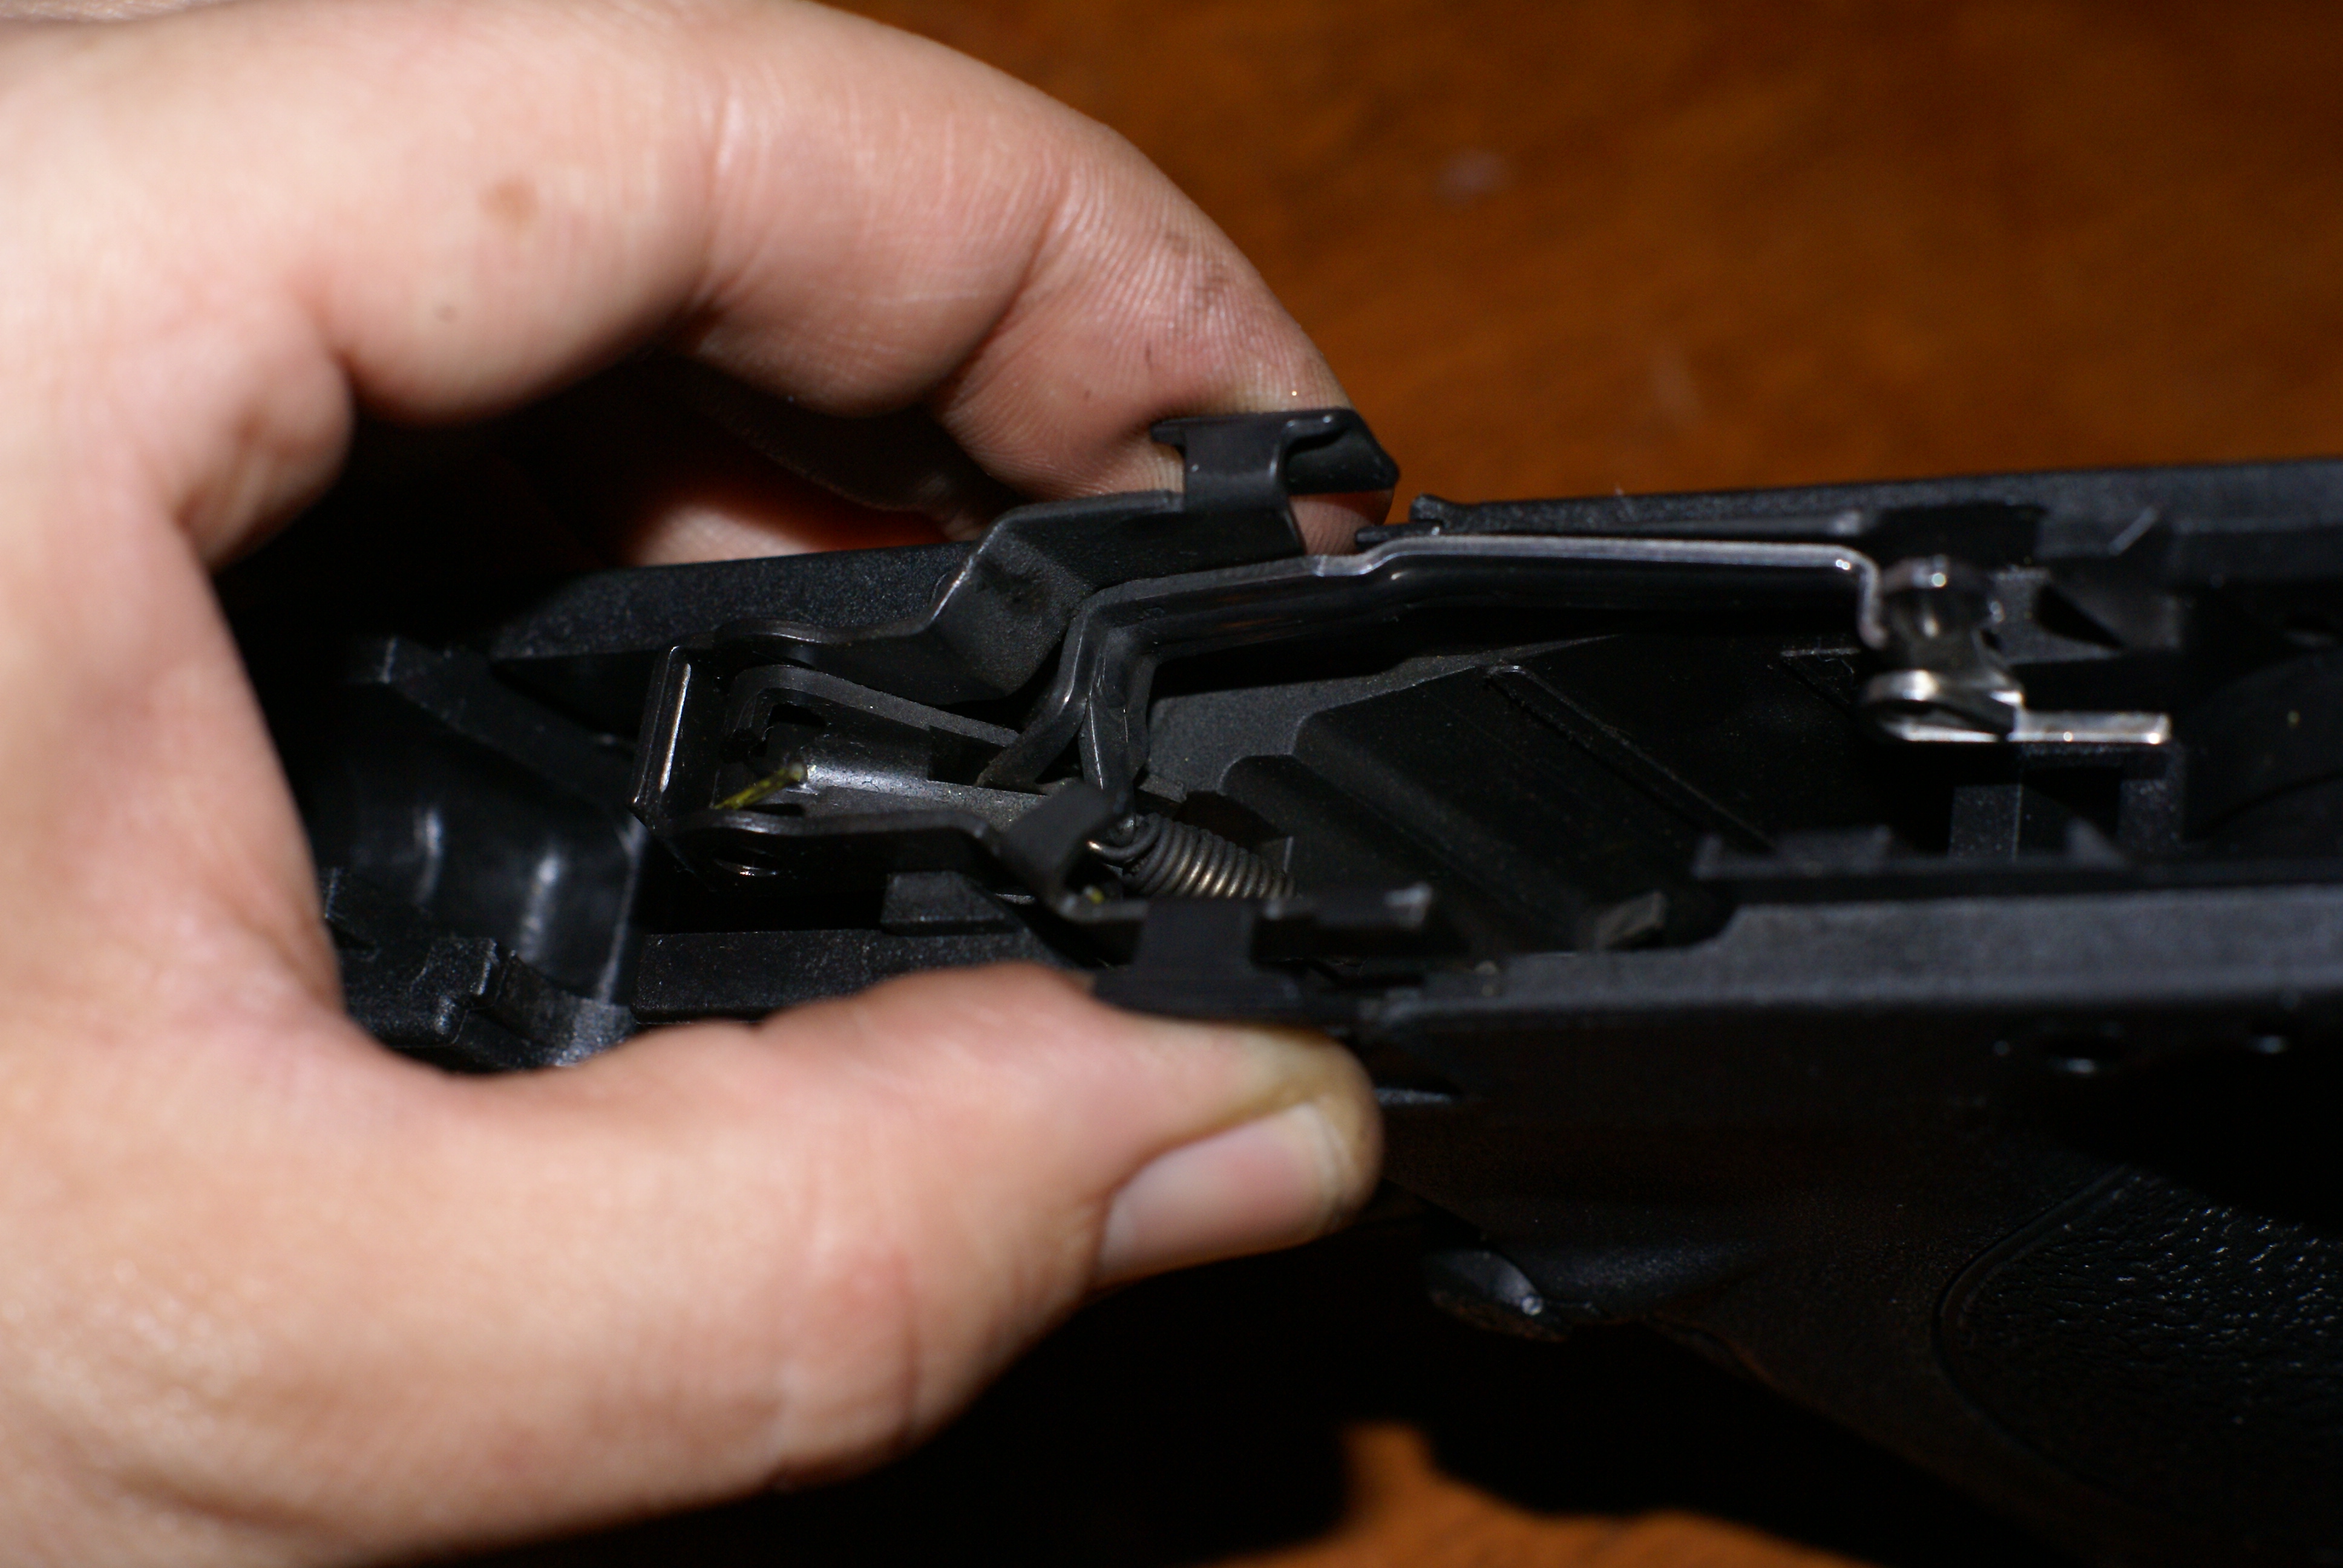
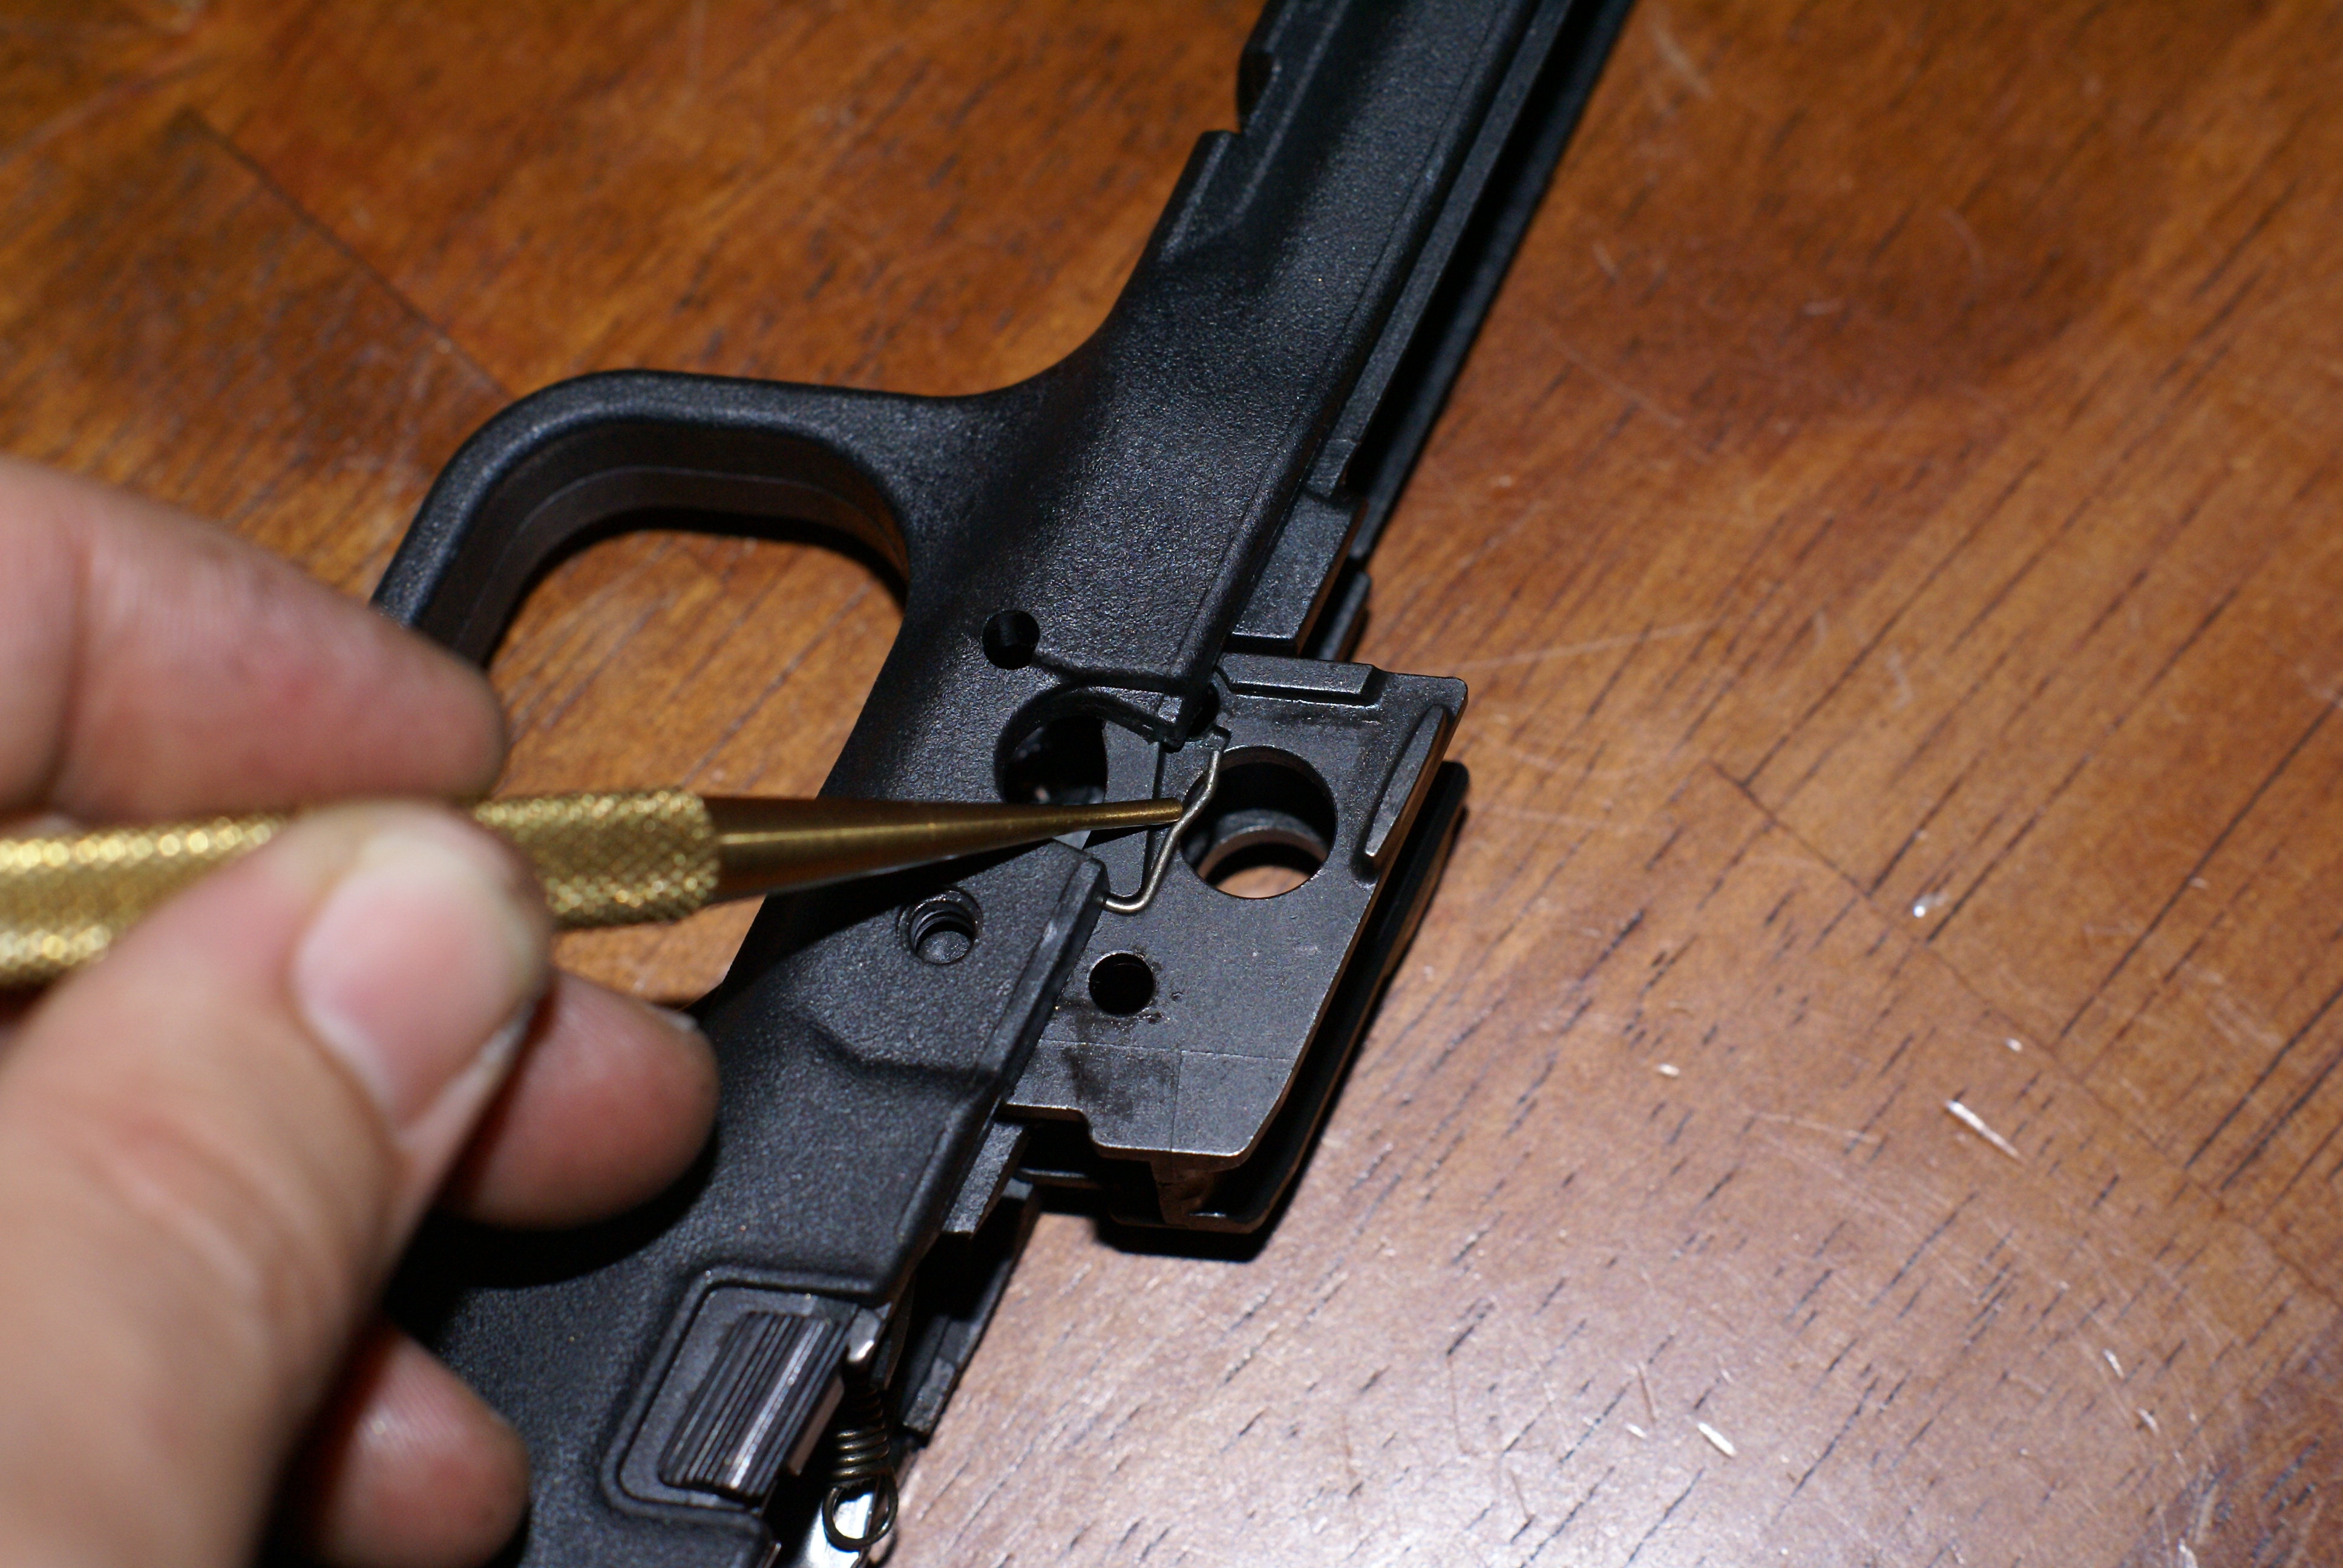
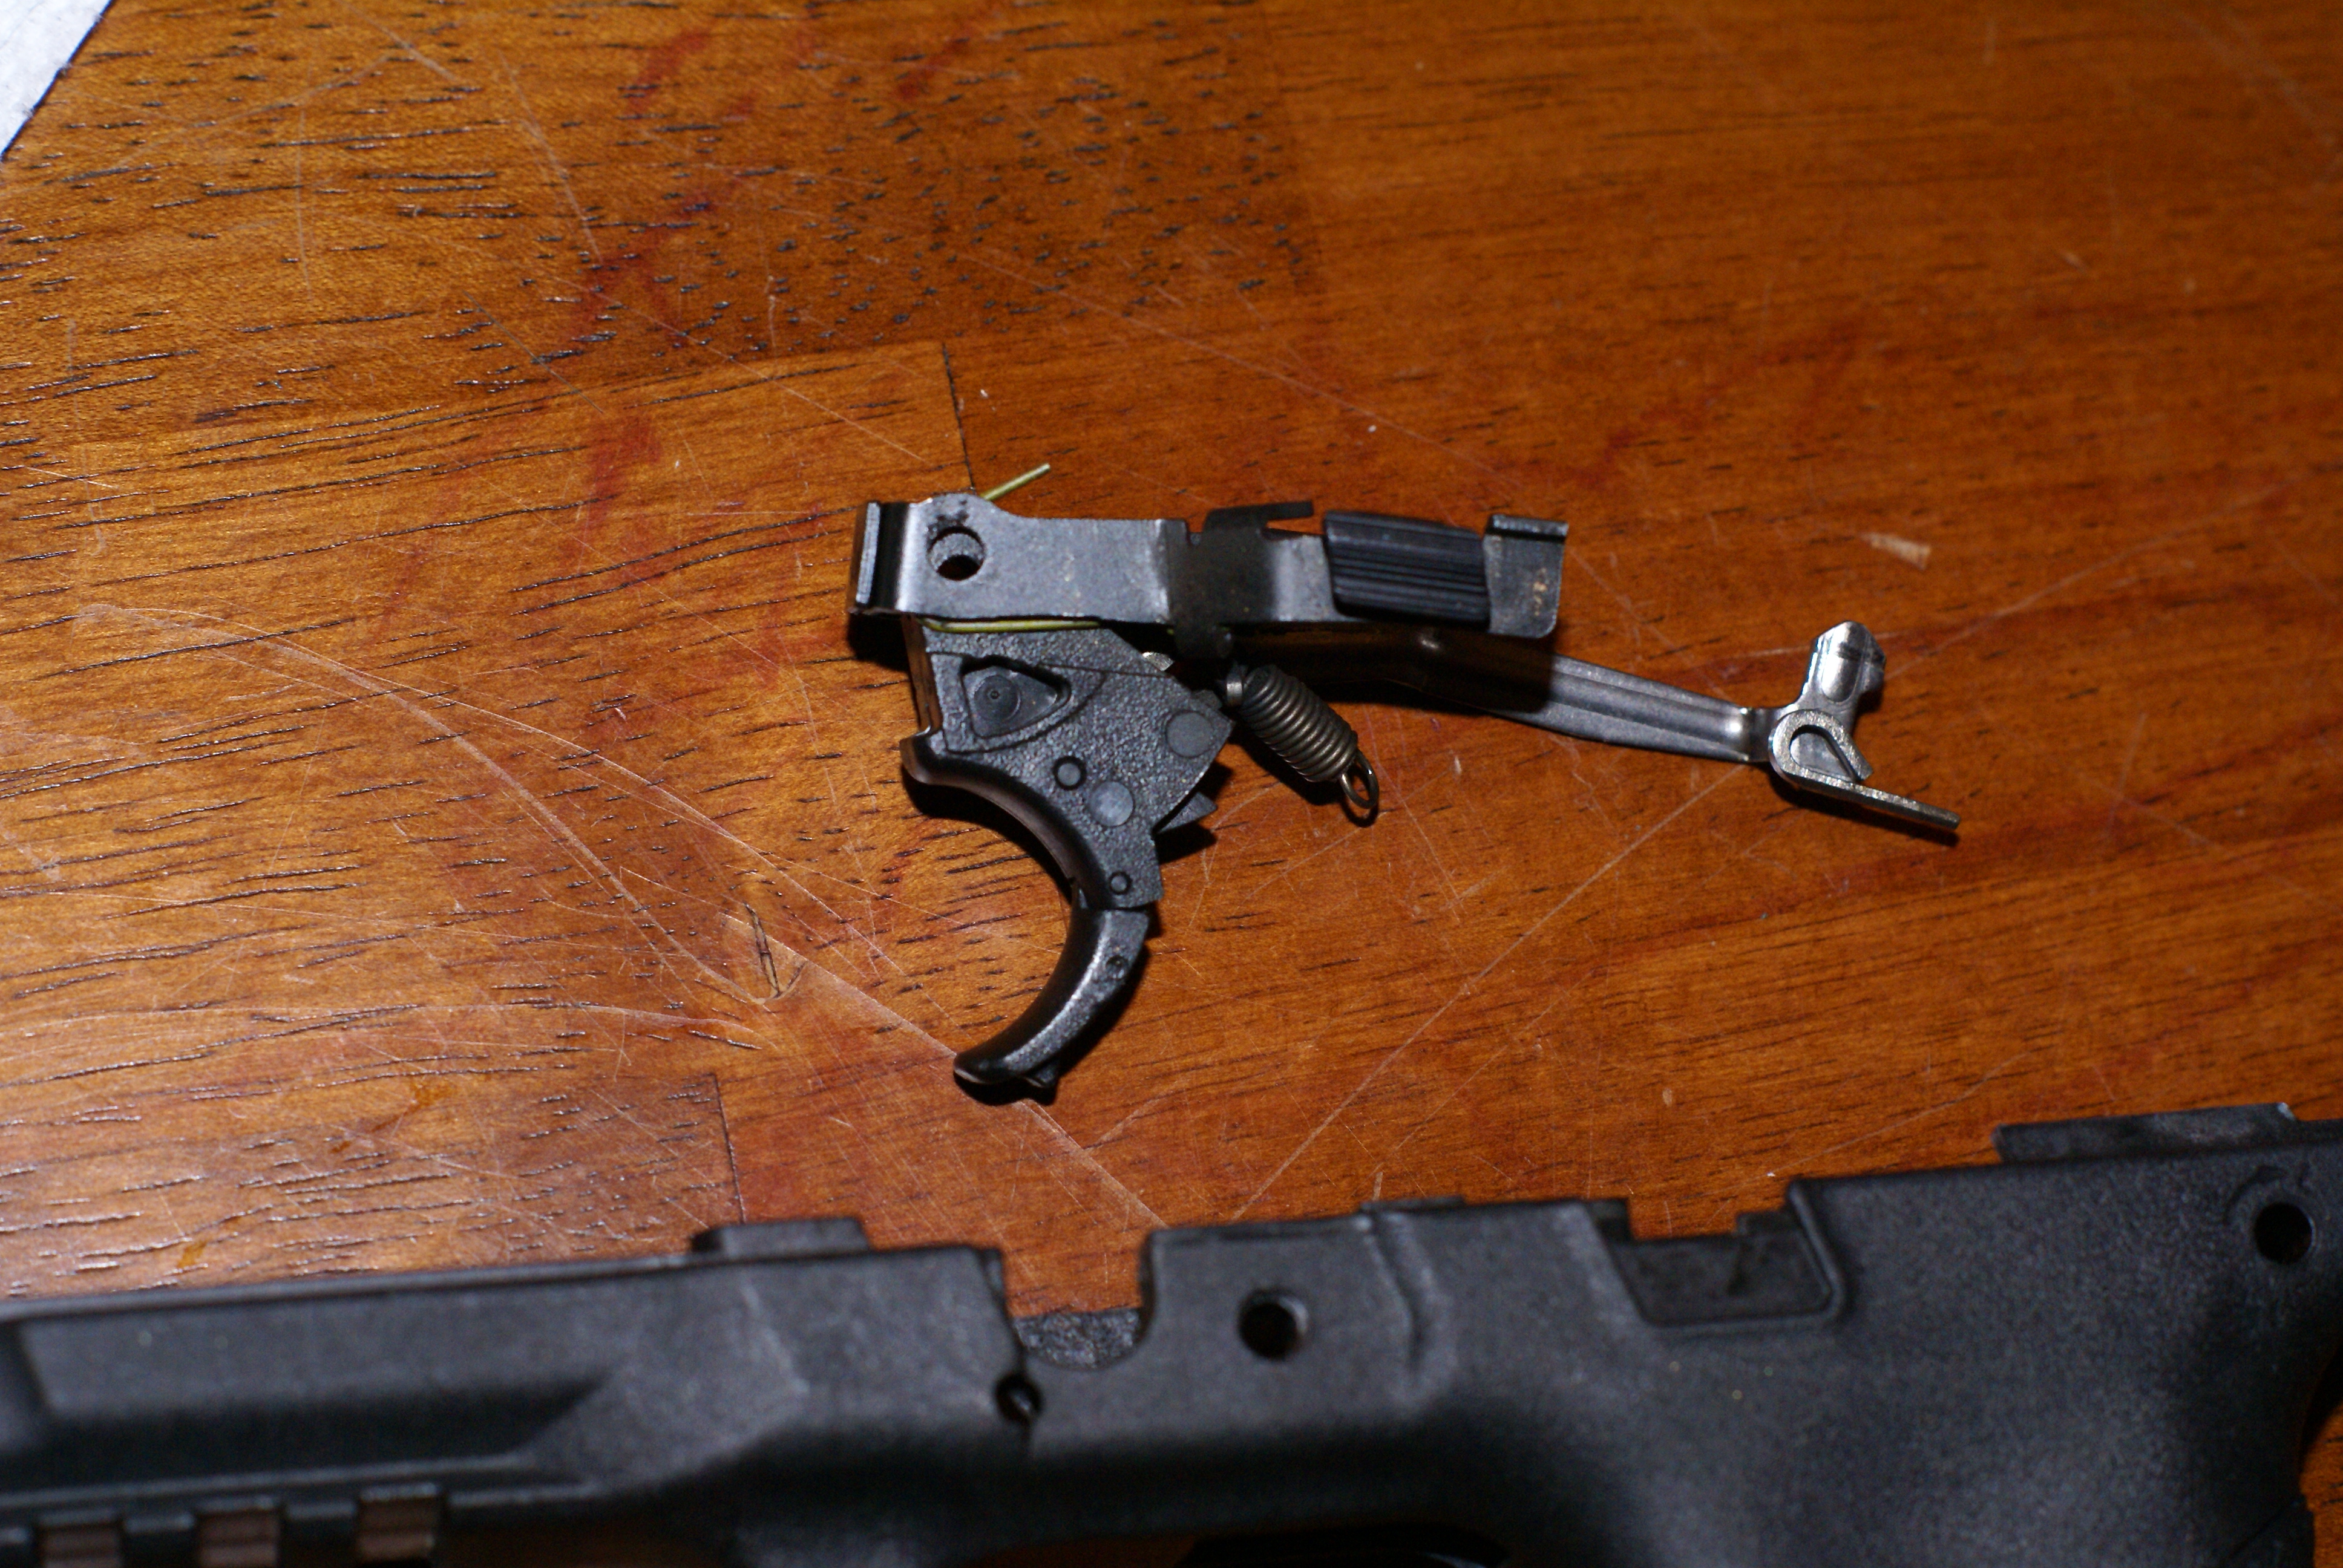
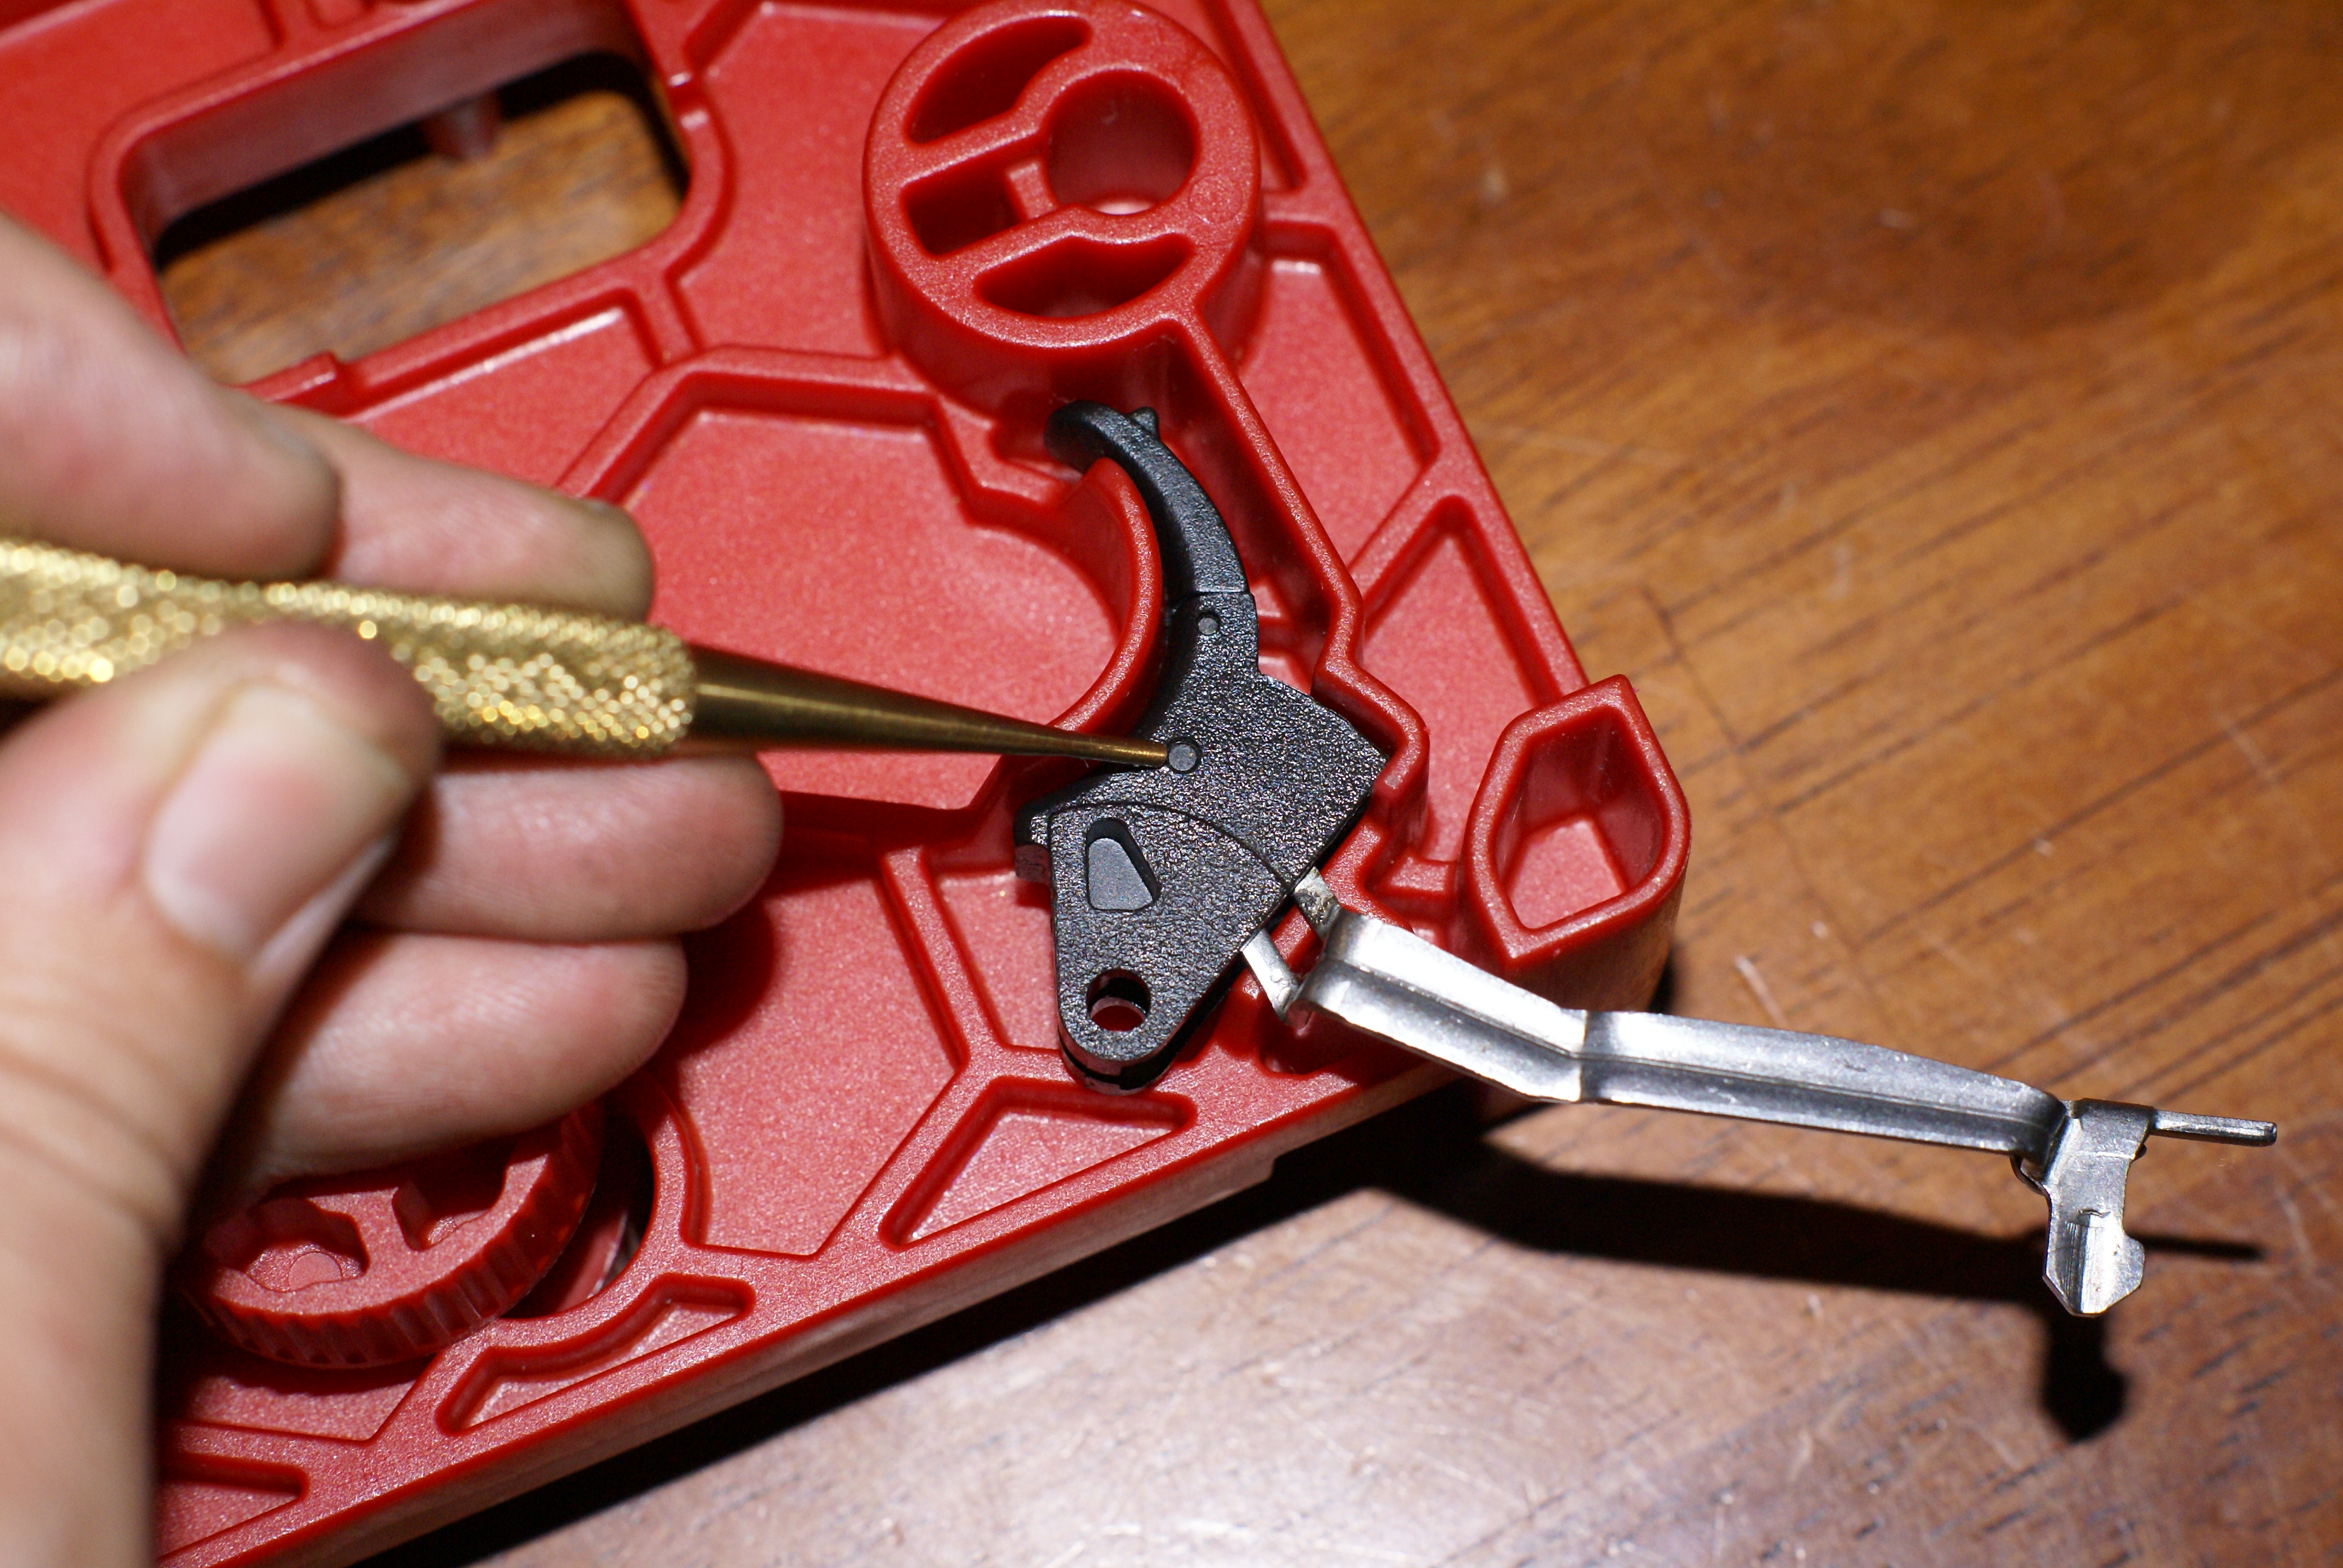
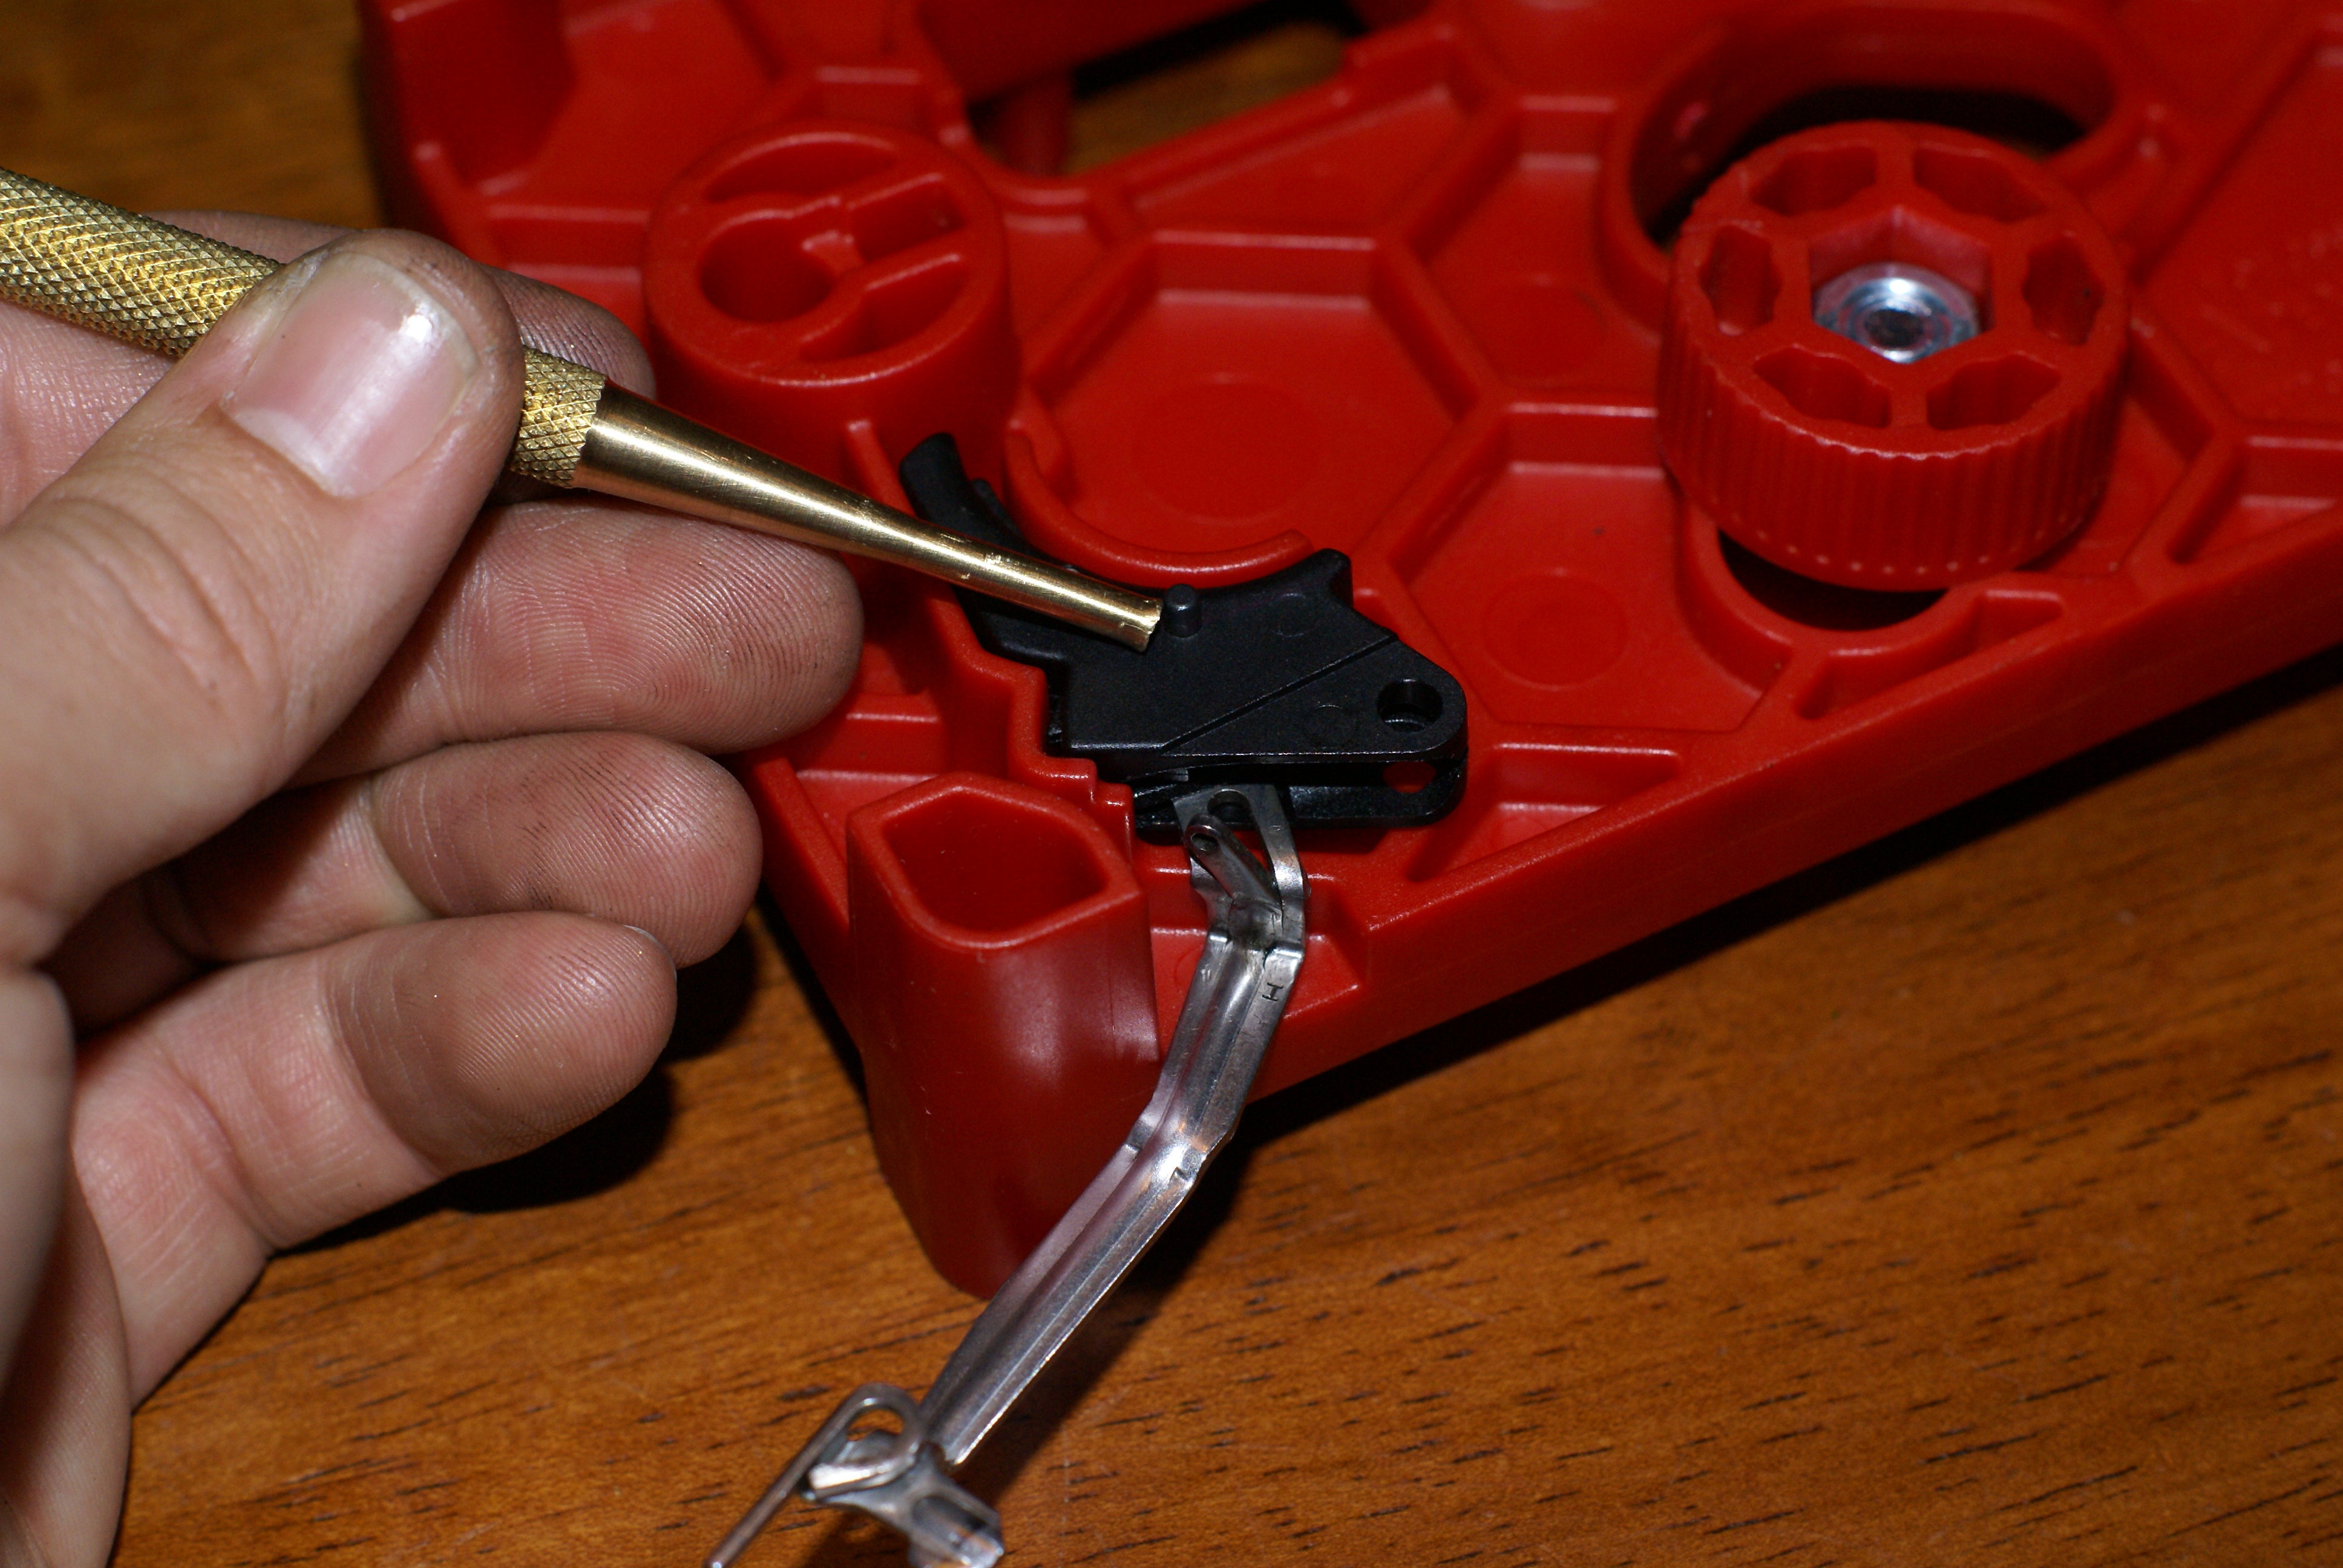
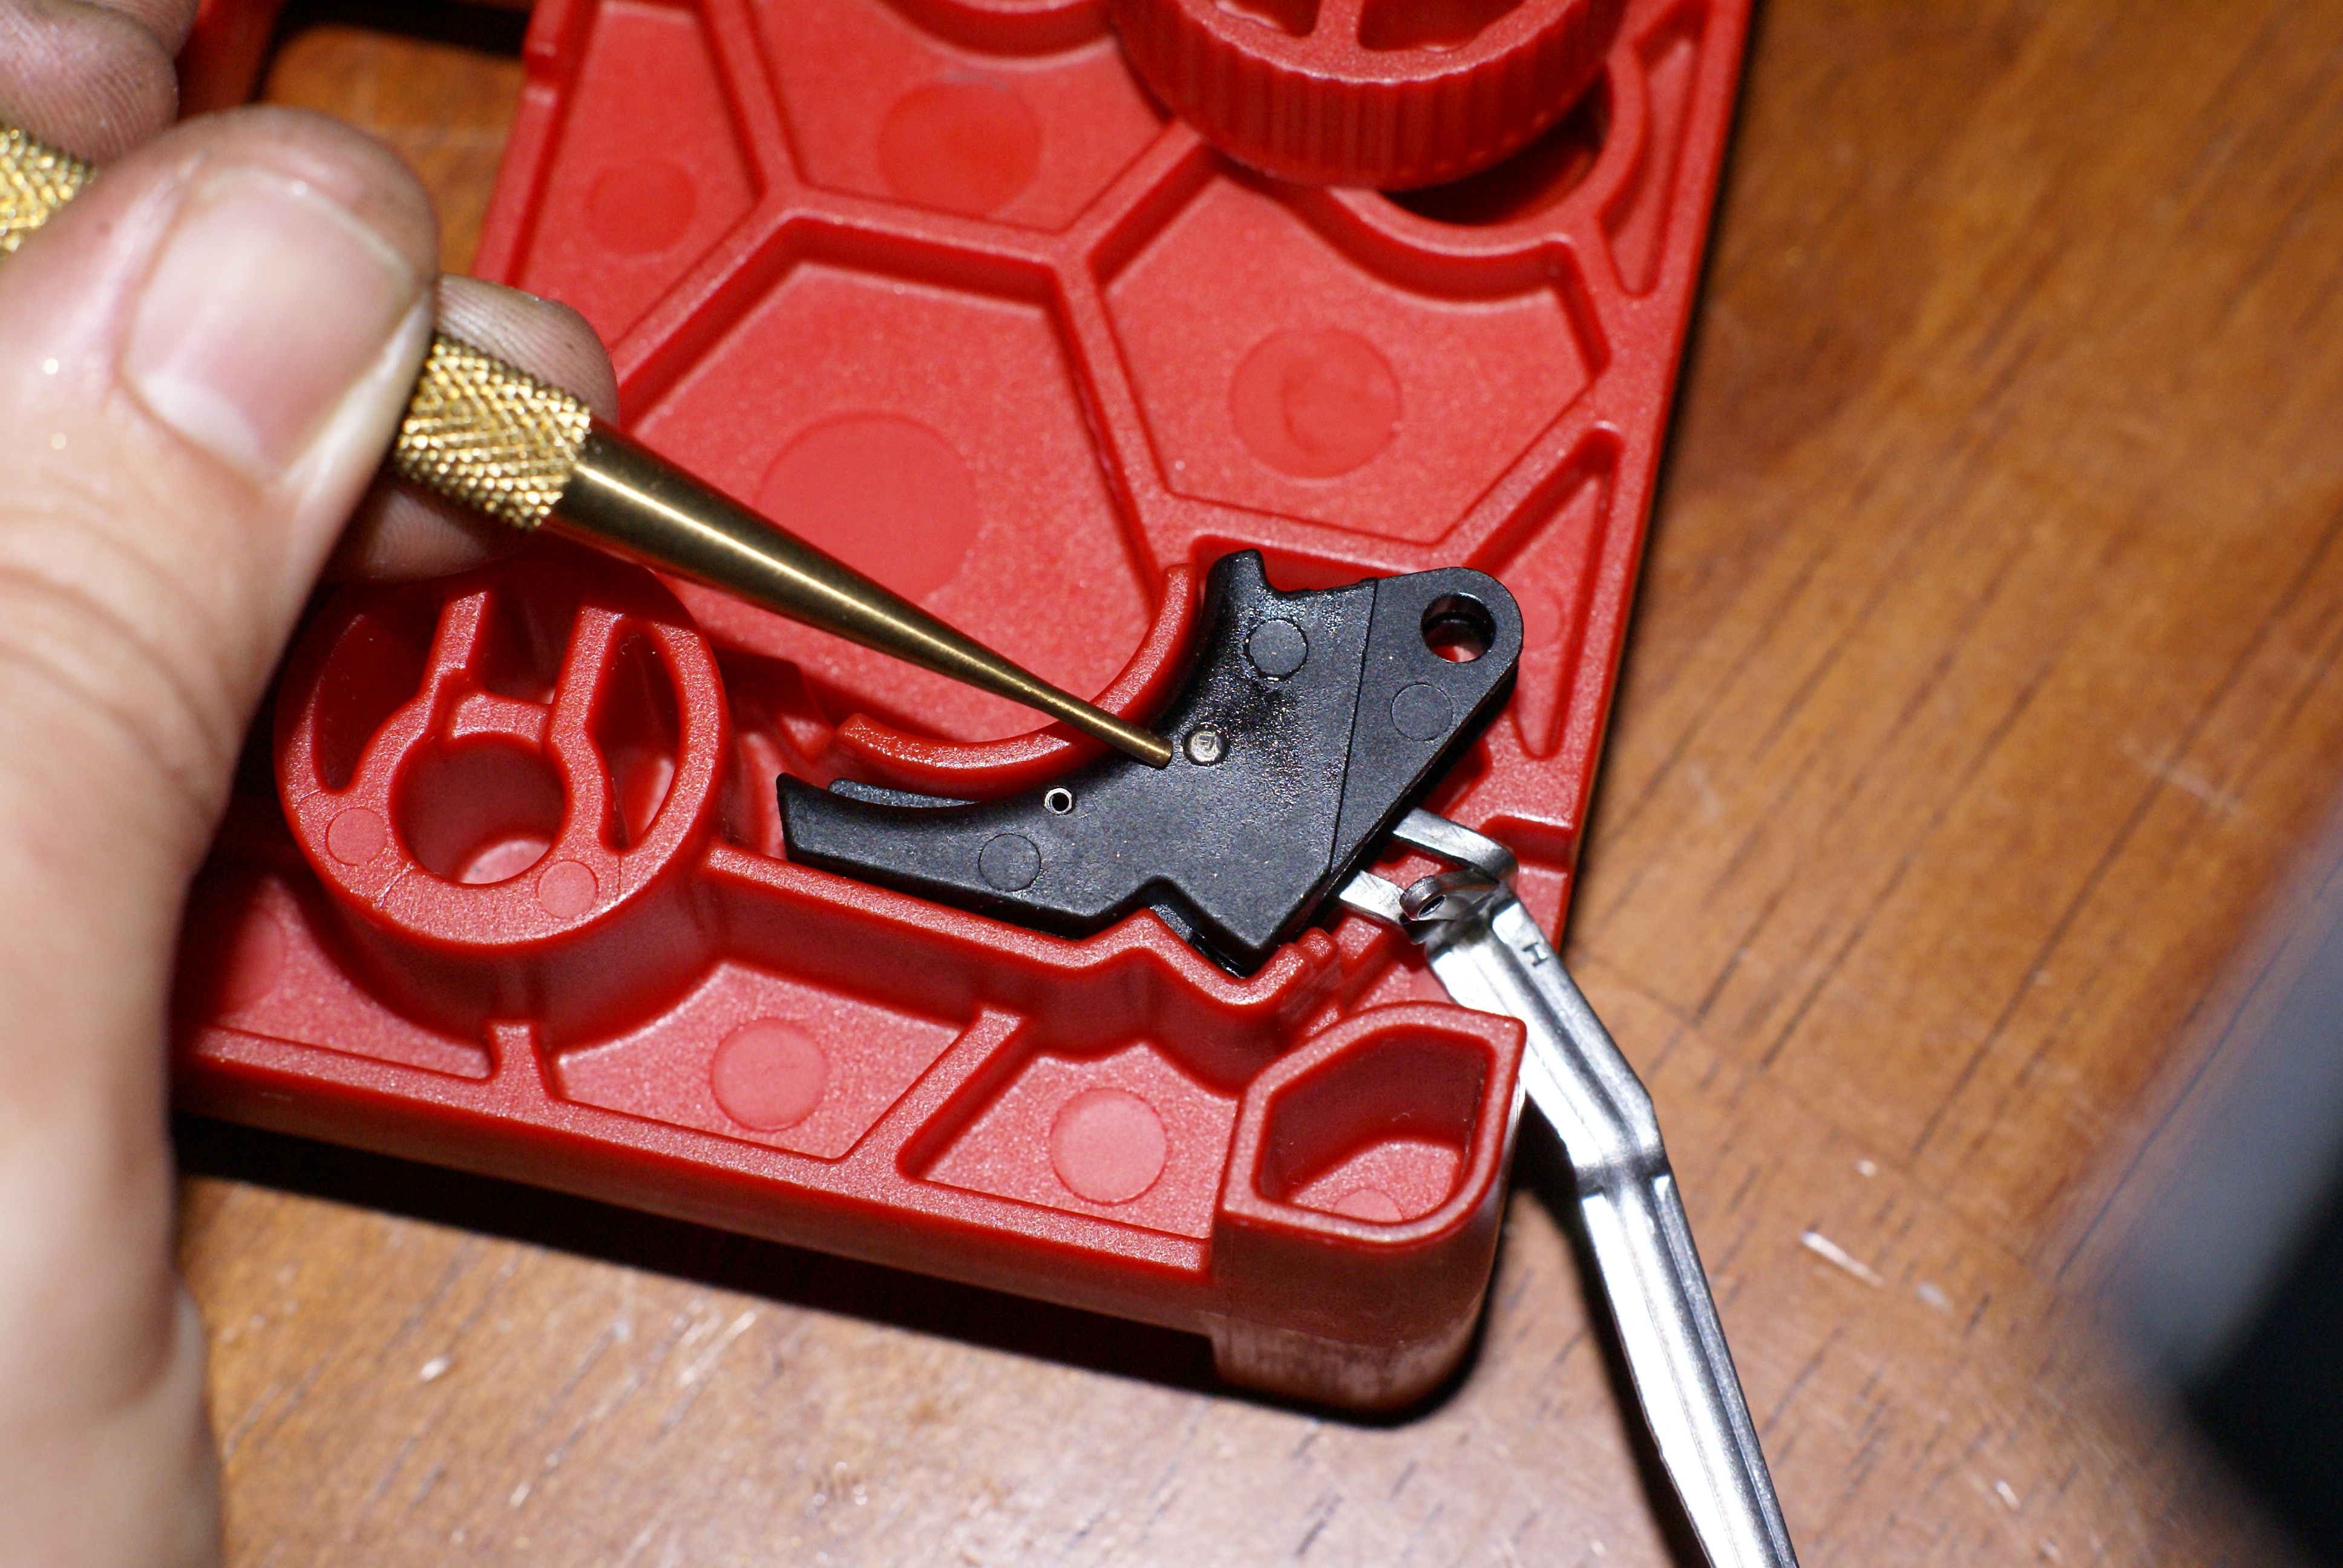
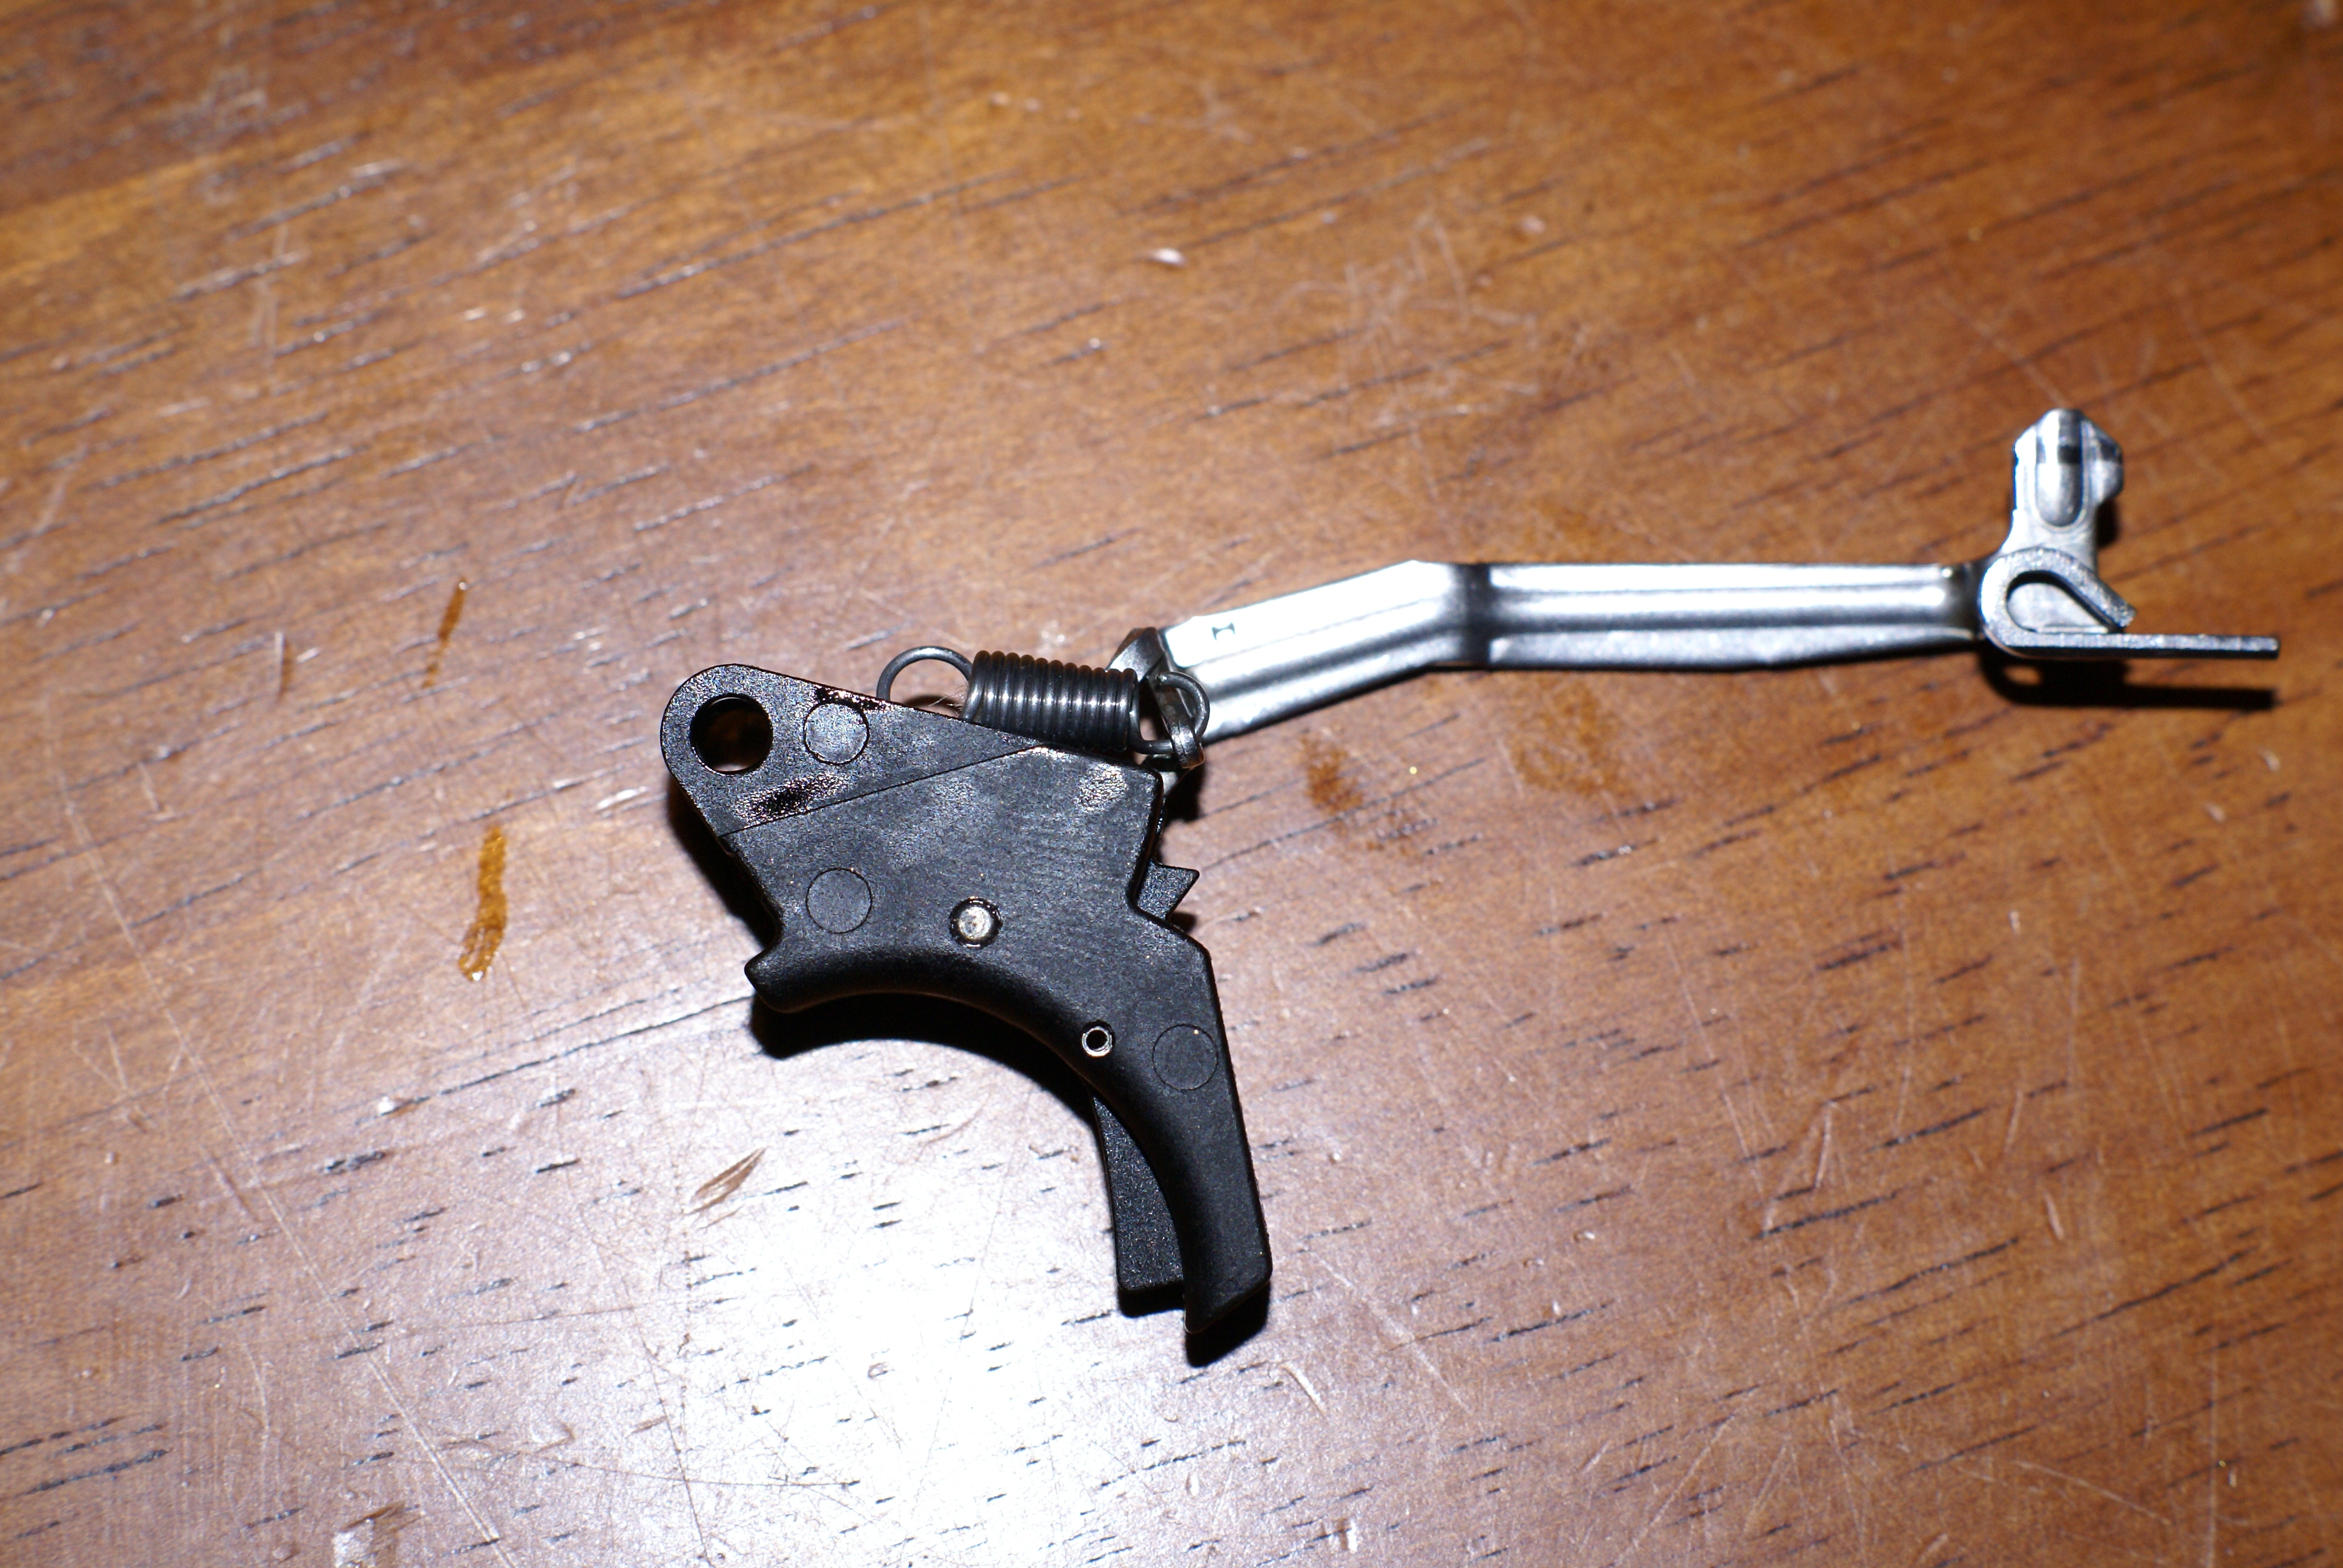
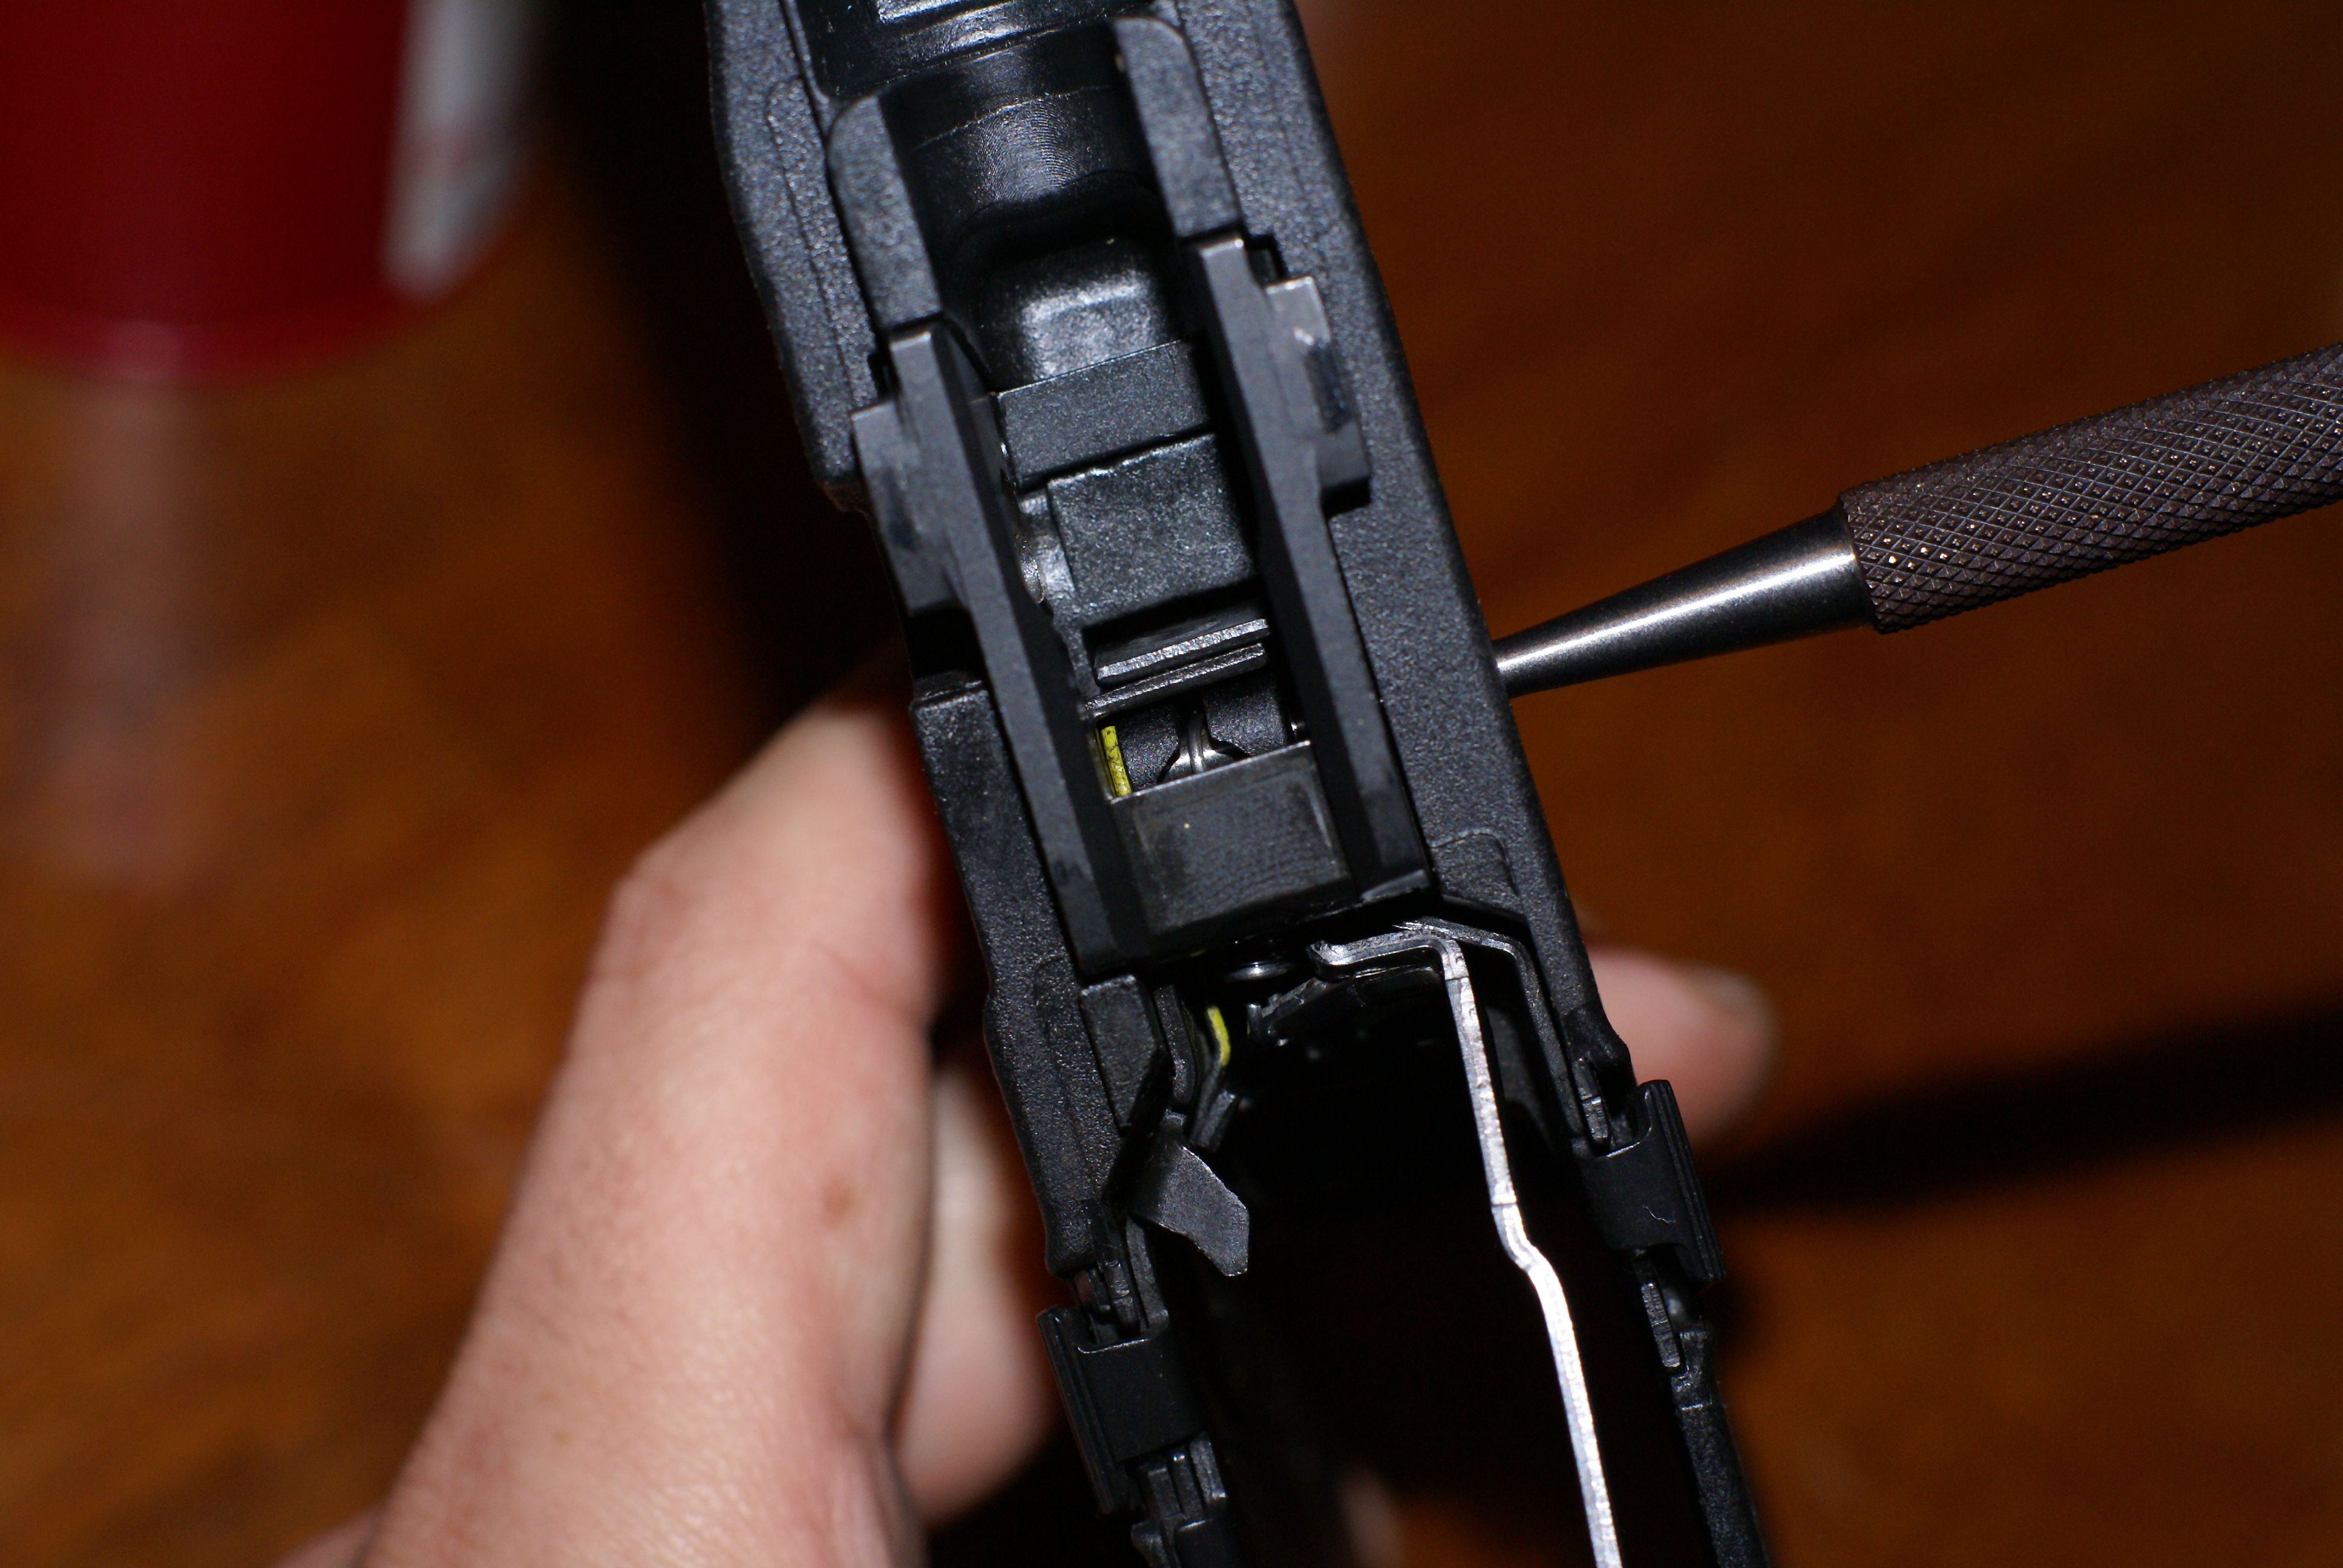
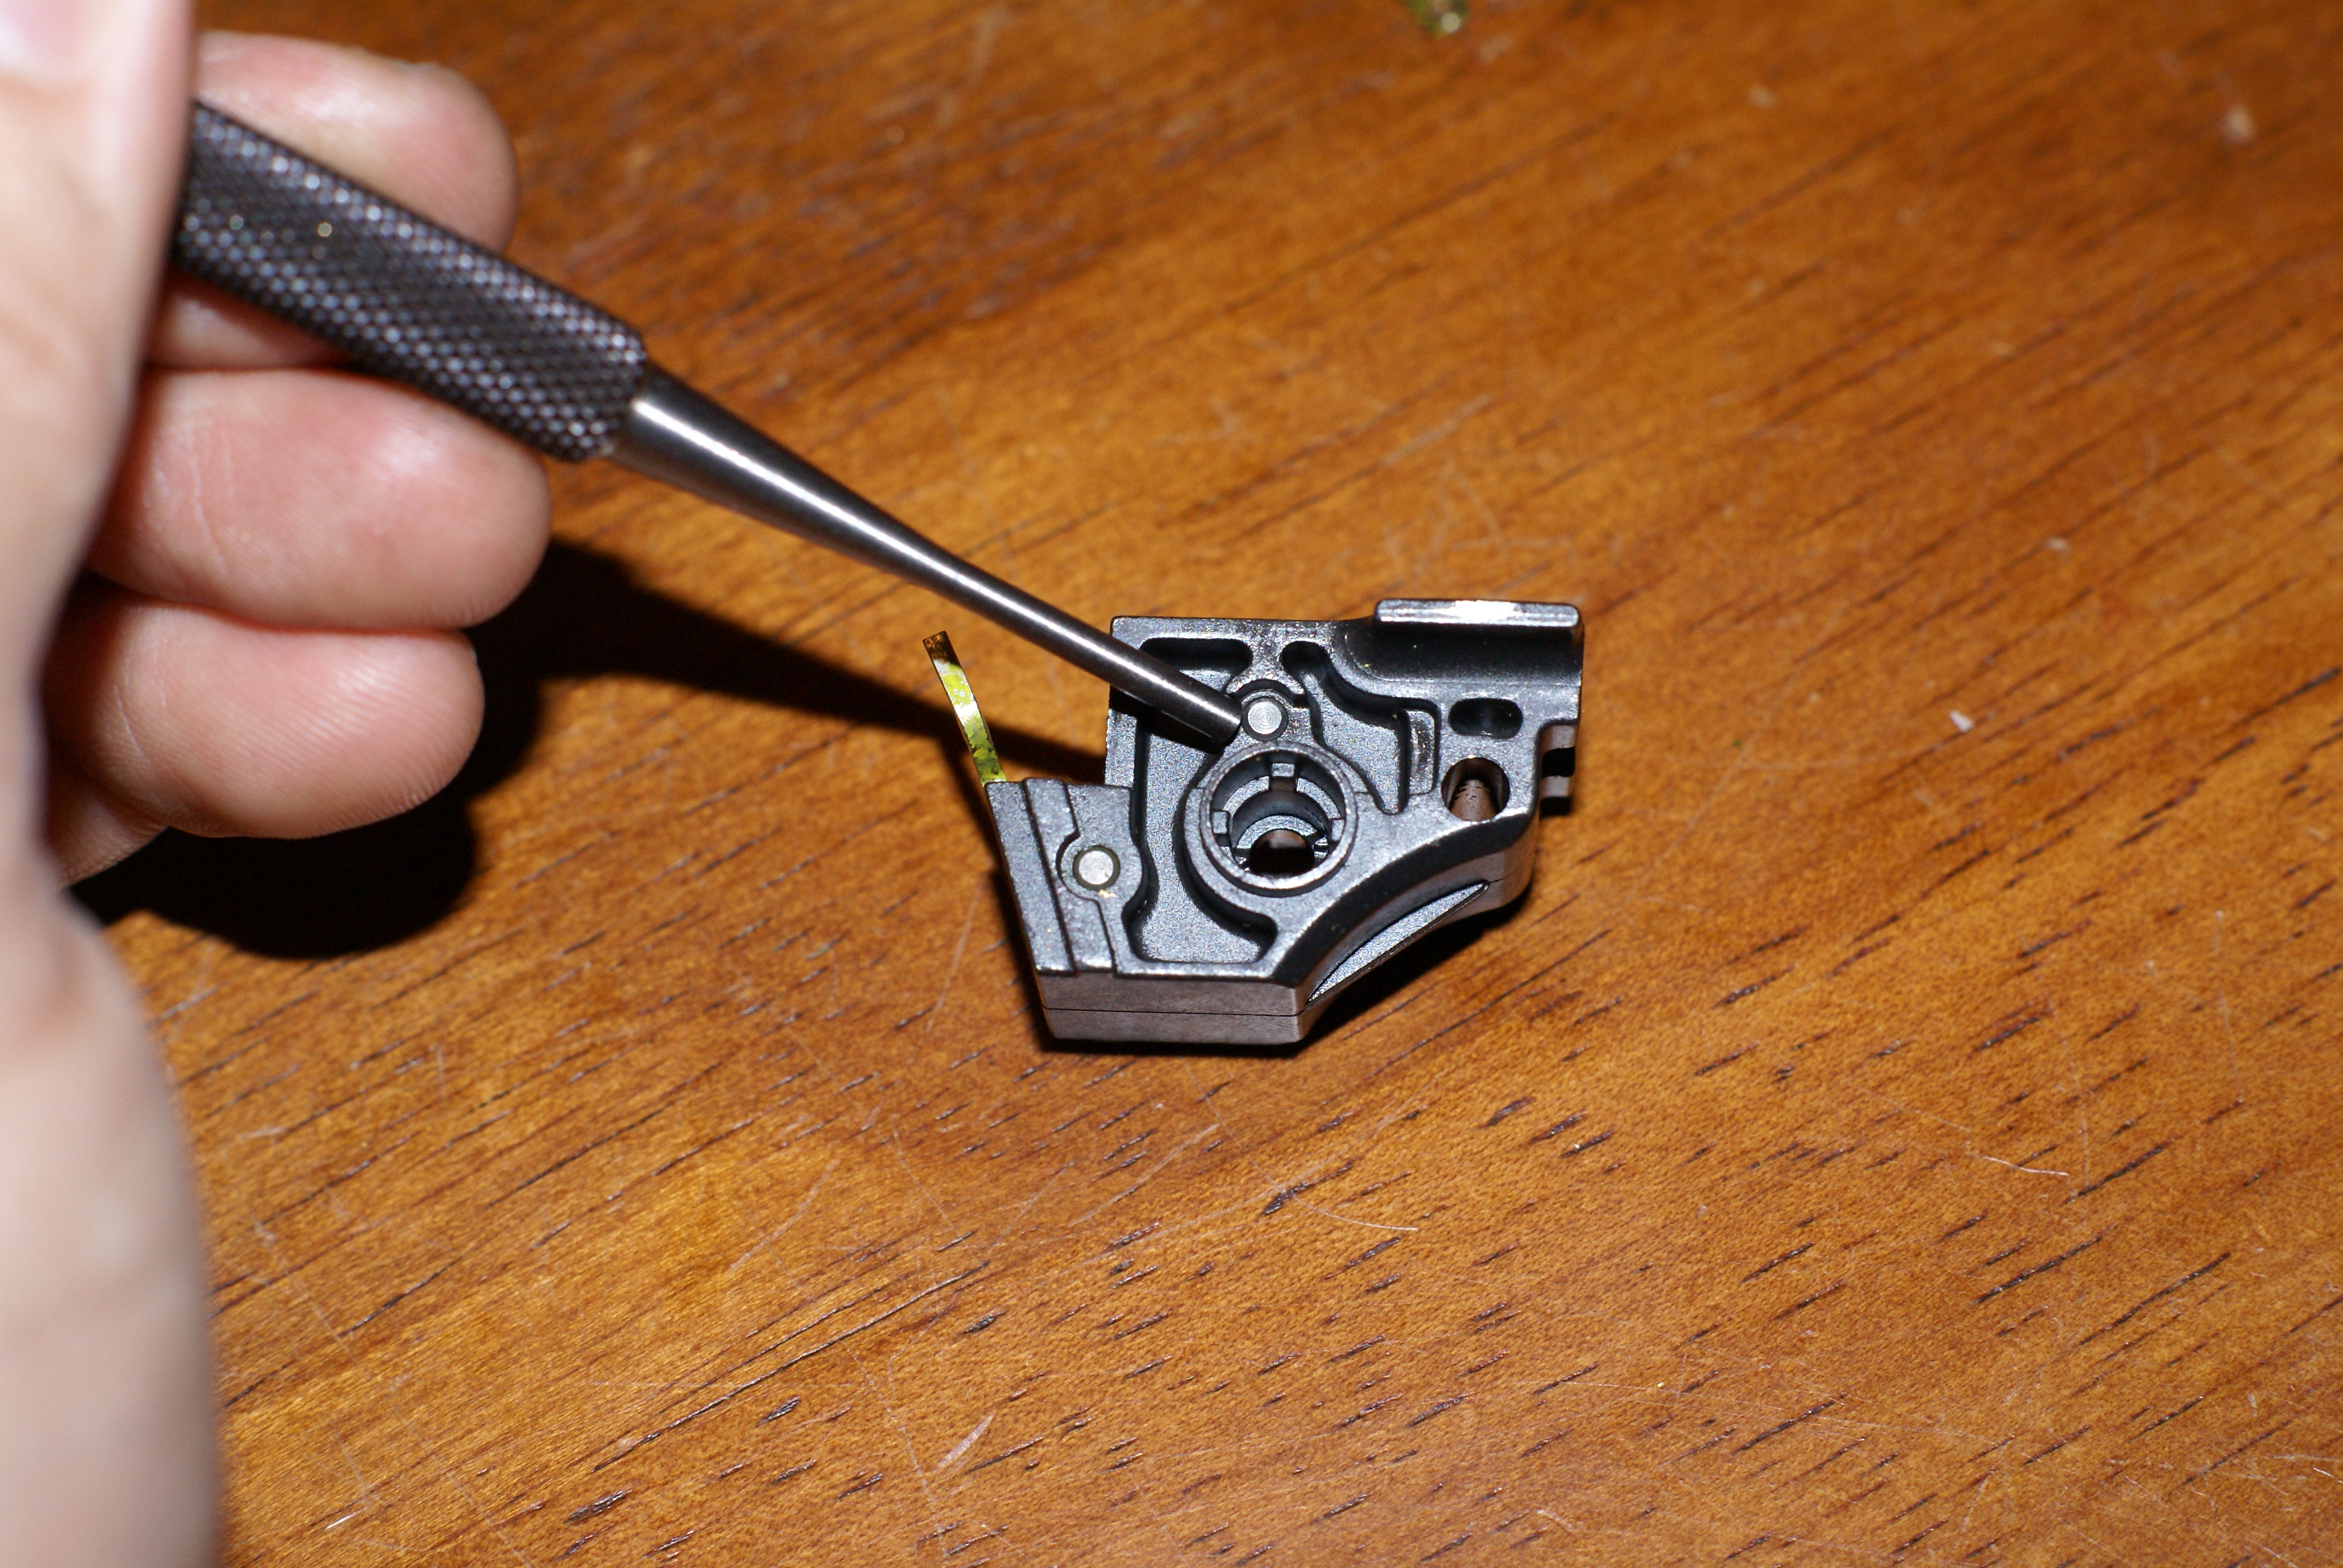
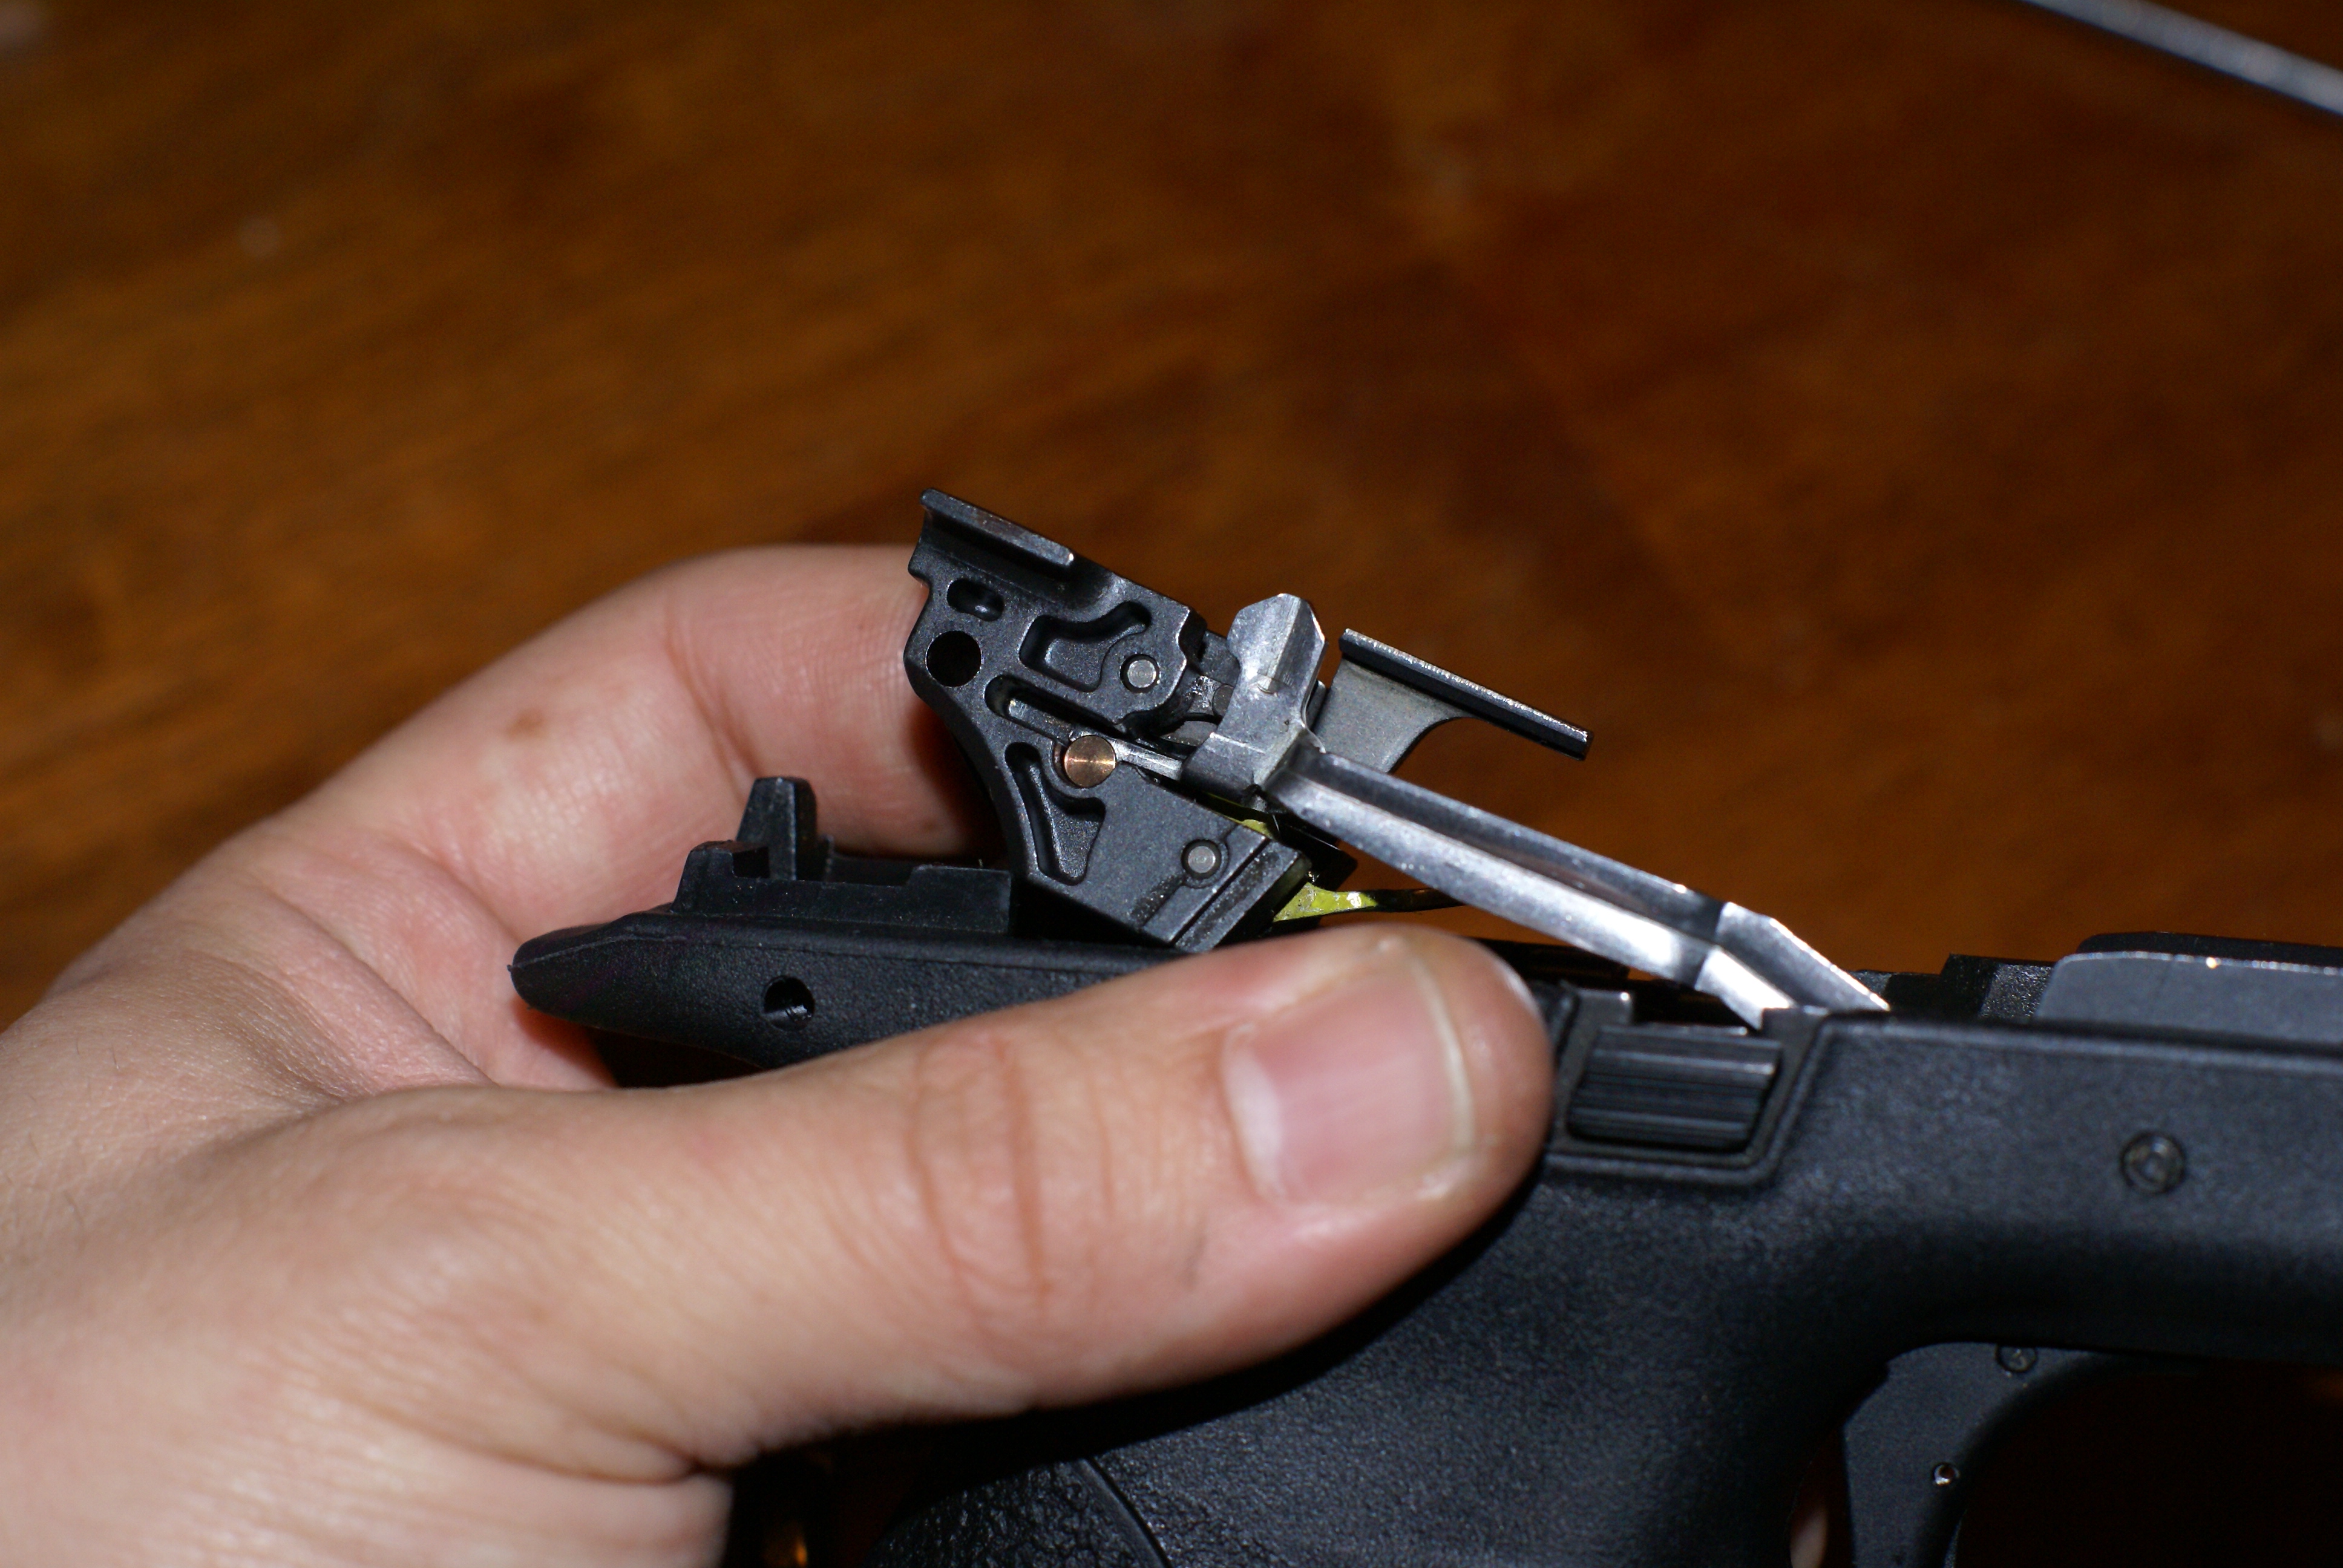
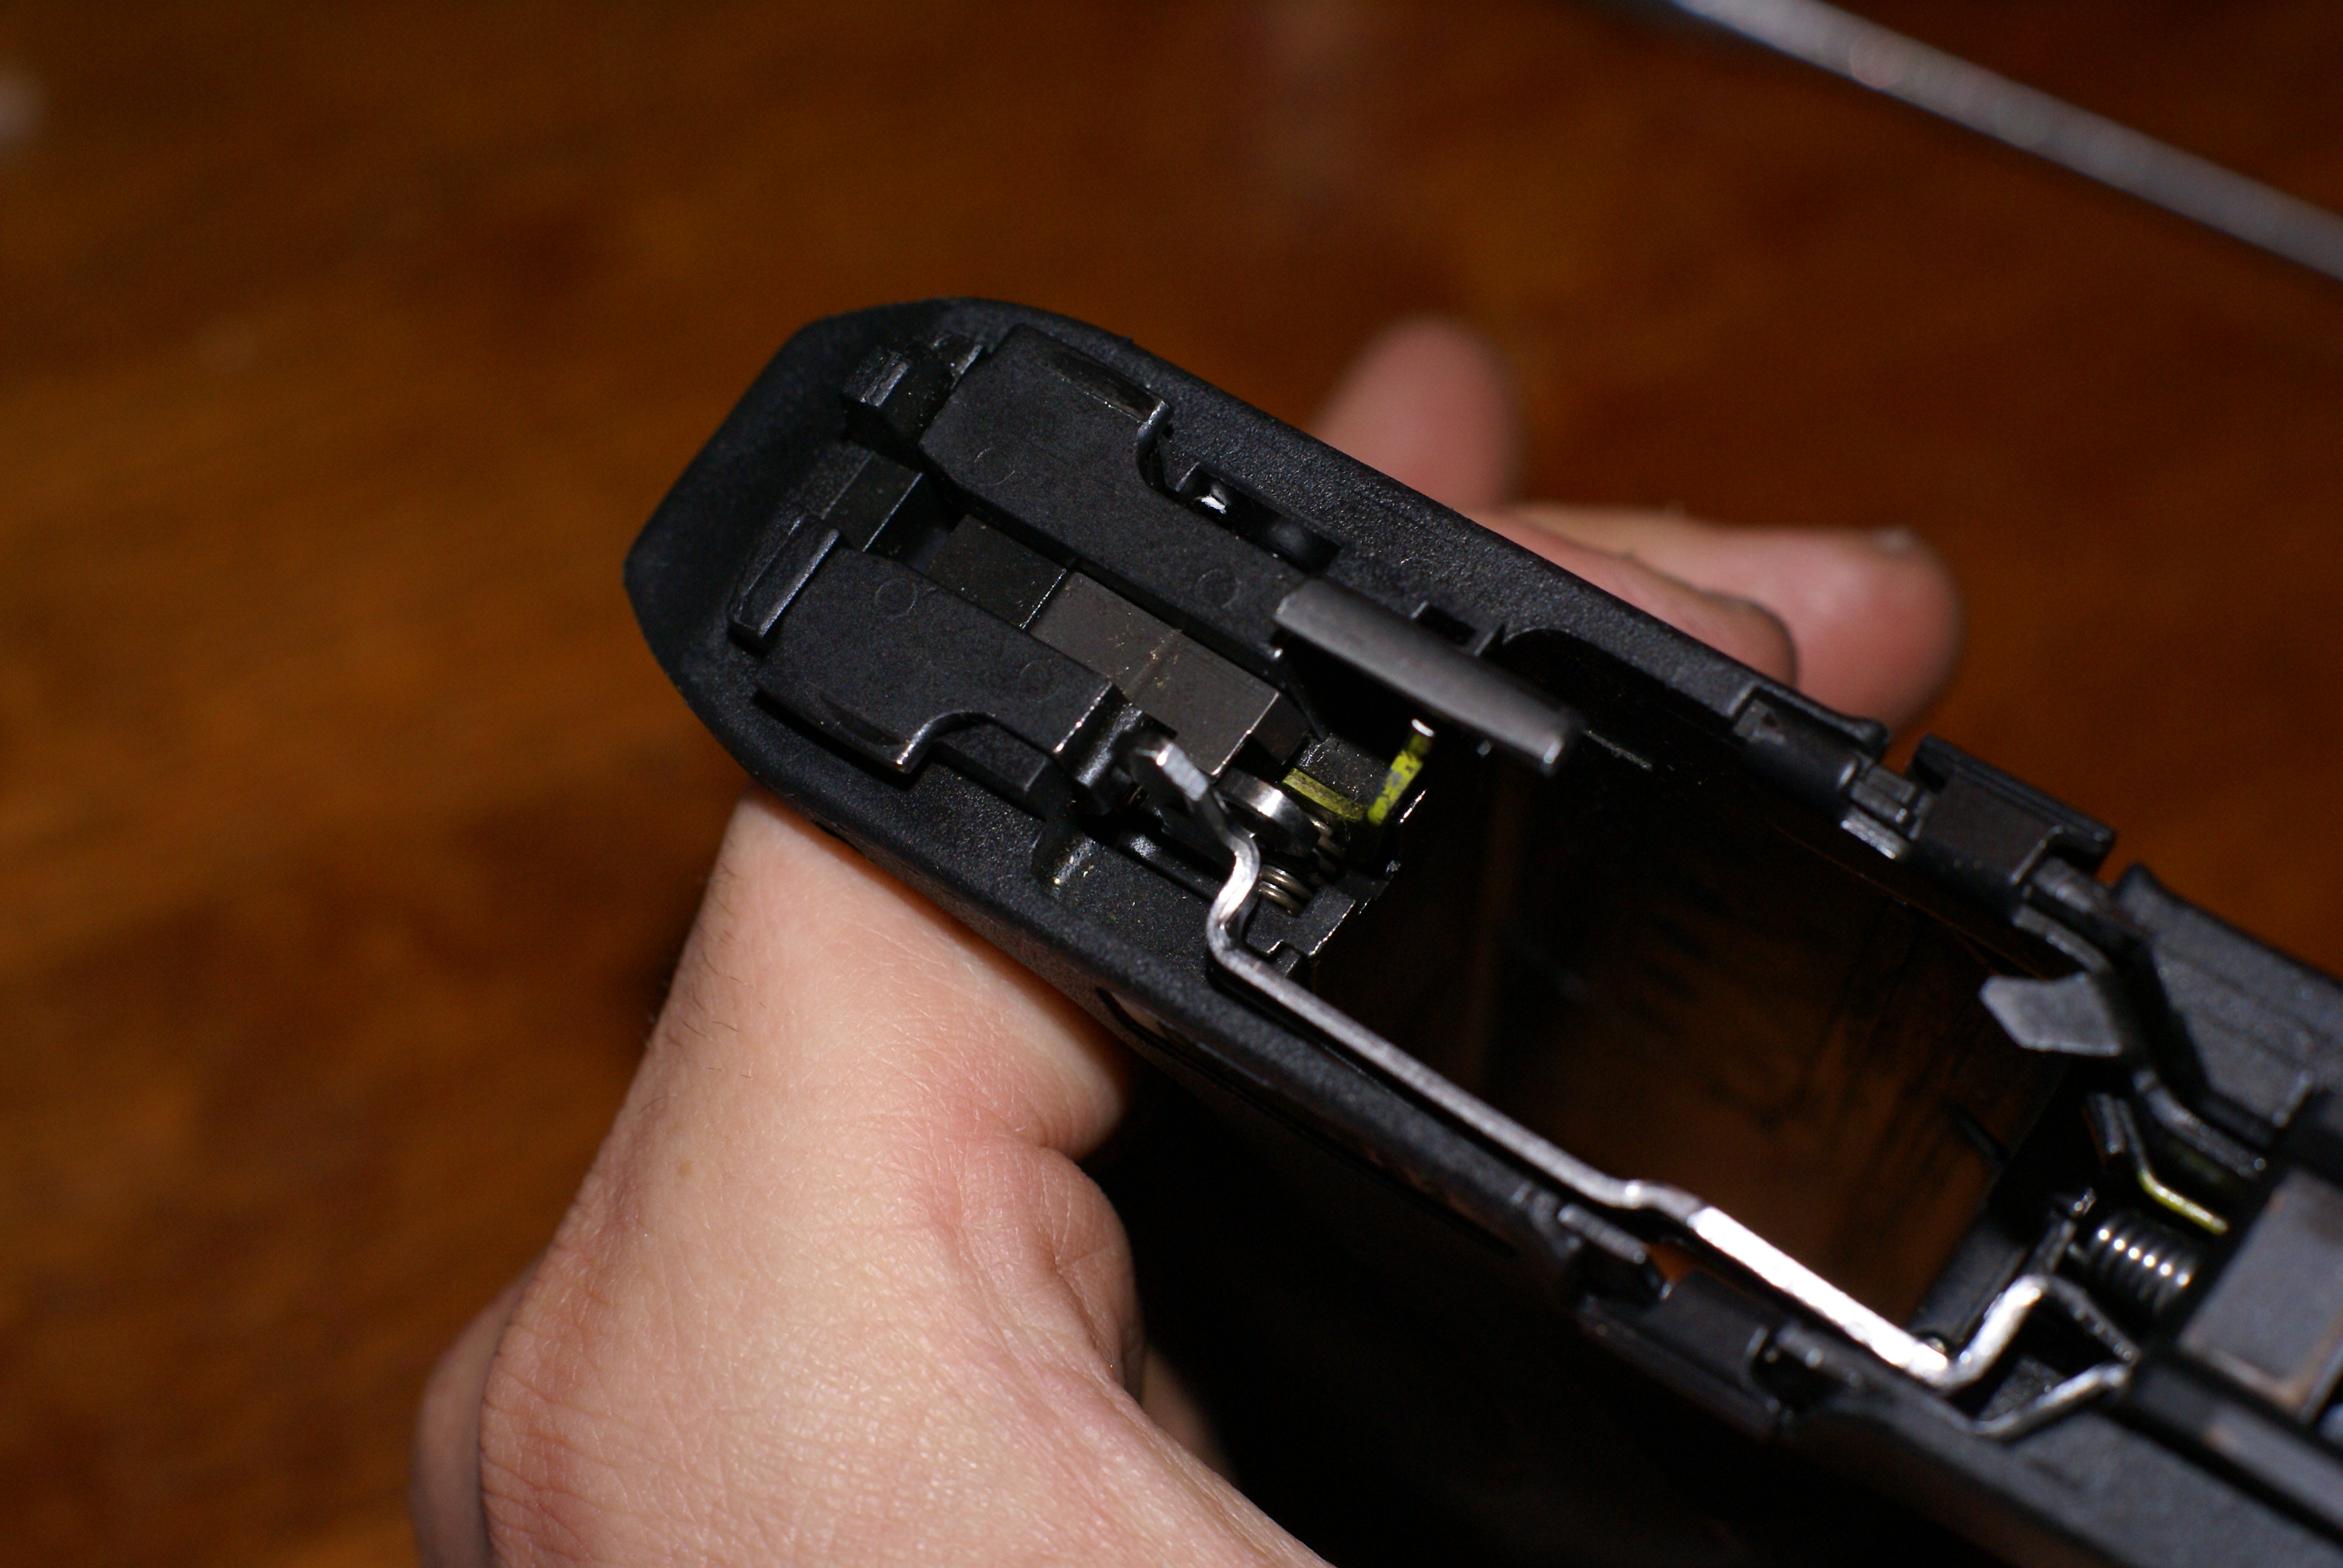
The forward set sear installation was an interesting process (in a good way). Apex Tactical Specialties has done a great job engineering this kit, and this is obvious when you compare the S&W sear to the new one. Here’s how the task was completed:

The final part of this kit’s installation is the replacement of the sear spring, and sear. Using a 1/16″ punch, I removed the sear pivot pin from left to right while keeping my thumb over the sear. The reason for this is that the sear is under spring tension, and my be ejected from the housing block and lost. I do have the Reset Assist Mechanism installed, and it was removed prior to this photograph.
Here is a comparison between the factory sear spring from Smith and Wesson (left), and the new one from Apex Tactical Specialties (right) that is located inside of the sear housing block. There is a noticeable difference between the two. In order for the Forward Set Sear to function correctly and be 100% reliable, the new spring places more tension on the new sear. This eliminates the possibility of sear flutter which may lead to a dead trigger or failure to reset. There is something else that is important to know. Older model M&P pistols will have a smaller spring that is approximately 1/16″ (vs 1/8″ in modern models), and the new spring will not fit due to the difference in diameters. To make the sear housing block compatible with the 1/8″ diameter, you can order a new one or contact Apex Tactical Specialties for replacement.
On the left, is the S&W sear. On the right, is the Forward Set Sear from Apex Tactical Specialties. Comparing the two, you can see the advanced timing of the sear.


After changing out the sear spring (reusing the plunger) and sear, the pin was replaced. The only extra step was to reinstall the Reset Assist Mechanism (seen in the photo as the bronze colored pin), and the kit does include a new spring for it.
The sear housing block was then reinstalled after lining up the connector bar.
At this point, the roll pin that holds the housing block in place was inserted half-way (a 1/8″ punch may be used as a substitute). It may need to be removed again to adjust the timing. The trigger was pulled a few times, checking for proper fit and function with special attention to the height the sear rises. The sidearm was fully reassembled and function checked including; take-up, trigger break, over travel, and reset. My M&P operated correctly, so no other modifications needed to be made and the roll pin was fully installed. However, if the striker did not release when the trigger was pulled, it is an easy fix. From what I understand, a slight adjustment may be required according to Apex Tactical. Since this information was provided up front in the product description on their website, I do not view this requirement as a con or negative attribute of the product.


If the striker does not release when the trigger is pulled, The loop on the connector bar needs to be adjusted. This adjustment will tilt the sear more, allowing the striker to release.
To accomplish the needed adjustment, the sear housing block will need to be removed. Once that is done, the gap in the connector bar loop is measured with a set of feeler gauges. Once you have your starting measurement (mine came in at .010″), use a small flat head screw driver to lift the loop up (increasing the gap size). I recommend adjusting in small increments from 0.002″ to 0.005″. The function should be checked by reinstalling the sear housing block after each adjustment. Once the striker releases properly, it’s good-to-go.
The trigger pull weight came in at 4 lb., 4 oz. using the 4 lb. trigger return spring.


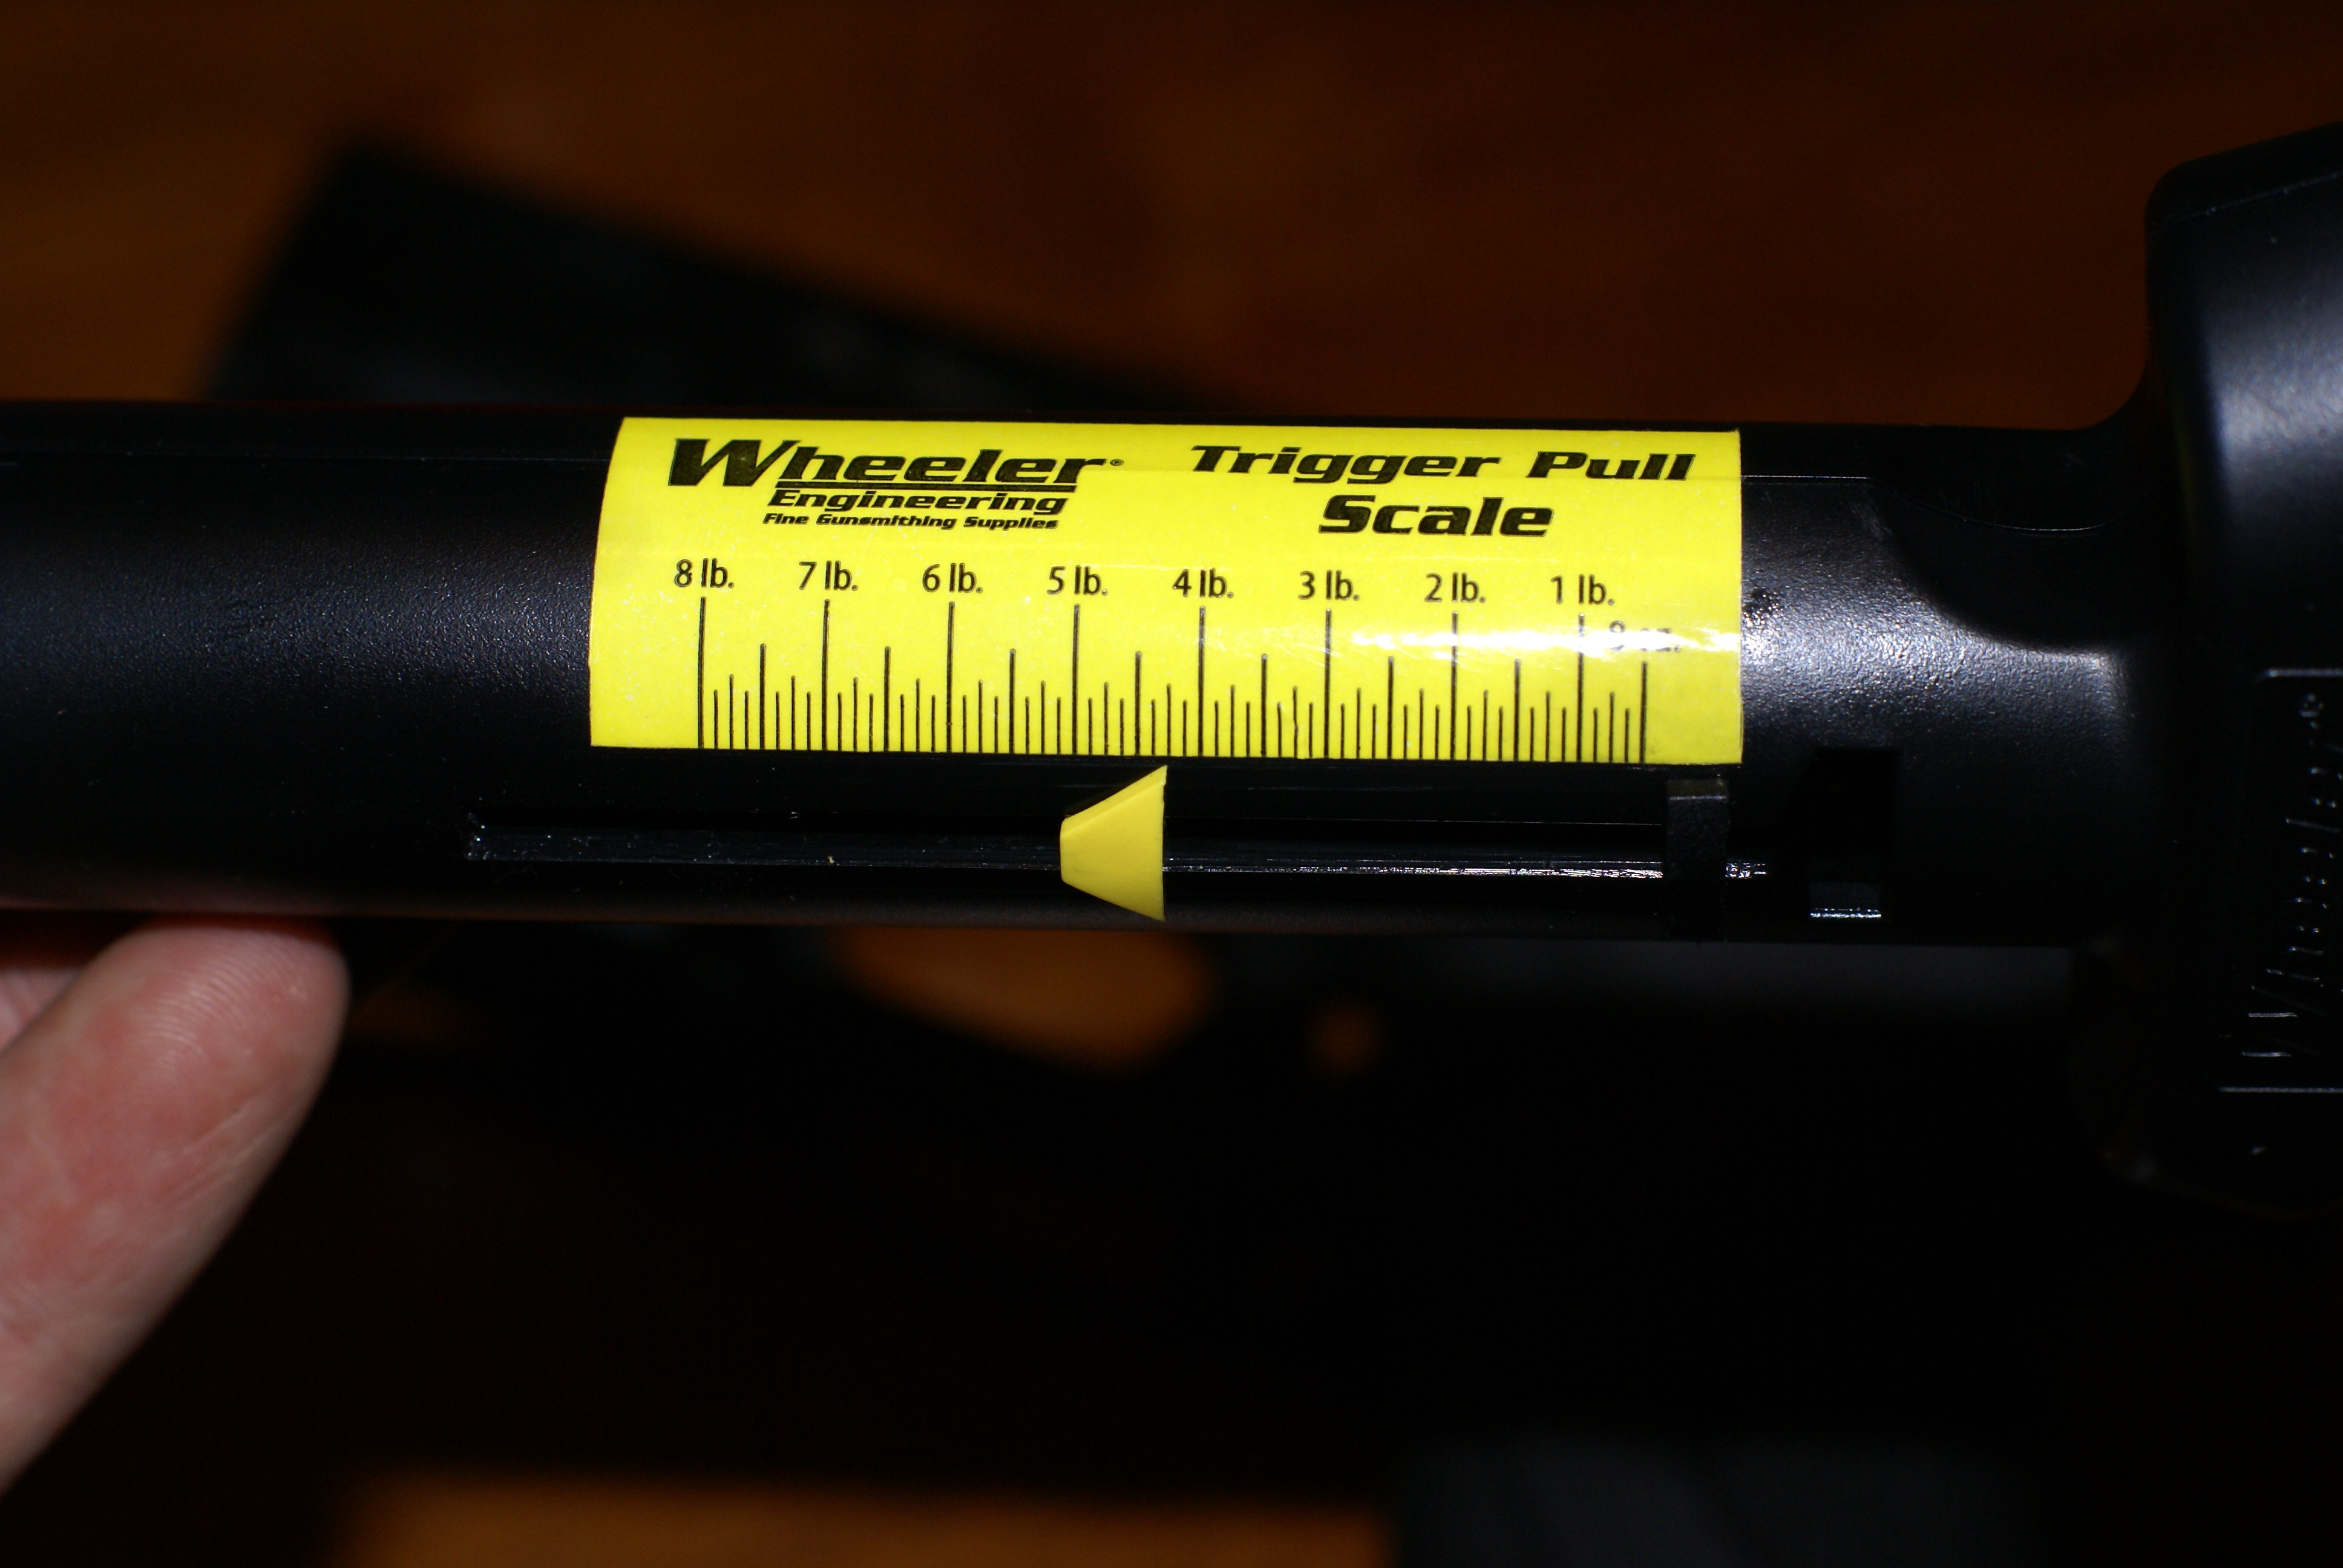
Now that the Forward Set Sear and Trigger Kit has been installed, how does it shoot? How does it feel? Does it make a difference and most importantly, does it work? I will say this……

“Un-freakin’ believable and wicked pissah!”

For those of you who don’t know, I’m in the North East just south of M.A. The phrases I just used are complimentary and with good reason. Apex Tactical Specialties has created a top-shelf product that not only performs, but well exceeded my expectations. Yes, I was expecting a better trigger break with reduced take-up and over travel. No, I wasn’t expecting it to feel similar to a 1911. It did. Not only that,  but the increase in accuracy was amazing as well.

Here are the comparison targets that were shot benched/stabilized at 25 yards, with five rounds each. The target on the left was shot prior to the Forward Set Sear and Trigger installation, and the one on the right is after the installation and about 500 rounds cycled (flawlessly).
Before the FSS&T Kit was installed, the benched group of five rounds at 25 yards measured about 6″ X 6″.
After the installation, the group shrunk down to about 2.5″ X 2.5″. It would have been better, but I am including the flyer. Outstanding improvement in accuracy!


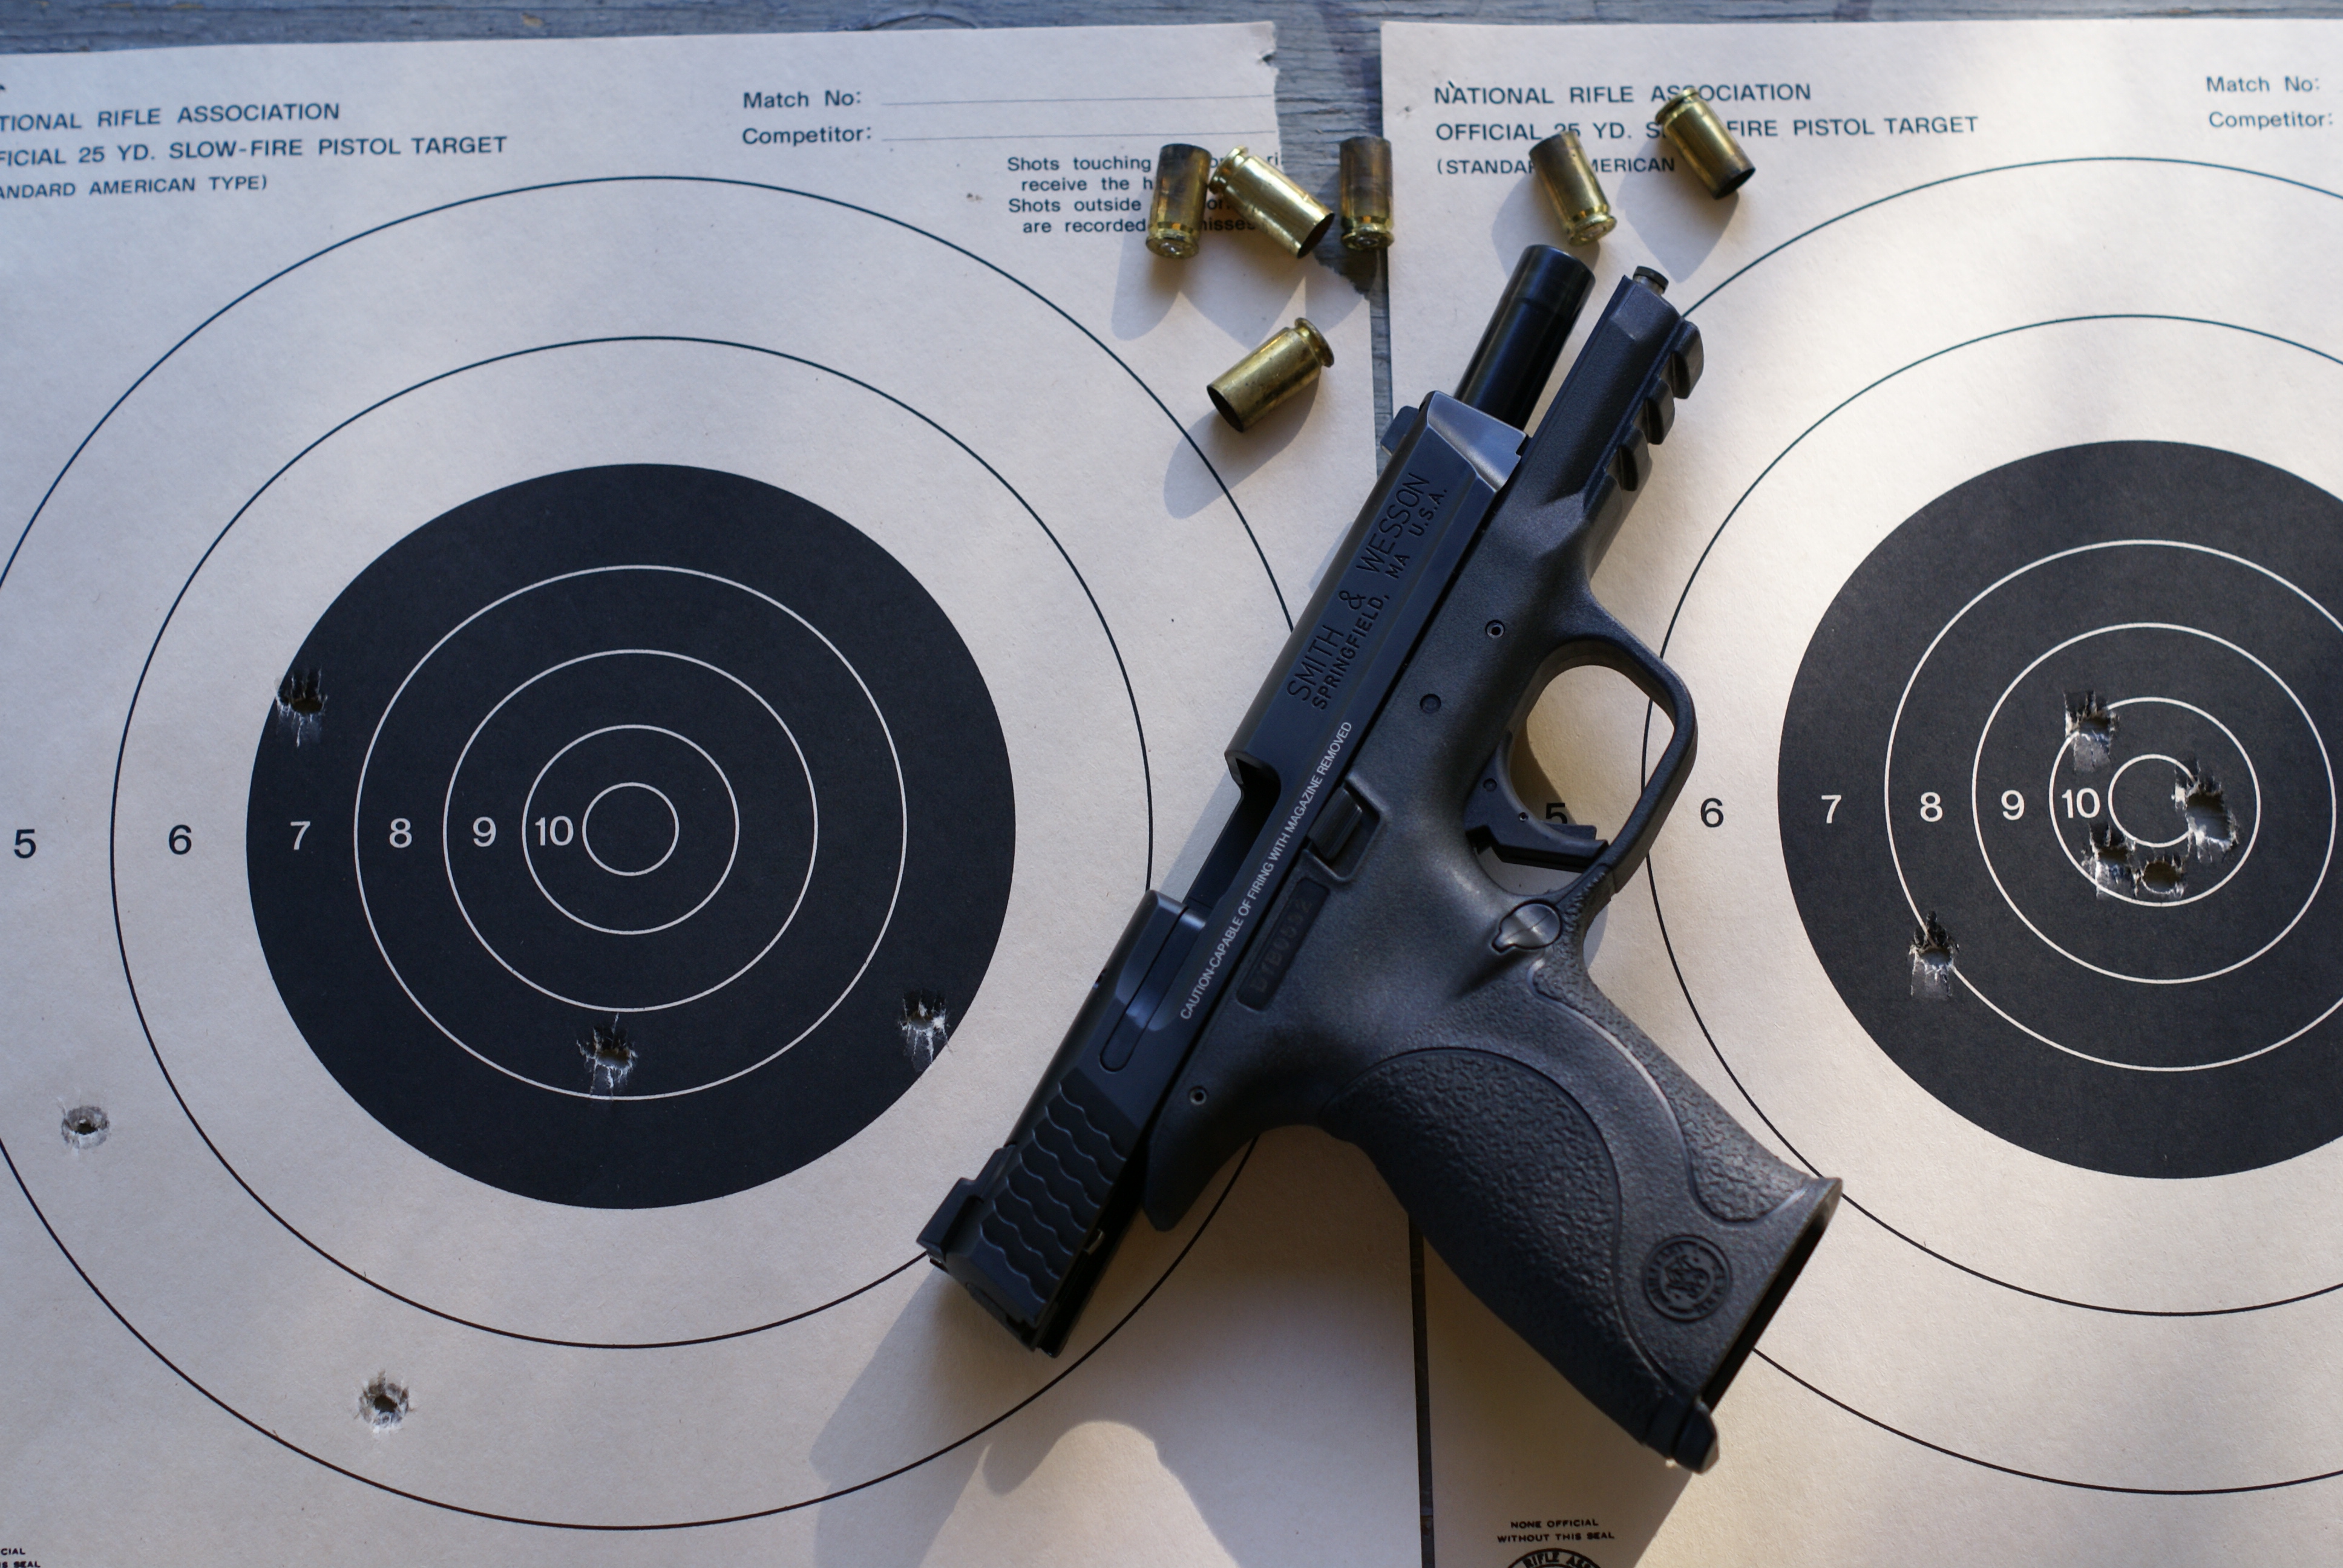
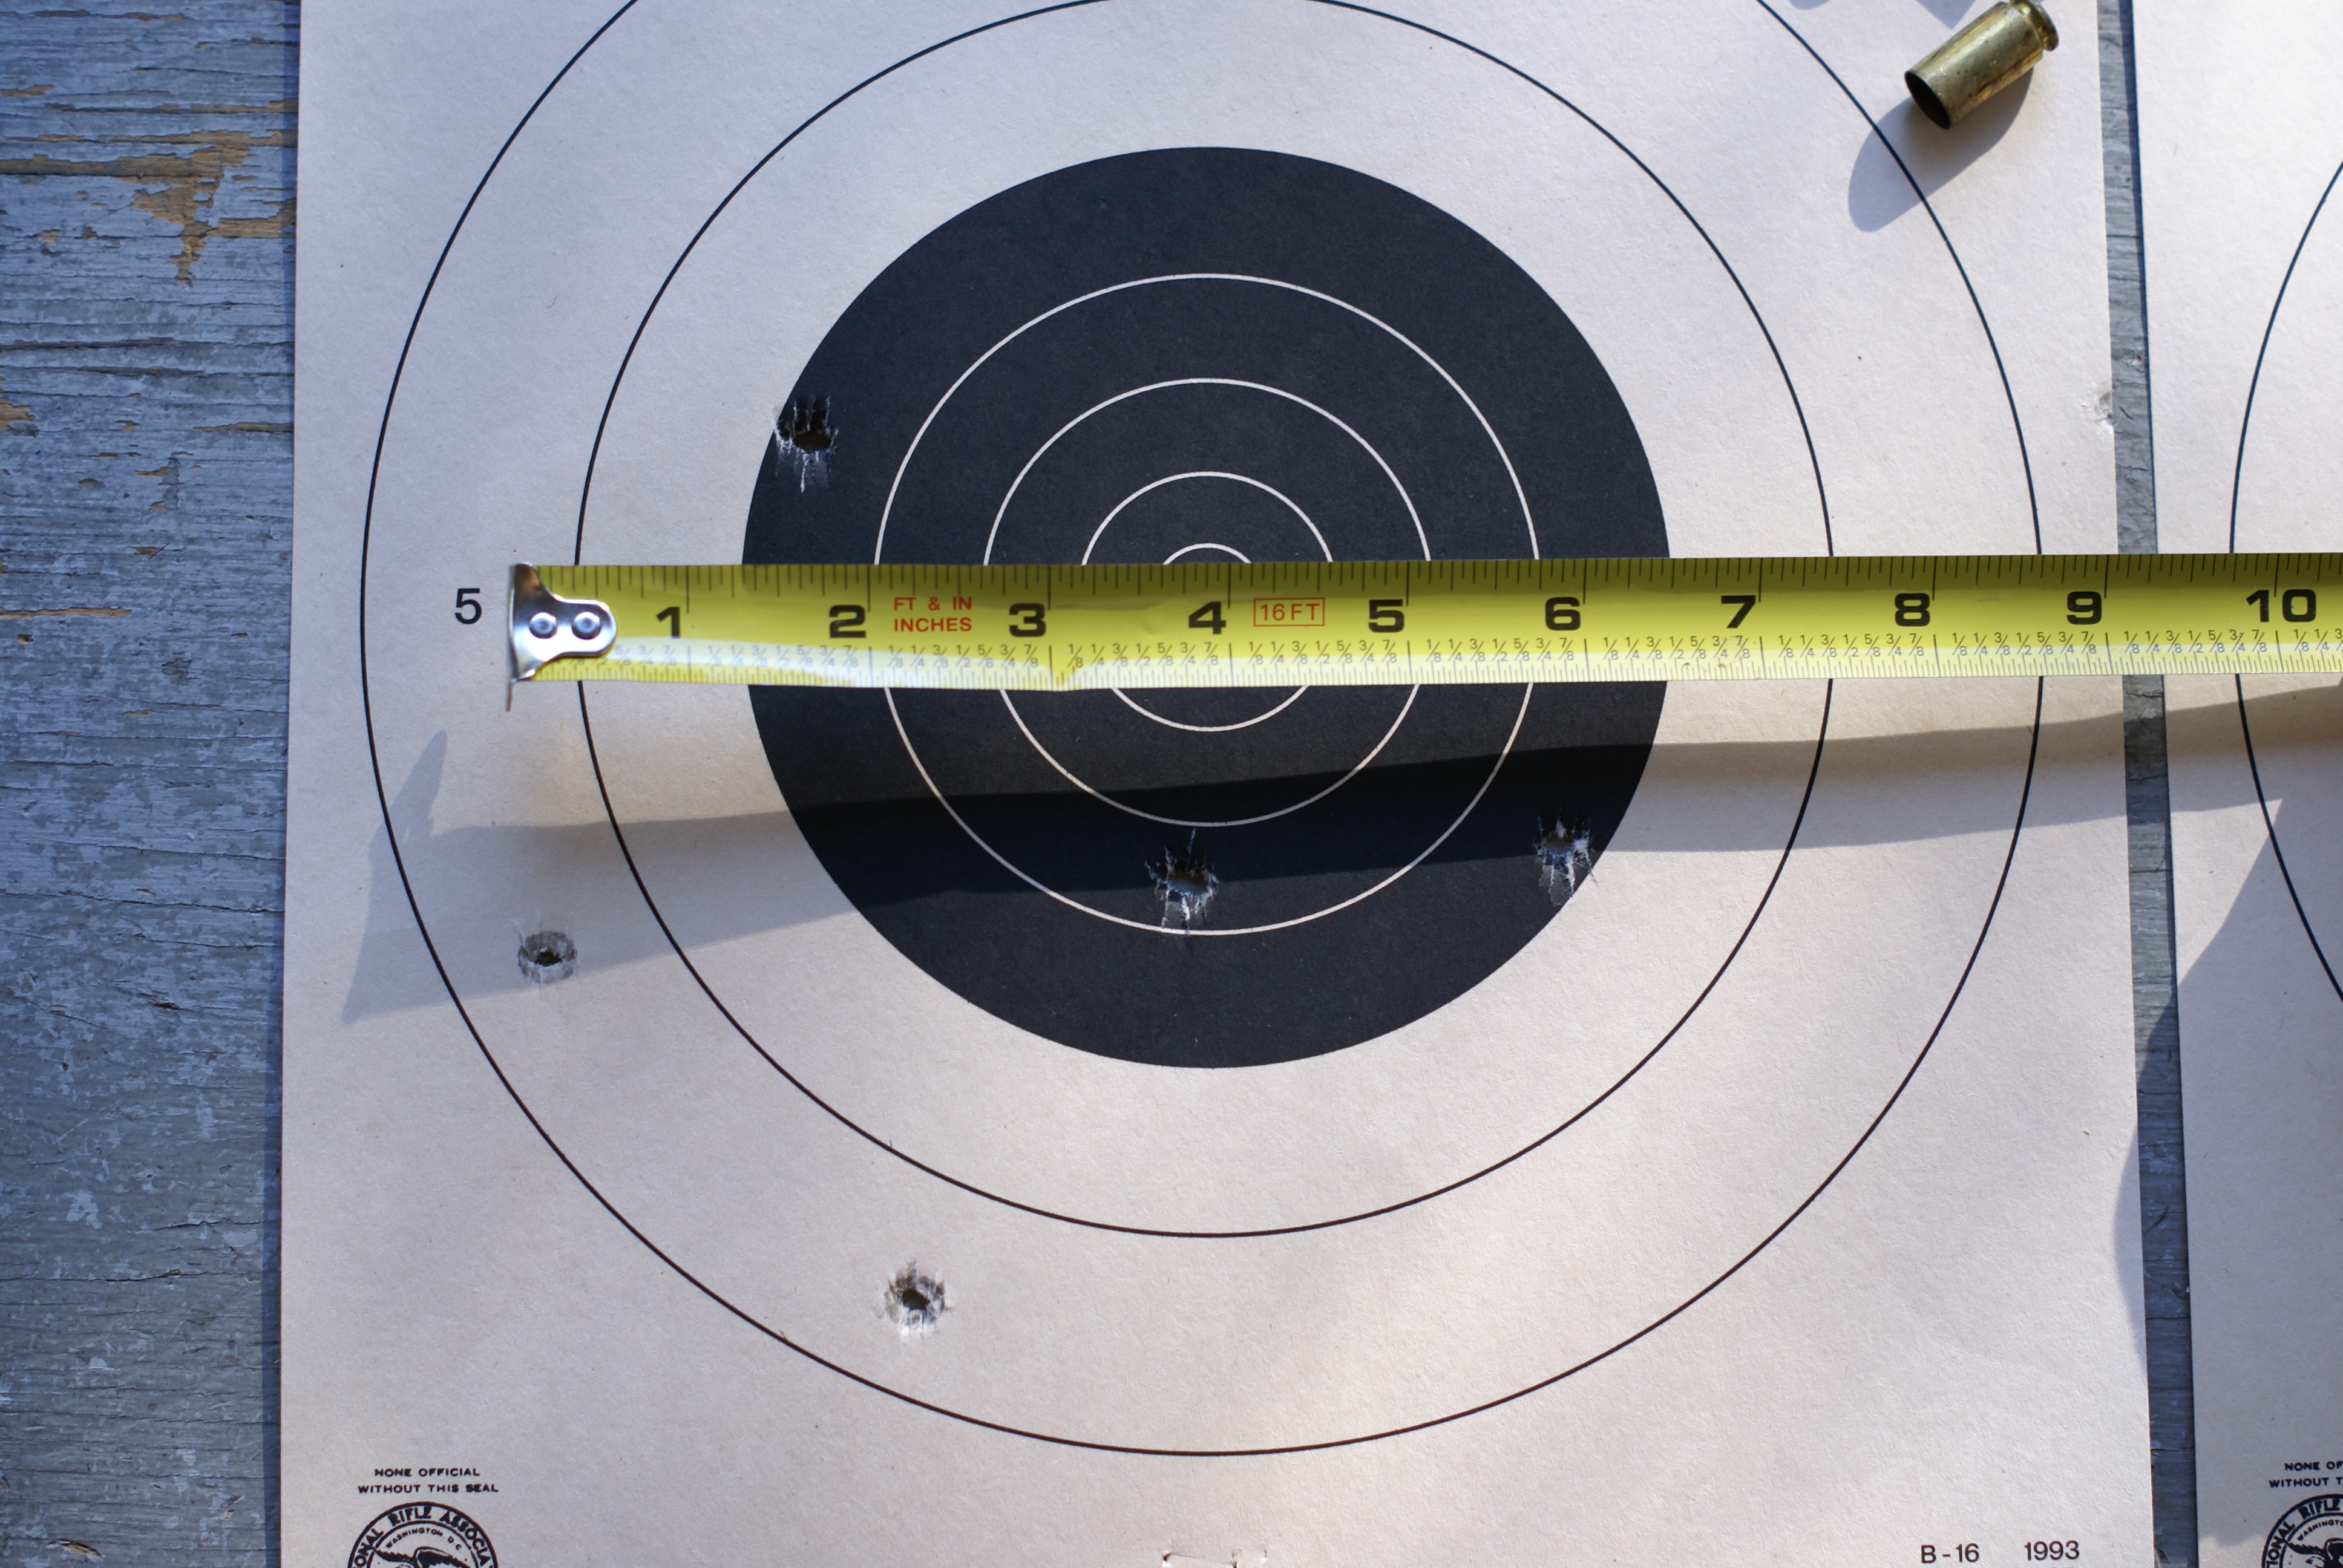
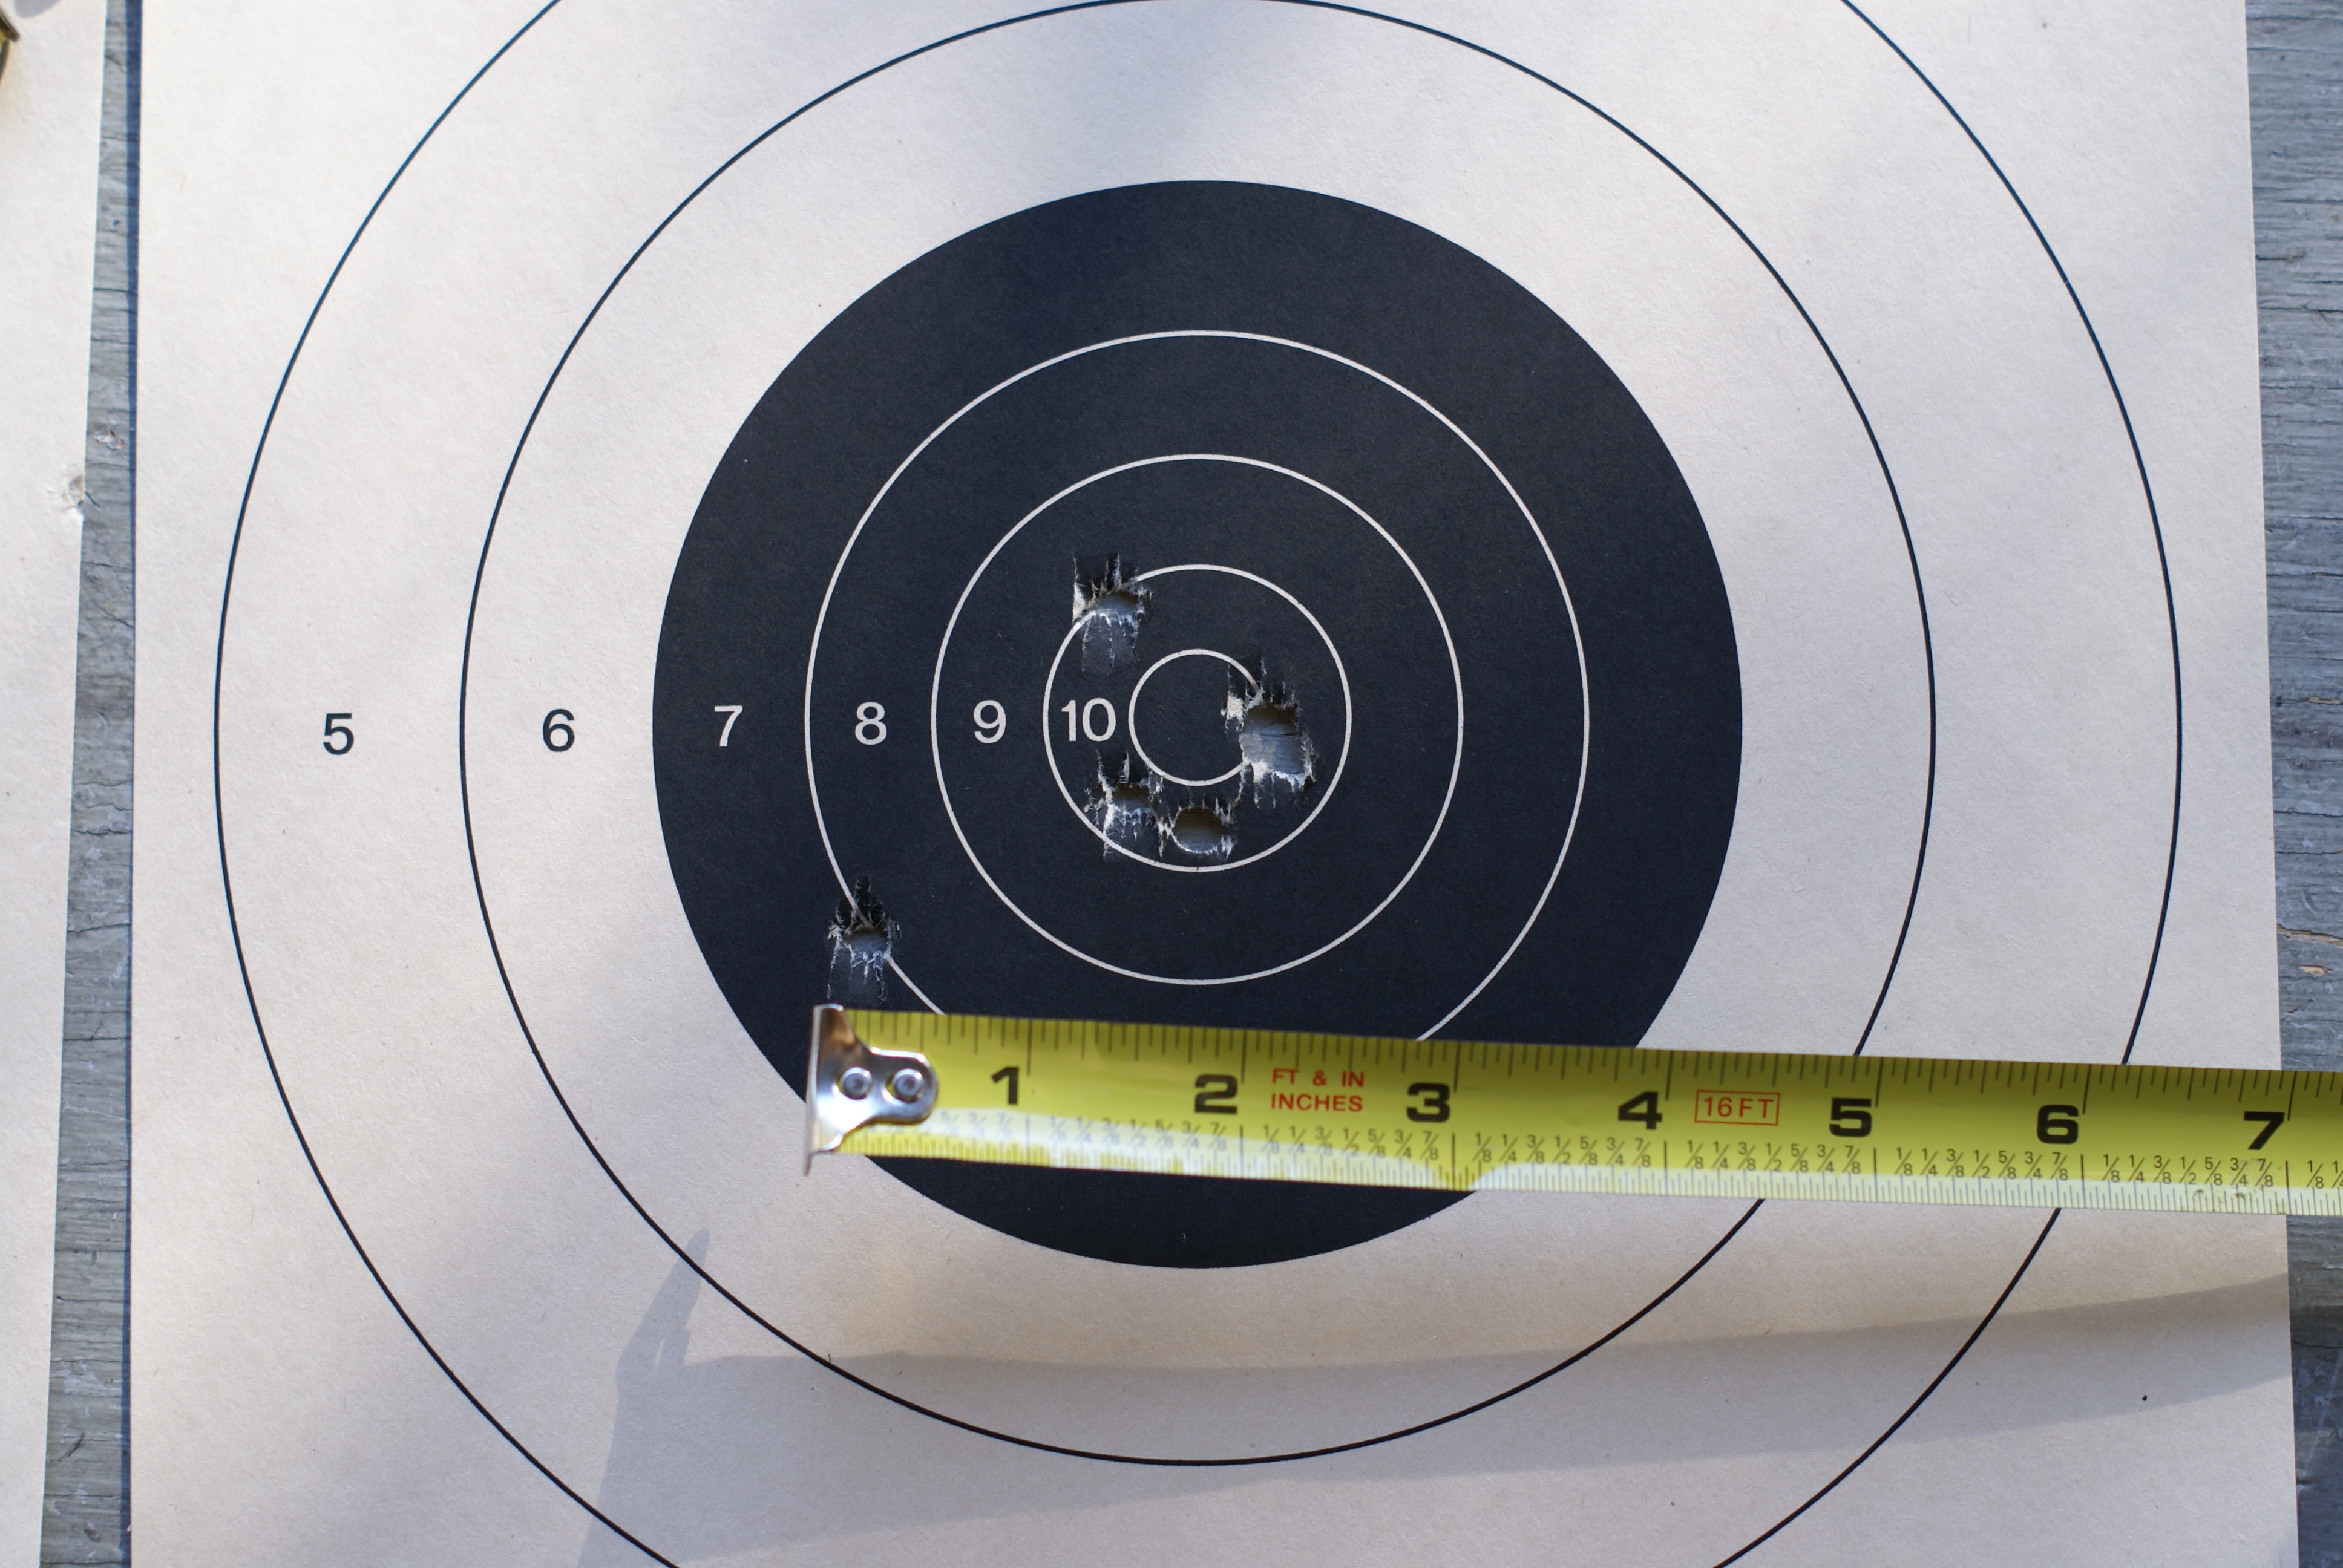
While this was a slightly advanced installation, the results  (in my opinion) make the tested Polymer Forward Set Sear and Trigger kit is not only worth the purchase price, but the time it takes to put it in (about a half an hour). Once again, Apex Tactical Specialties has taken me by surprise with another reliable product that functions as advertised. Their online catalog contains a plethora of products for M&P pistols and other make/models as well. With more products in the works, I’m looking forward to continuing to do business with them, as they provide some of the best products I’ve used, and had the honor to test. My recommendation is; if you own a Smith and Wesson M&P pistol, this is your one-stop-shop. You won’t find better components anywhere else. Another great thing about this company is the customer service and installation support they provide. A perfect example of this is a walk through video for this kit with pistolsmith Randy Lee.

Thanks for reading,

-Rhody