
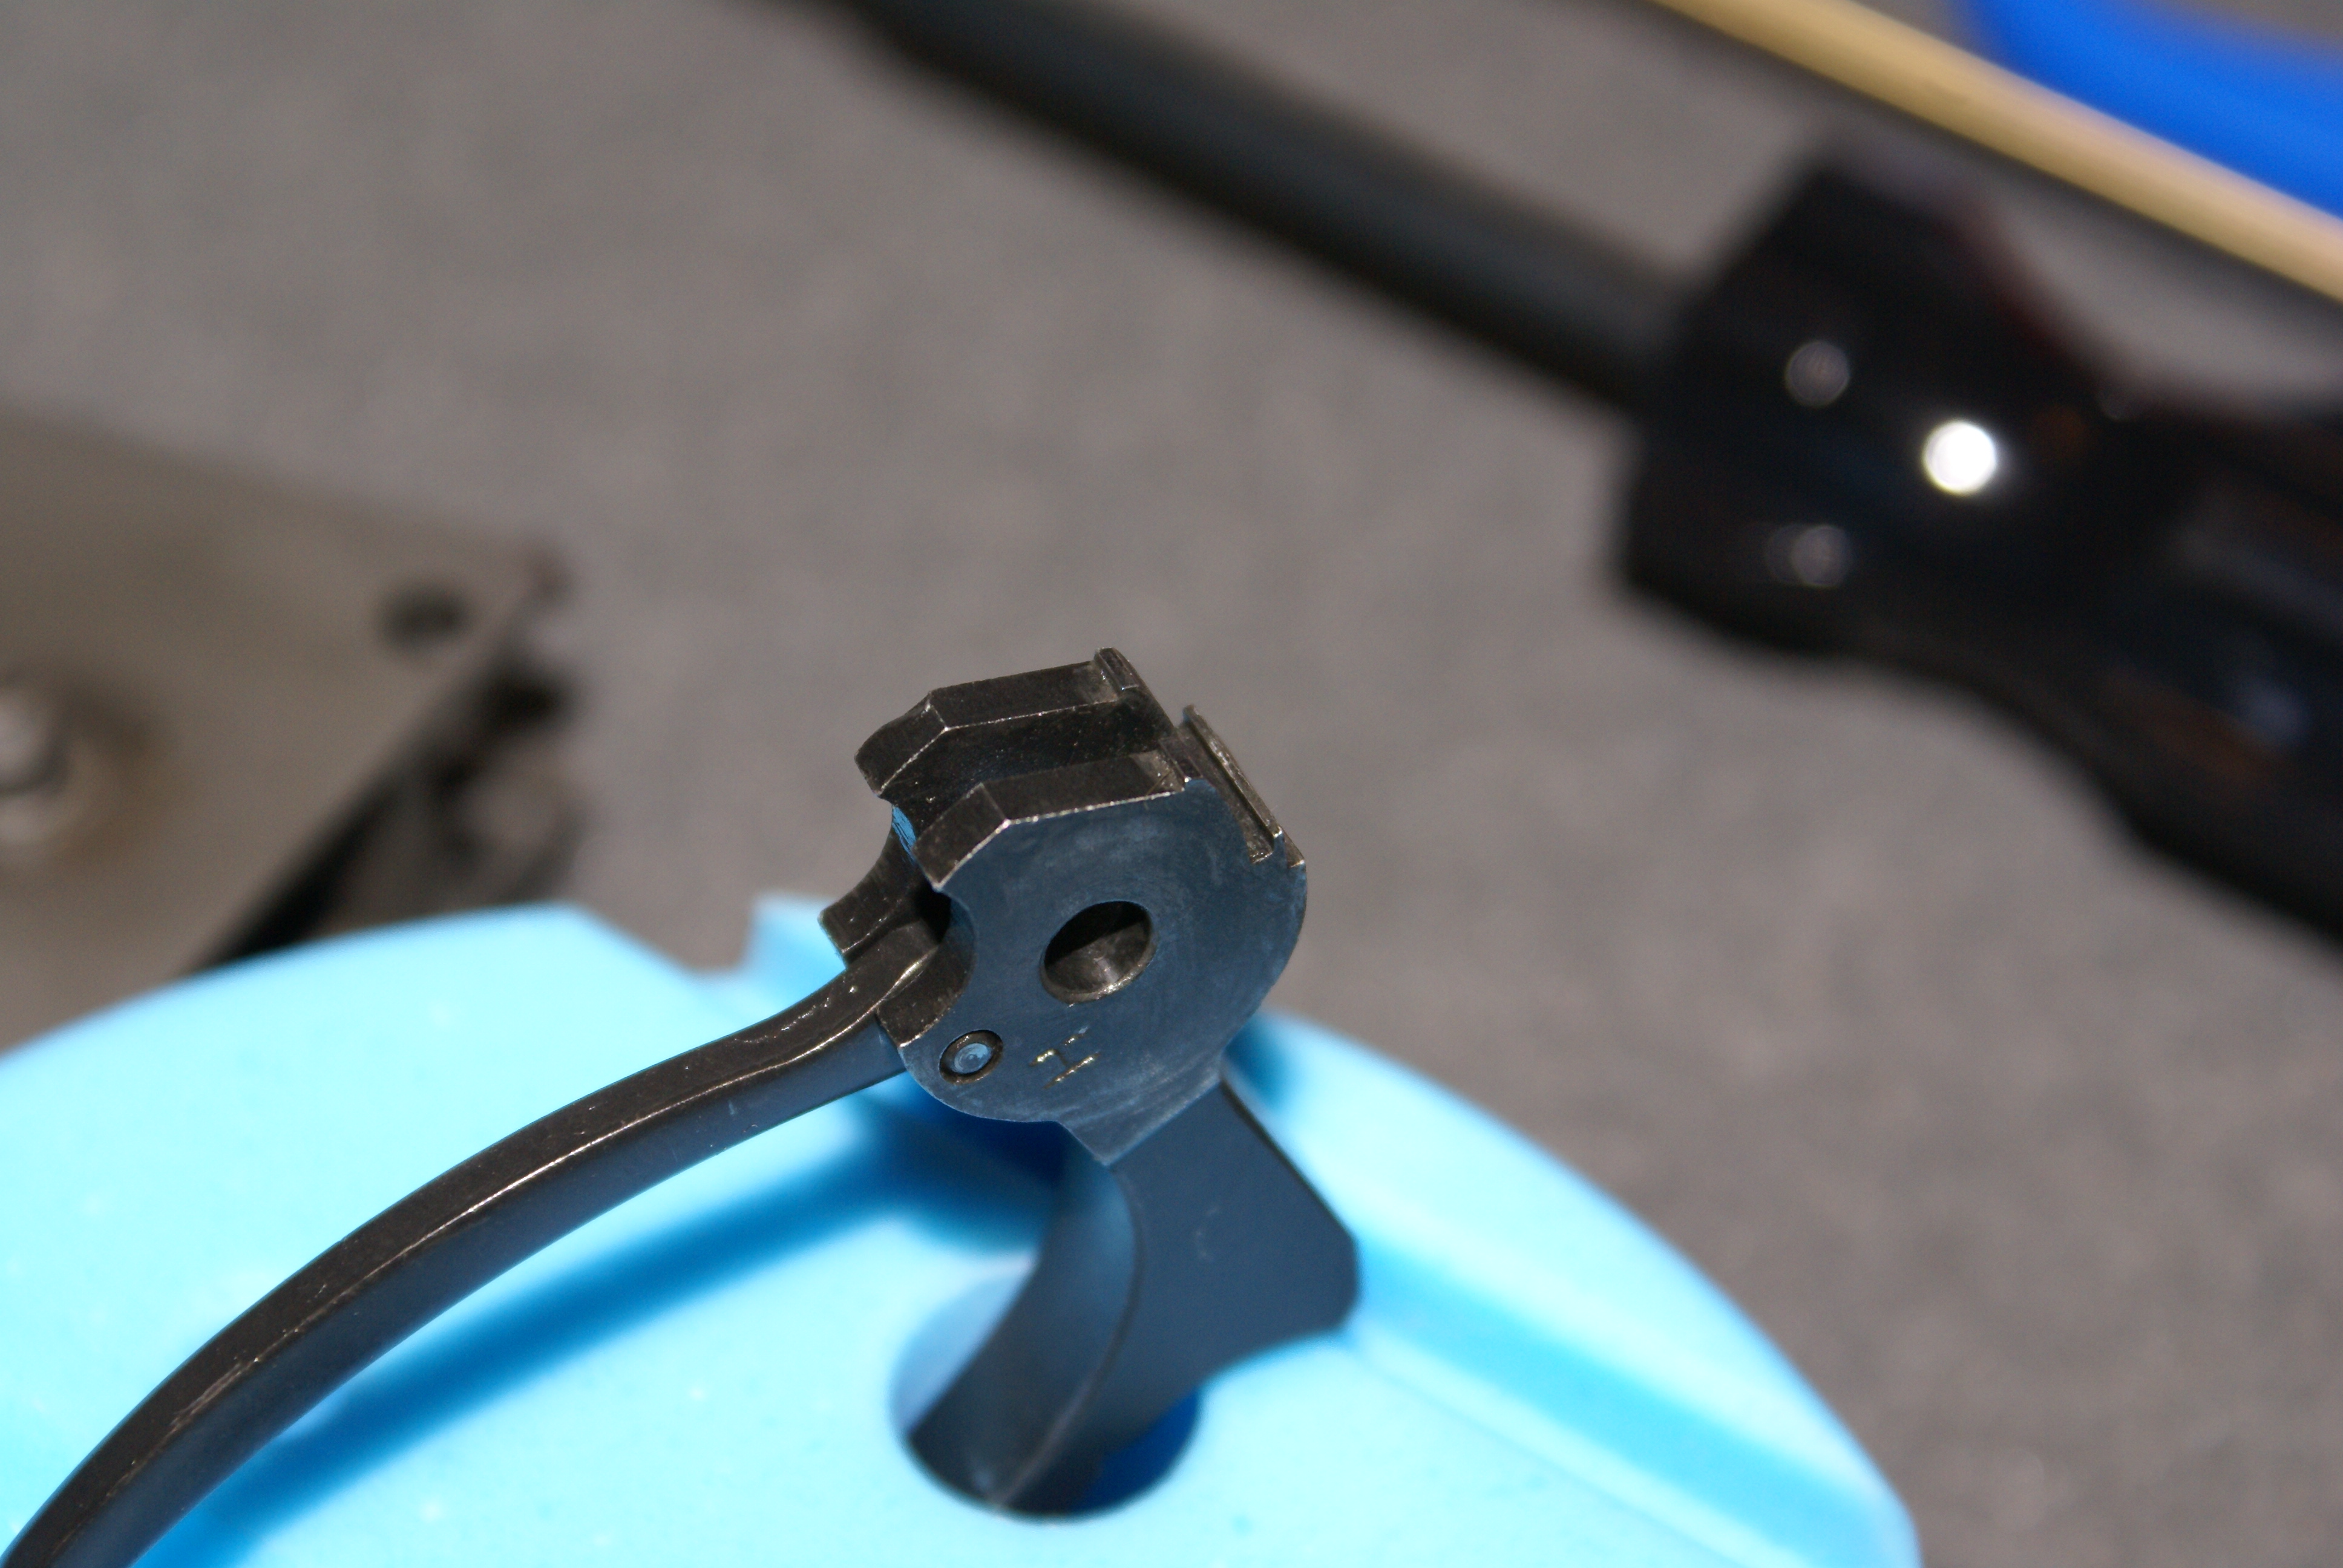
One of the most common improvements that is done to a firearm is a trigger job. This is done for a number of reasons such as; an improved response of the action, accuracy, and to get that crisp “glass rod” feeling when the shot breaks with near zero take-up. In my experience, the 1911 platform is the number one sidearm that I’ve seen come in for this service. There are a number of manufacturers that supply jigs and other tools for prepping sears, and I have used a few in the past. Some work better than others, and some just aren’t worth the aggravation. The key elements for completing this task are: patients, finesse, and of course; quality tooling. The task of prepping sear surfaces may seem easy, but often times can be frustrating and incorrectly done. Common mistakes are a wrong stoning angle and the removing of too much material resulting in unsafe conditions such as; hammer follow (the hammer falls without the depression of the trigger), and too light of a trigger pull for the intended purpose (generally lighter for competition, heavier for hunting or carry in regards to safety).
“Modifying the manufacturer’s design of a firearm may void your warranty. This article is for informational purposes only, and is not meant to be a how-to guide. The purpose of this article is to review a specific product, and to show what may be involved in the installation, function and/or use. You (the reader) are responsible for the safe handling, operation, and function of your firearm. You are also liable for any damage, injury, or accidental death that may result from incorrect work you may perform. We Like Shooting (welikeshooting.com), its writers, and staff recommend consulting a competent gunsmith or armorer prior to working on your own firearm.”
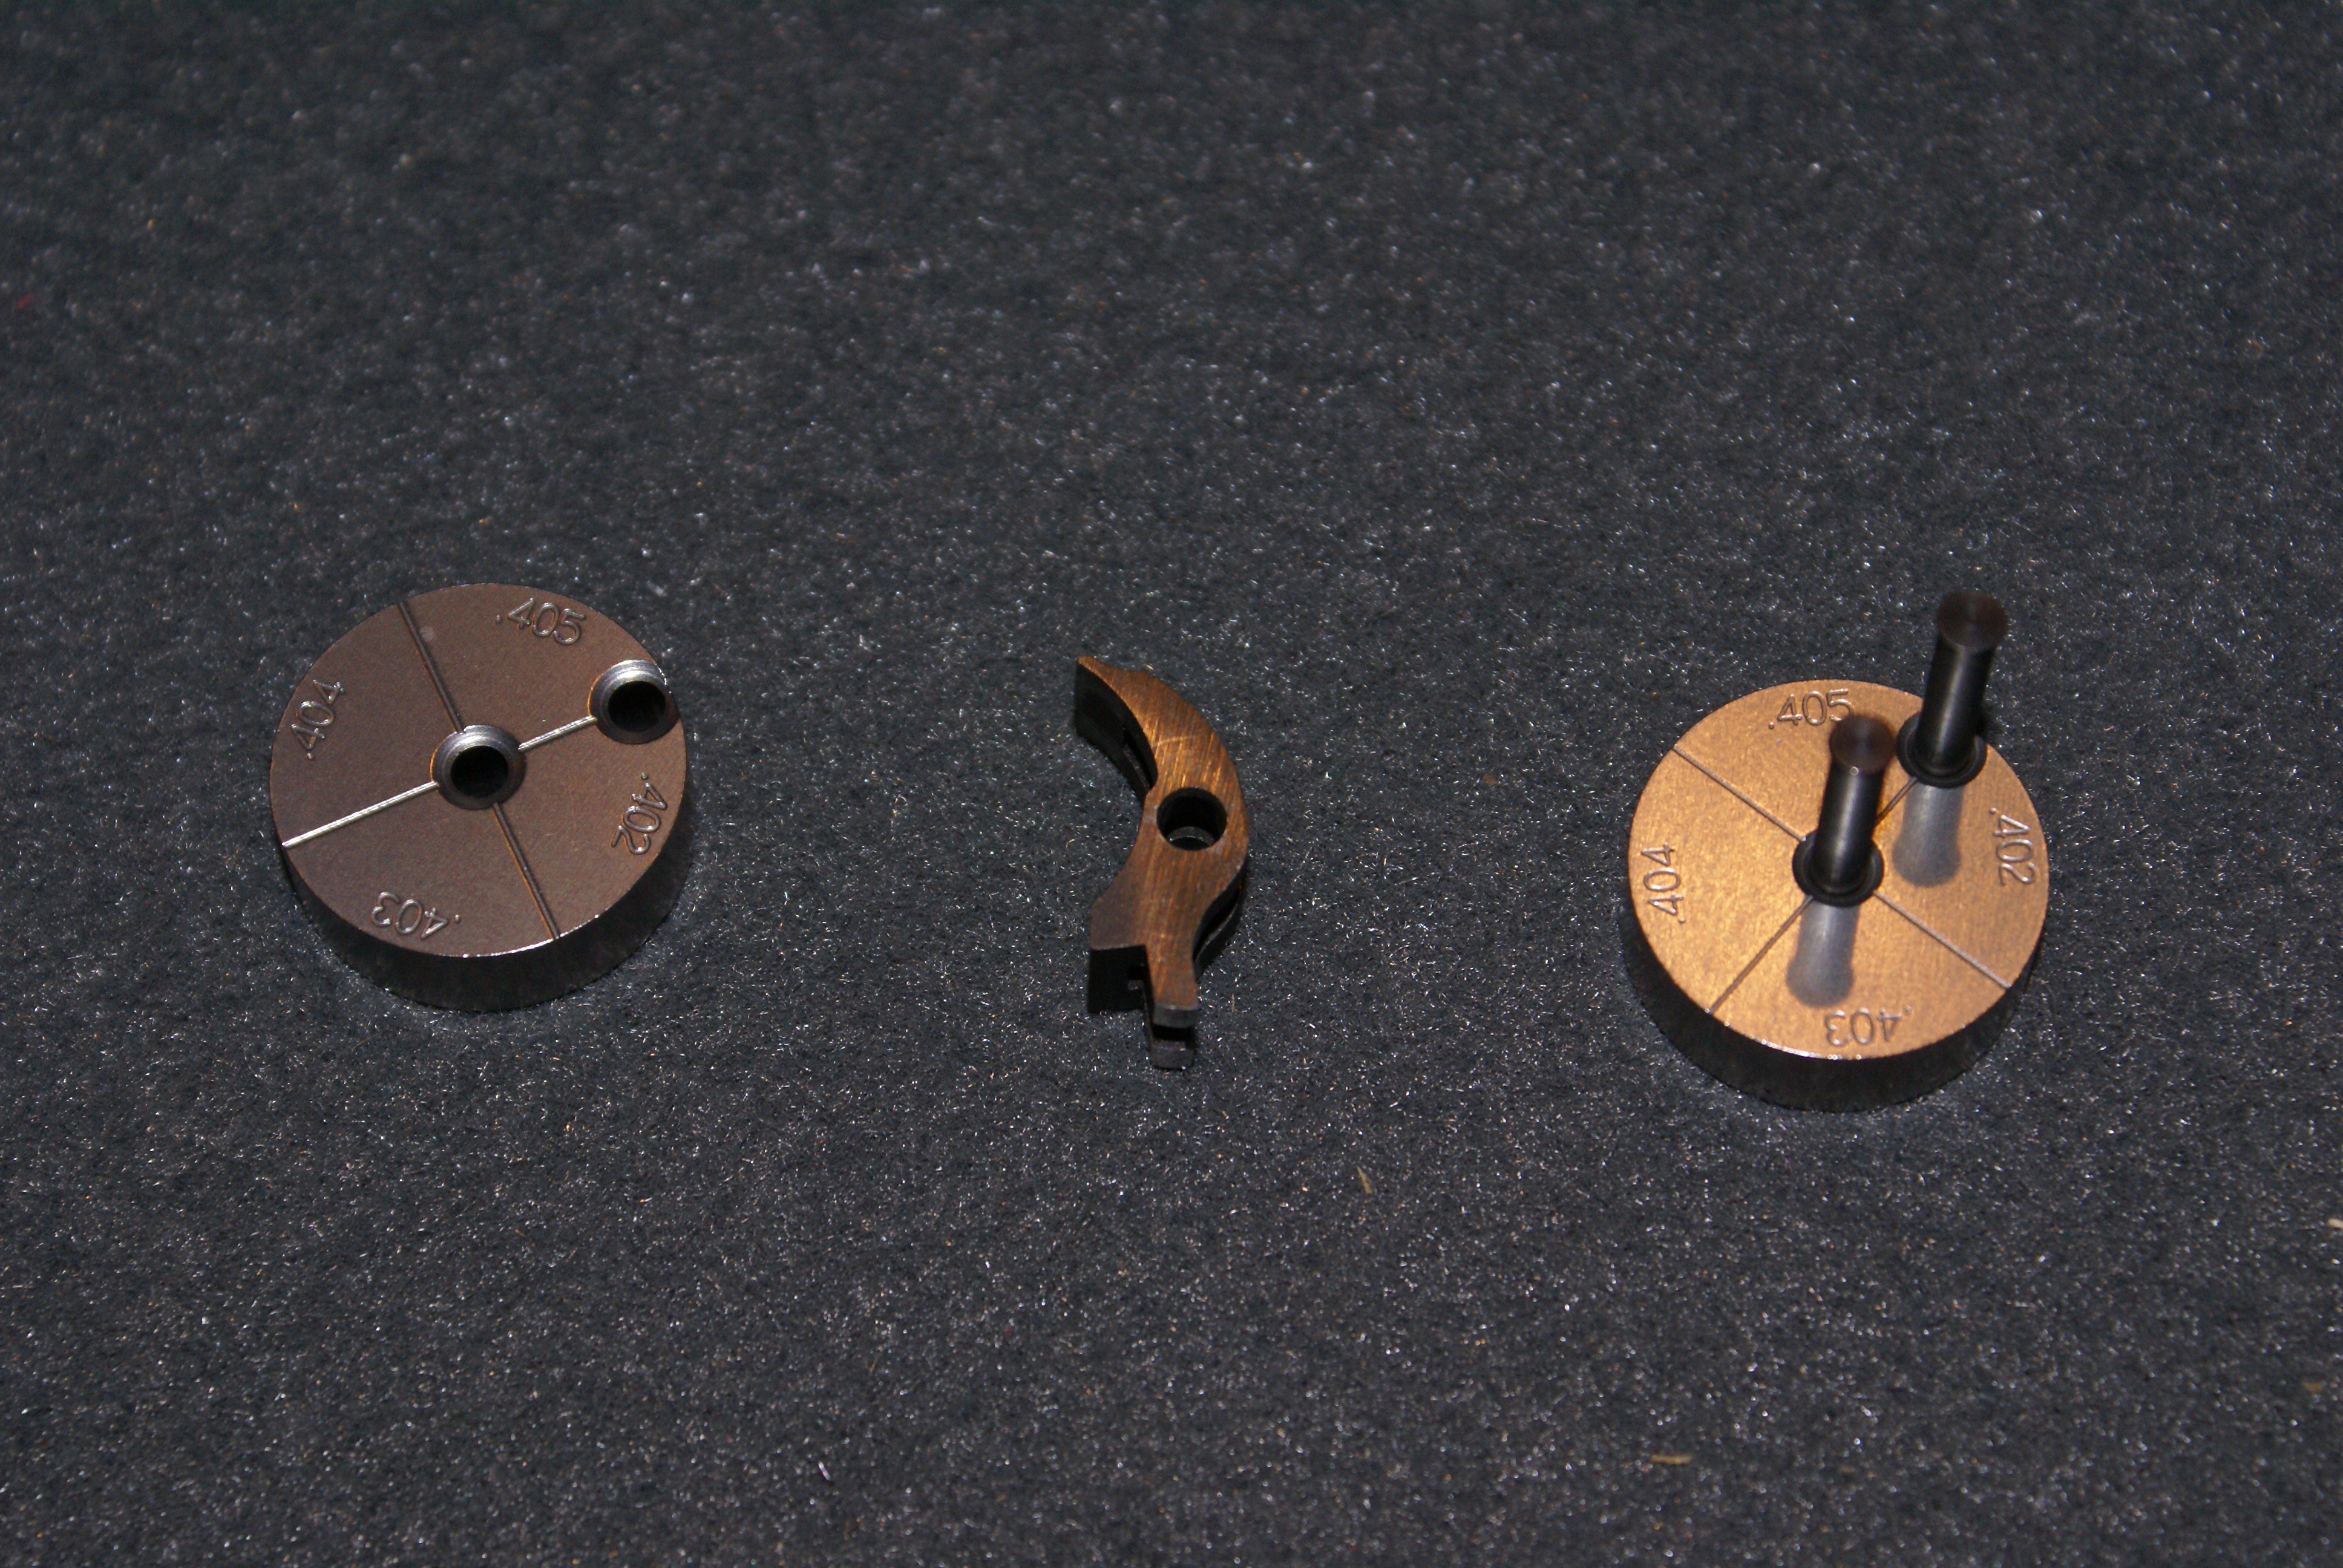
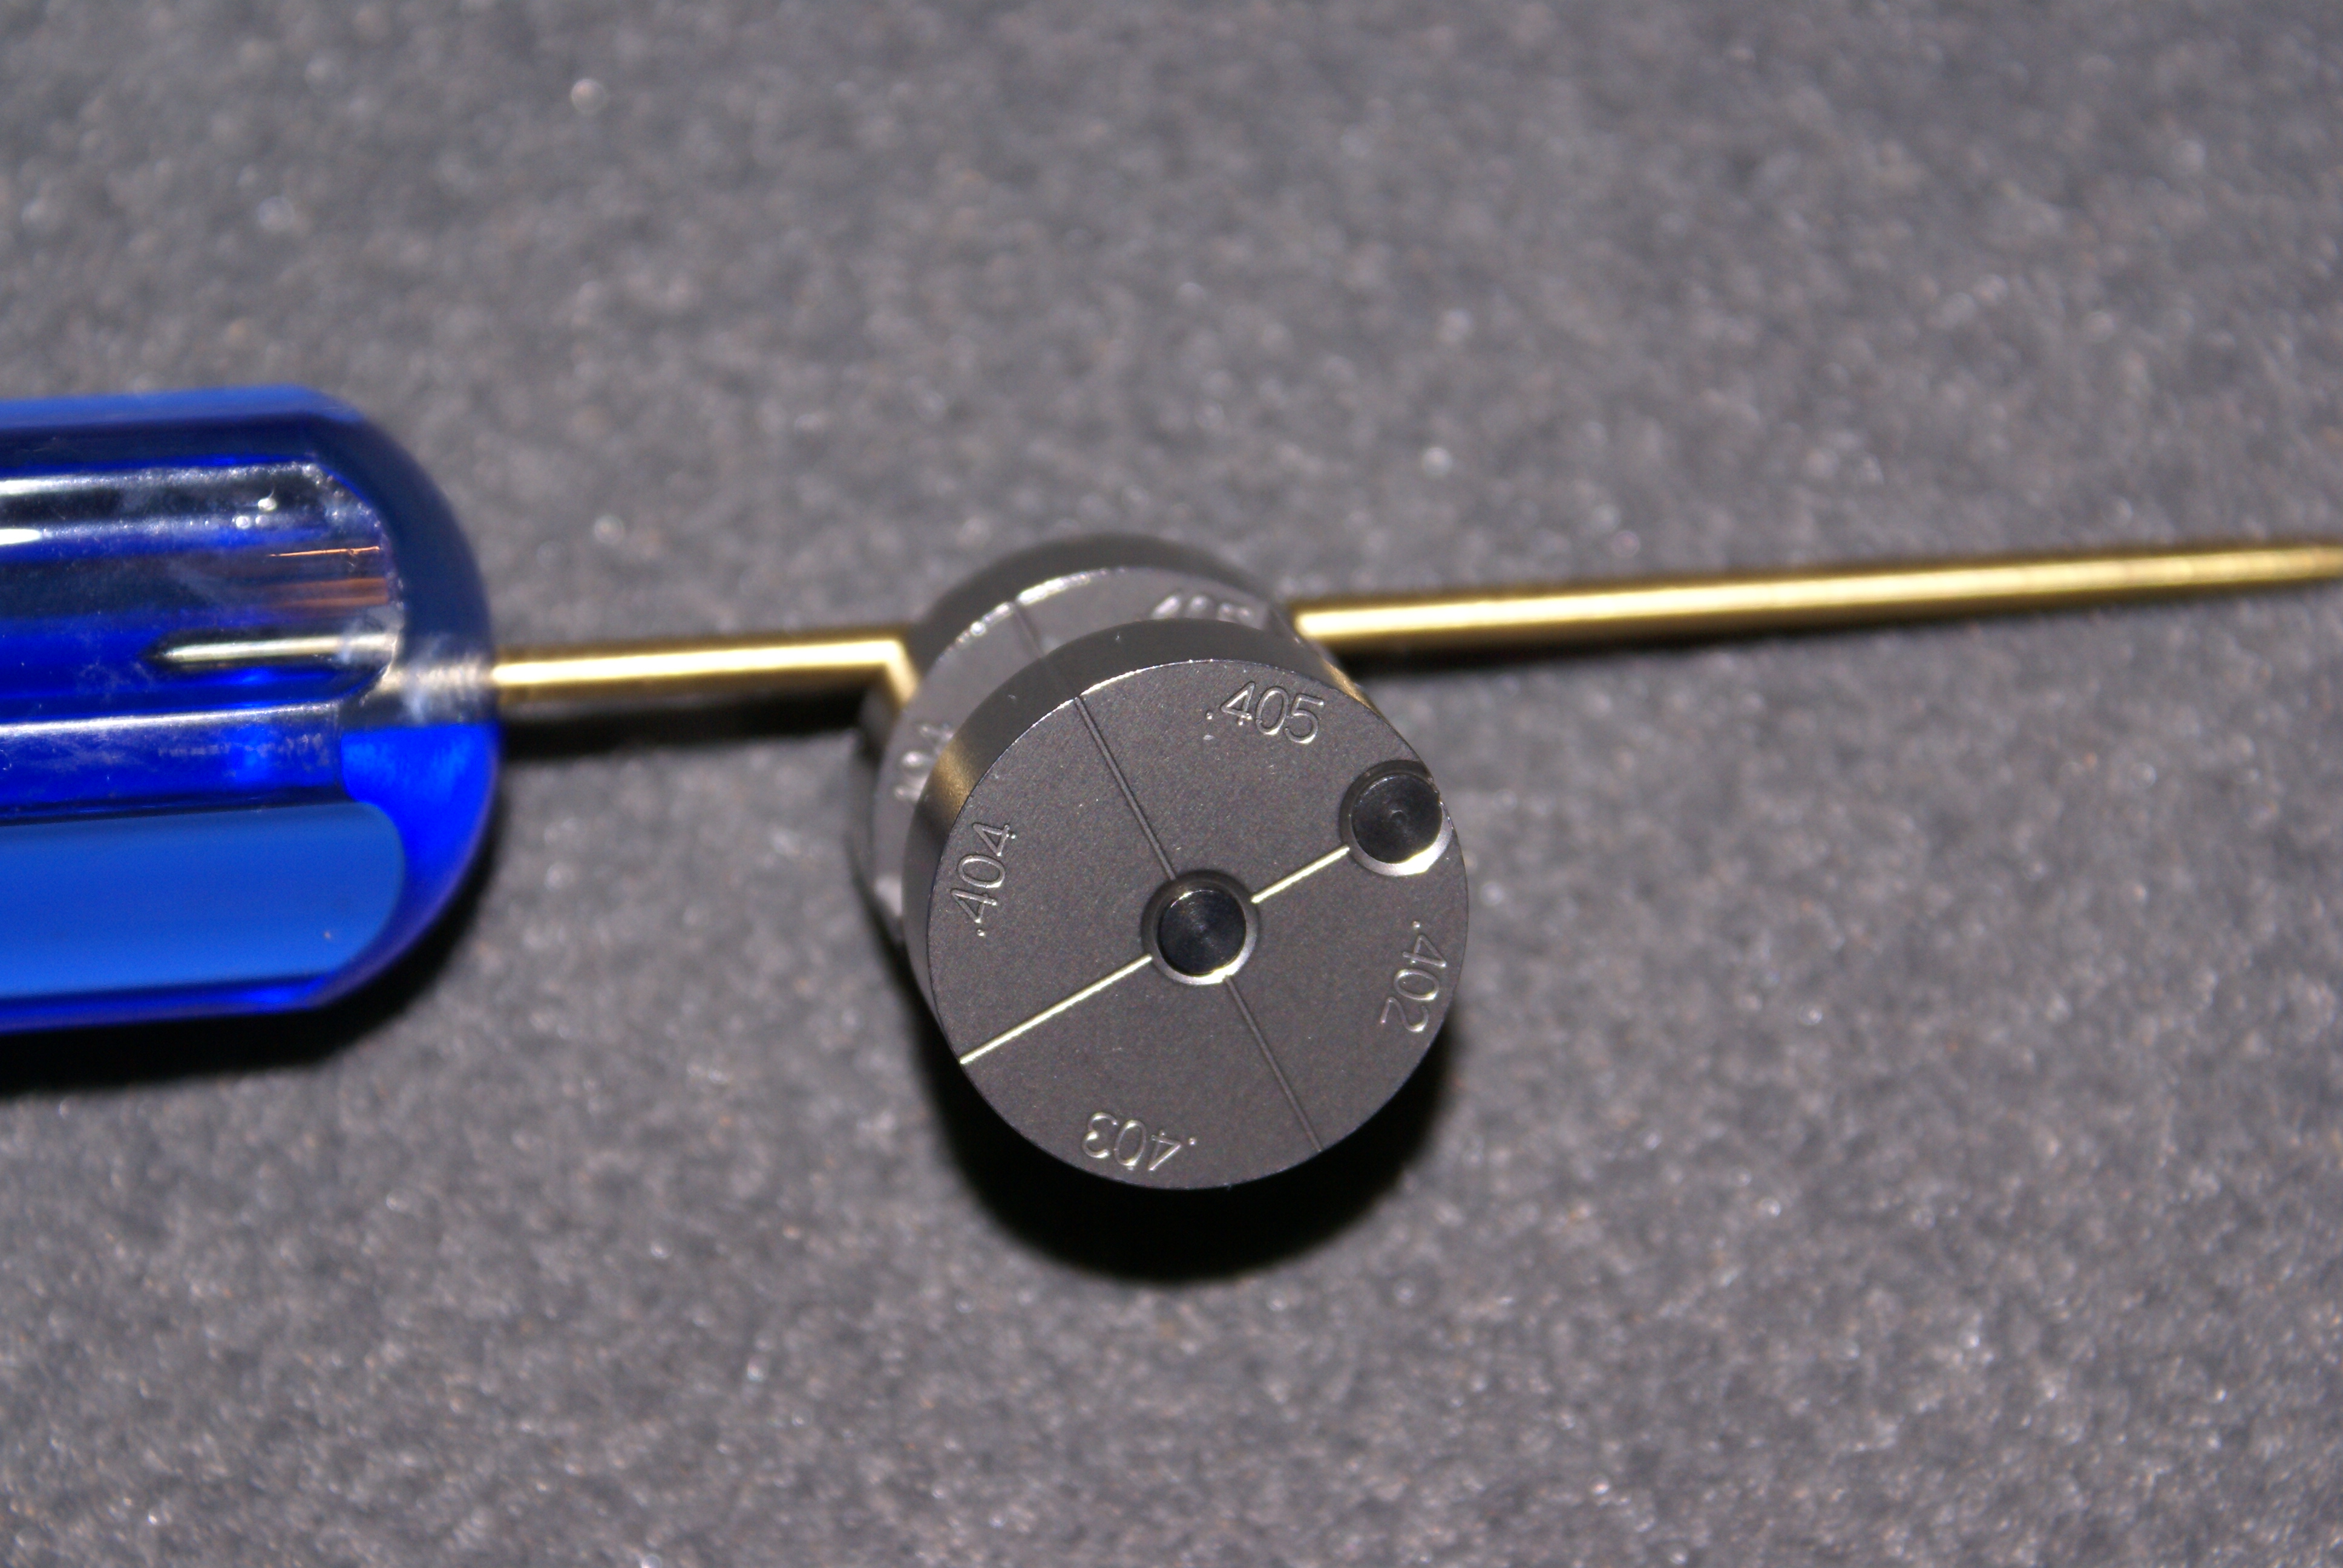
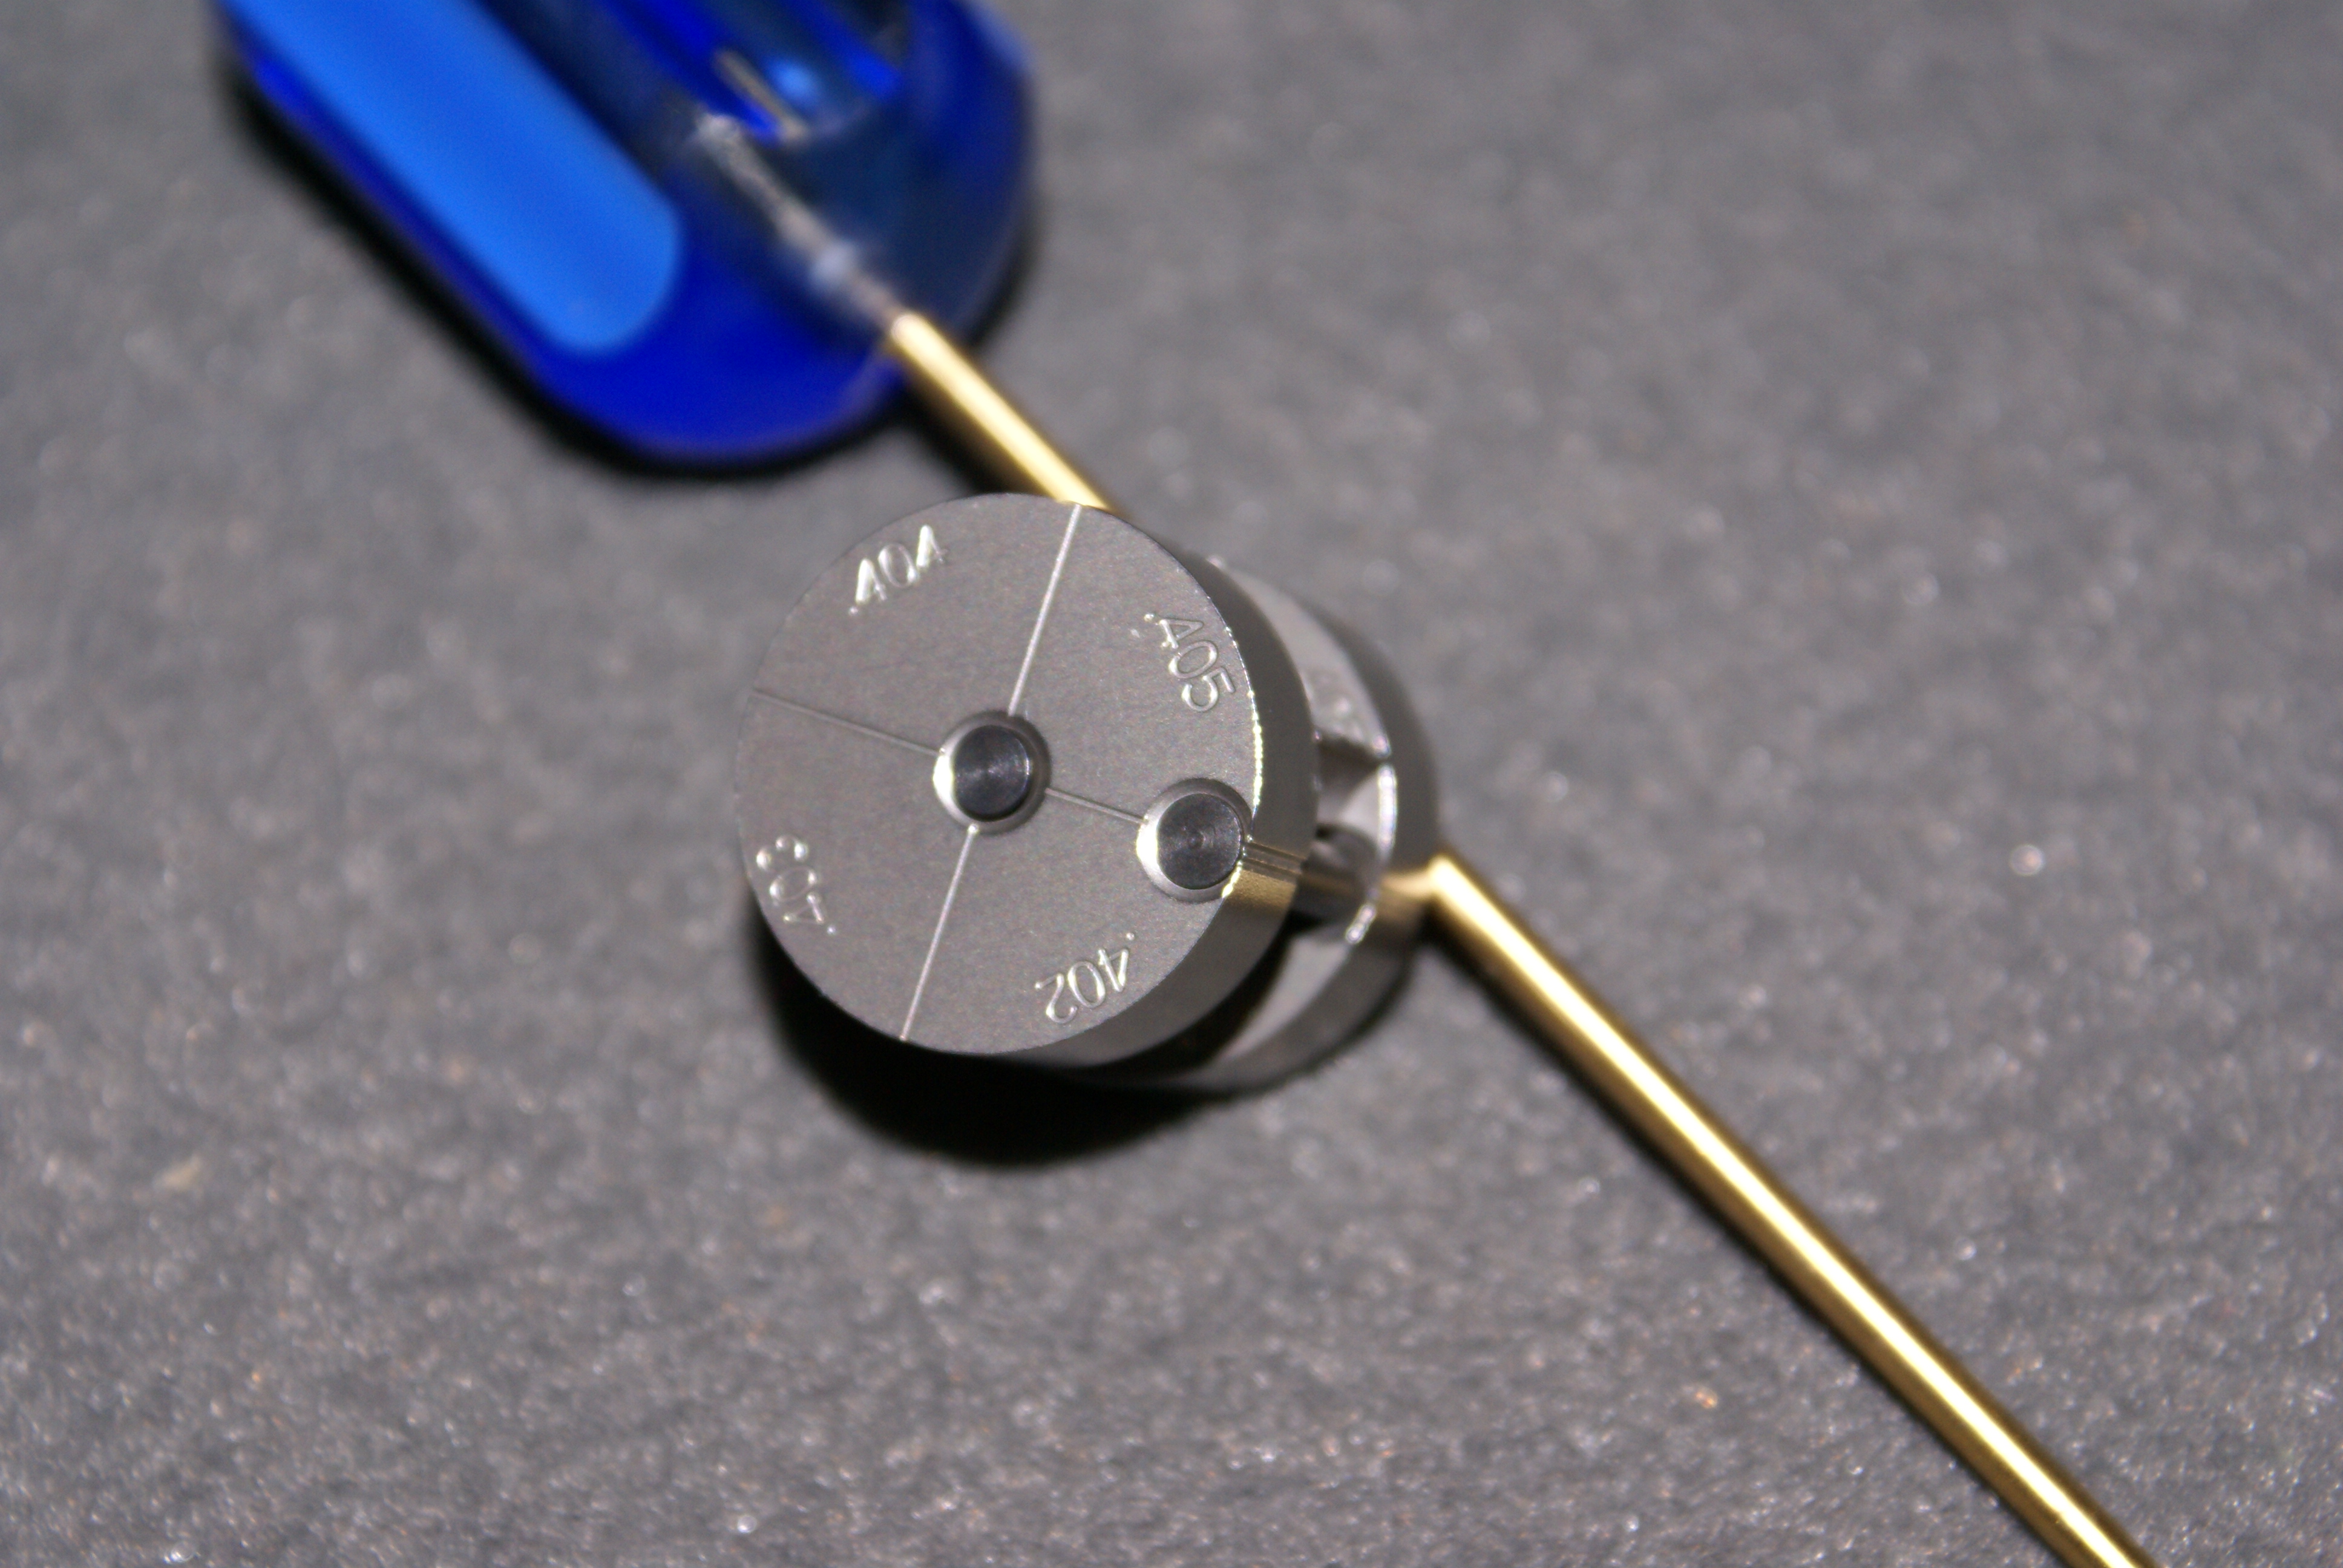
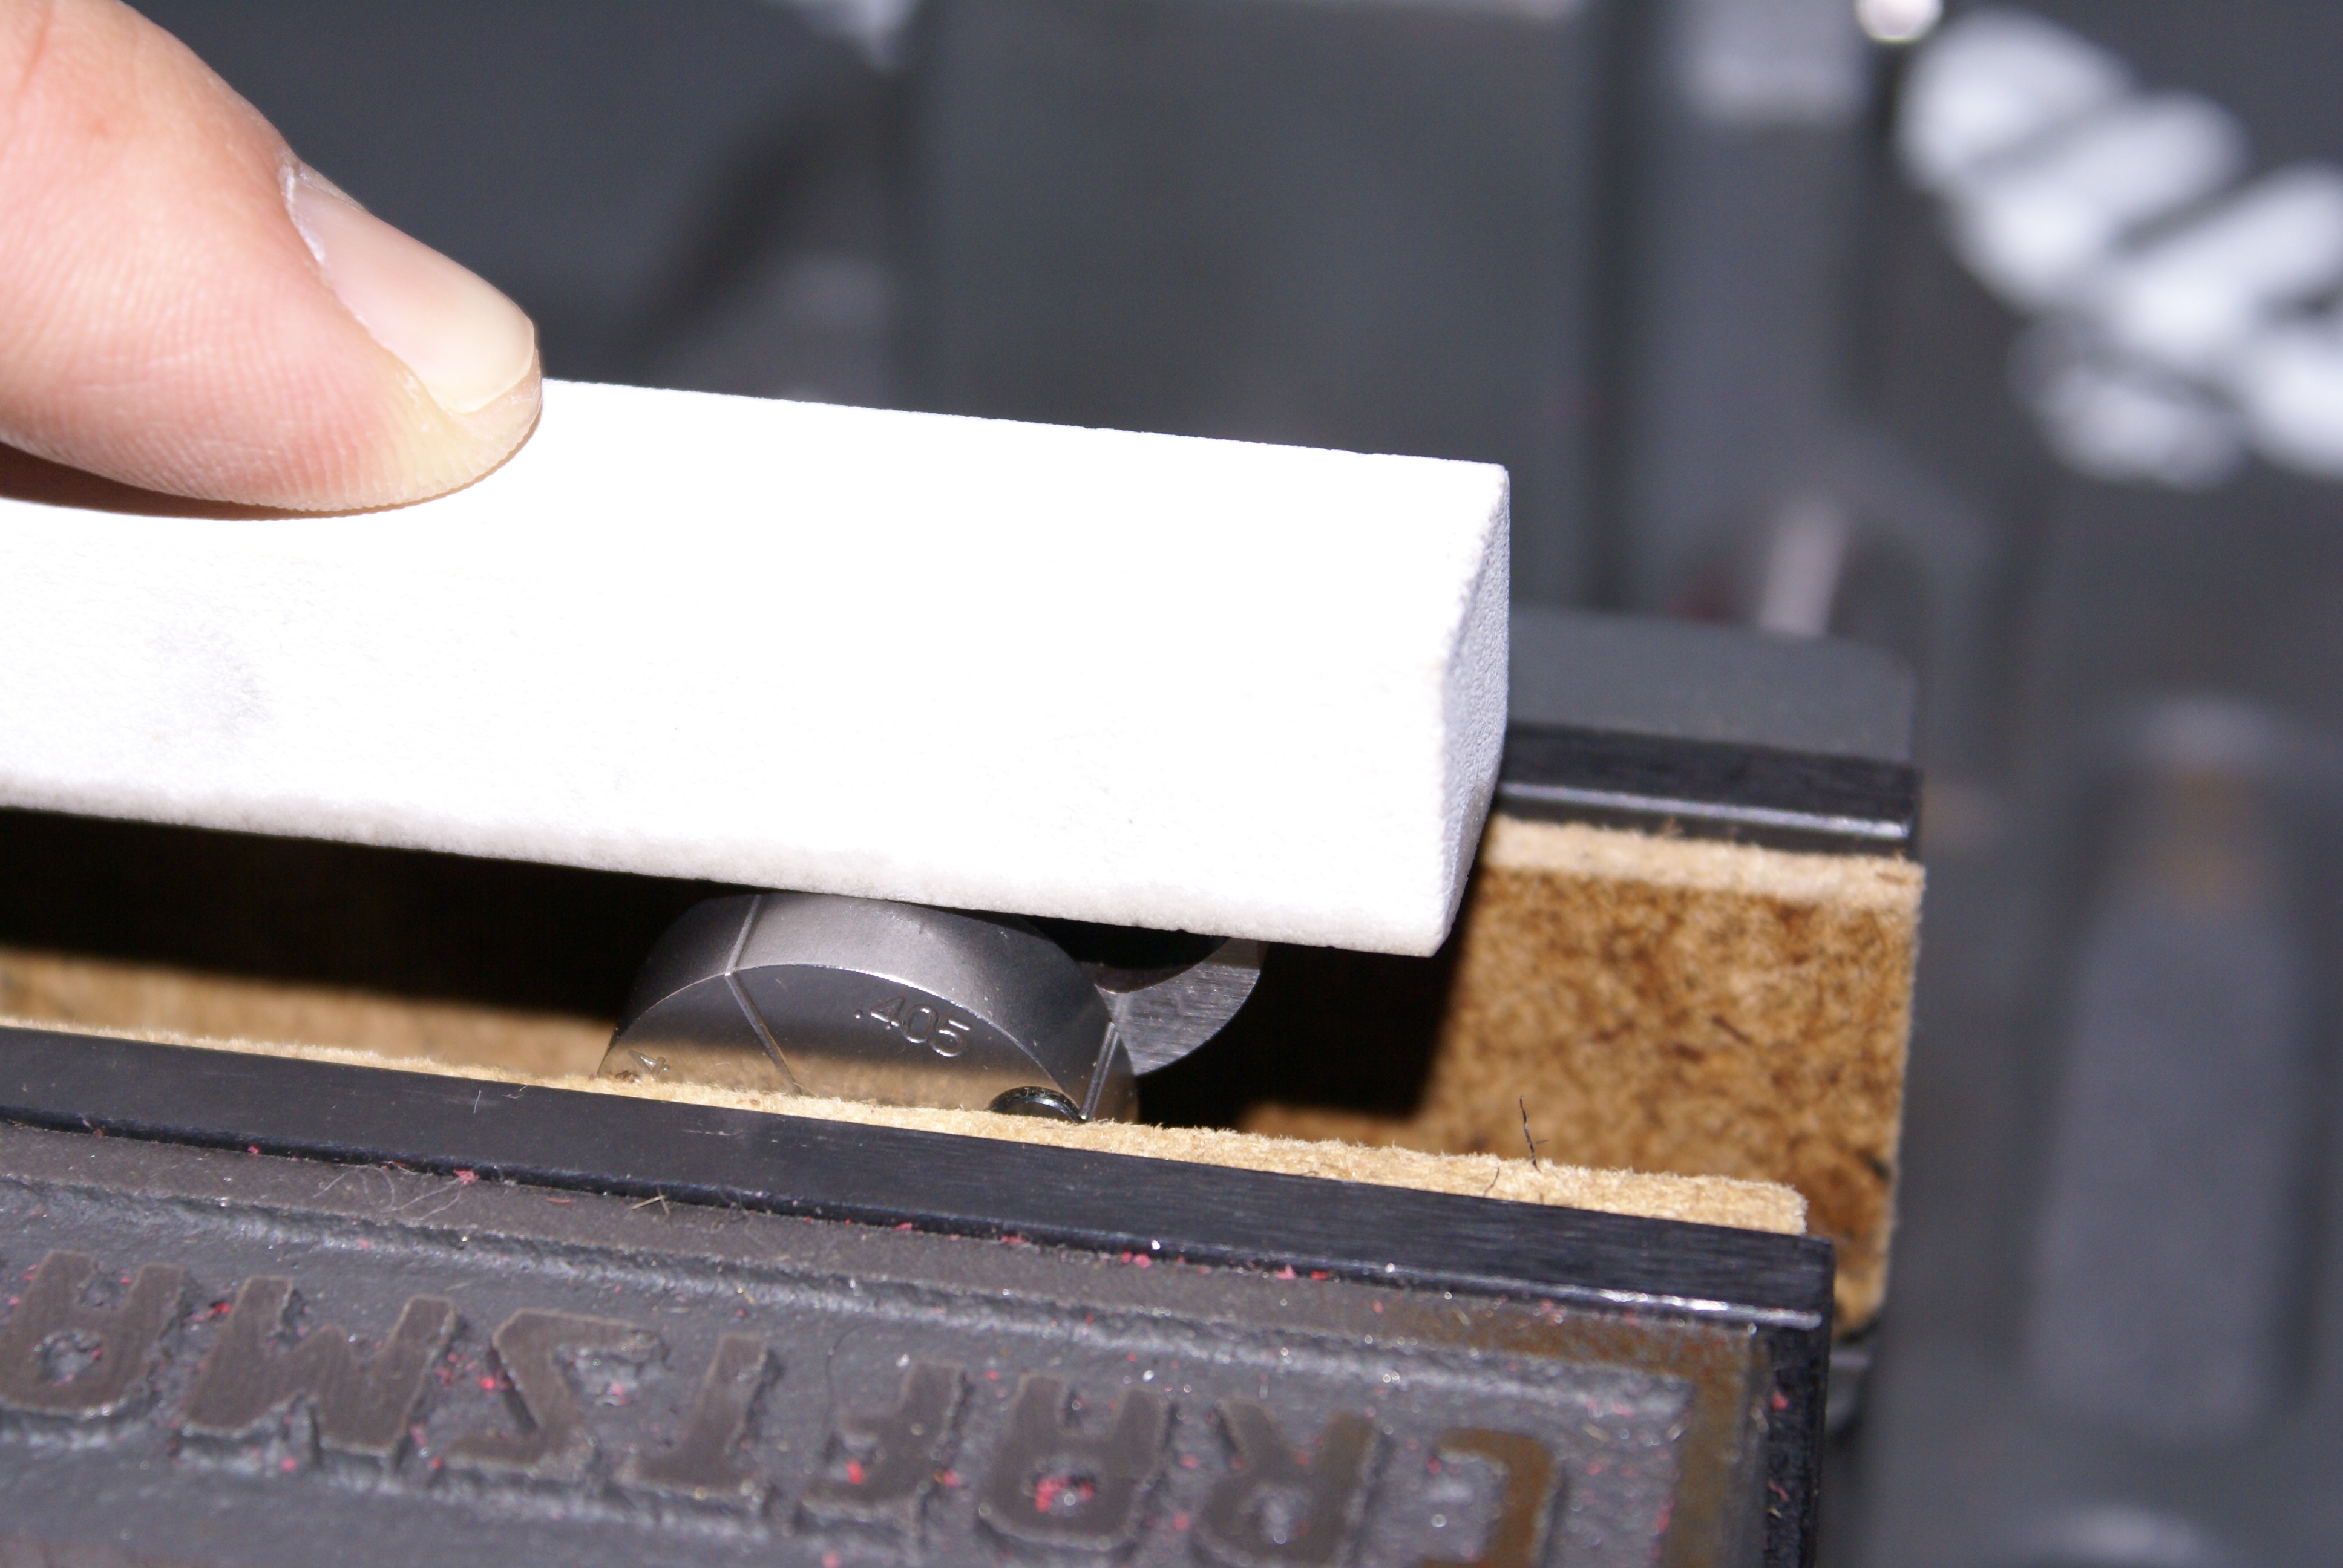
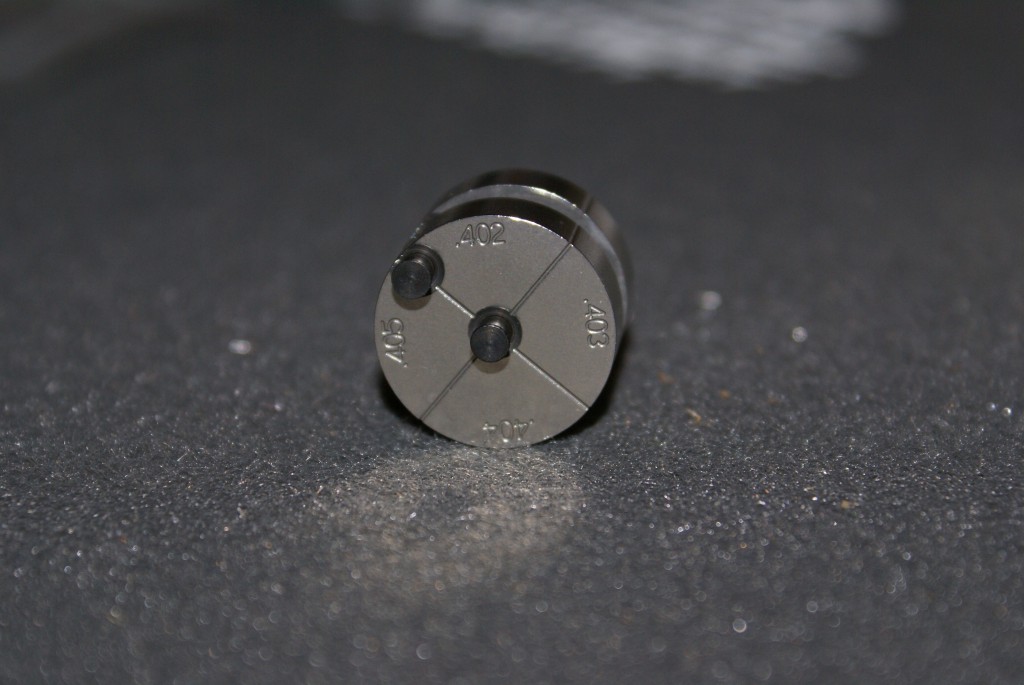
I’ve seen a bunch of jigs for prepping a 1911’s sear, and a few were good enough to use regularly. My personal preferences includes as few moving parts (or movements as possible), and a rock-solid fixture that securely holds the work piece so that the results are 100% repeatable. Yeah…. my hands aren’t as steady as they use to be, nor is my eye sight as sharp as it was a decade ago. A while back during the search for new tooling, I came across a company that offered a jig that fit my new requirements. The design was innovative and intriguing, as it put a radius on the primary sear surface and a flat surface on the secondary. All done with the same tool. “How does this work?” I wondered as I looked at the product info on Elite Warrior Armament’s website. With the offering of four preset lengths that protect against removing too much material (keeping it within safe tolerances), I was sold on the TR Pro Sear Jig (SKU#T-901) and had to get my hands on one.

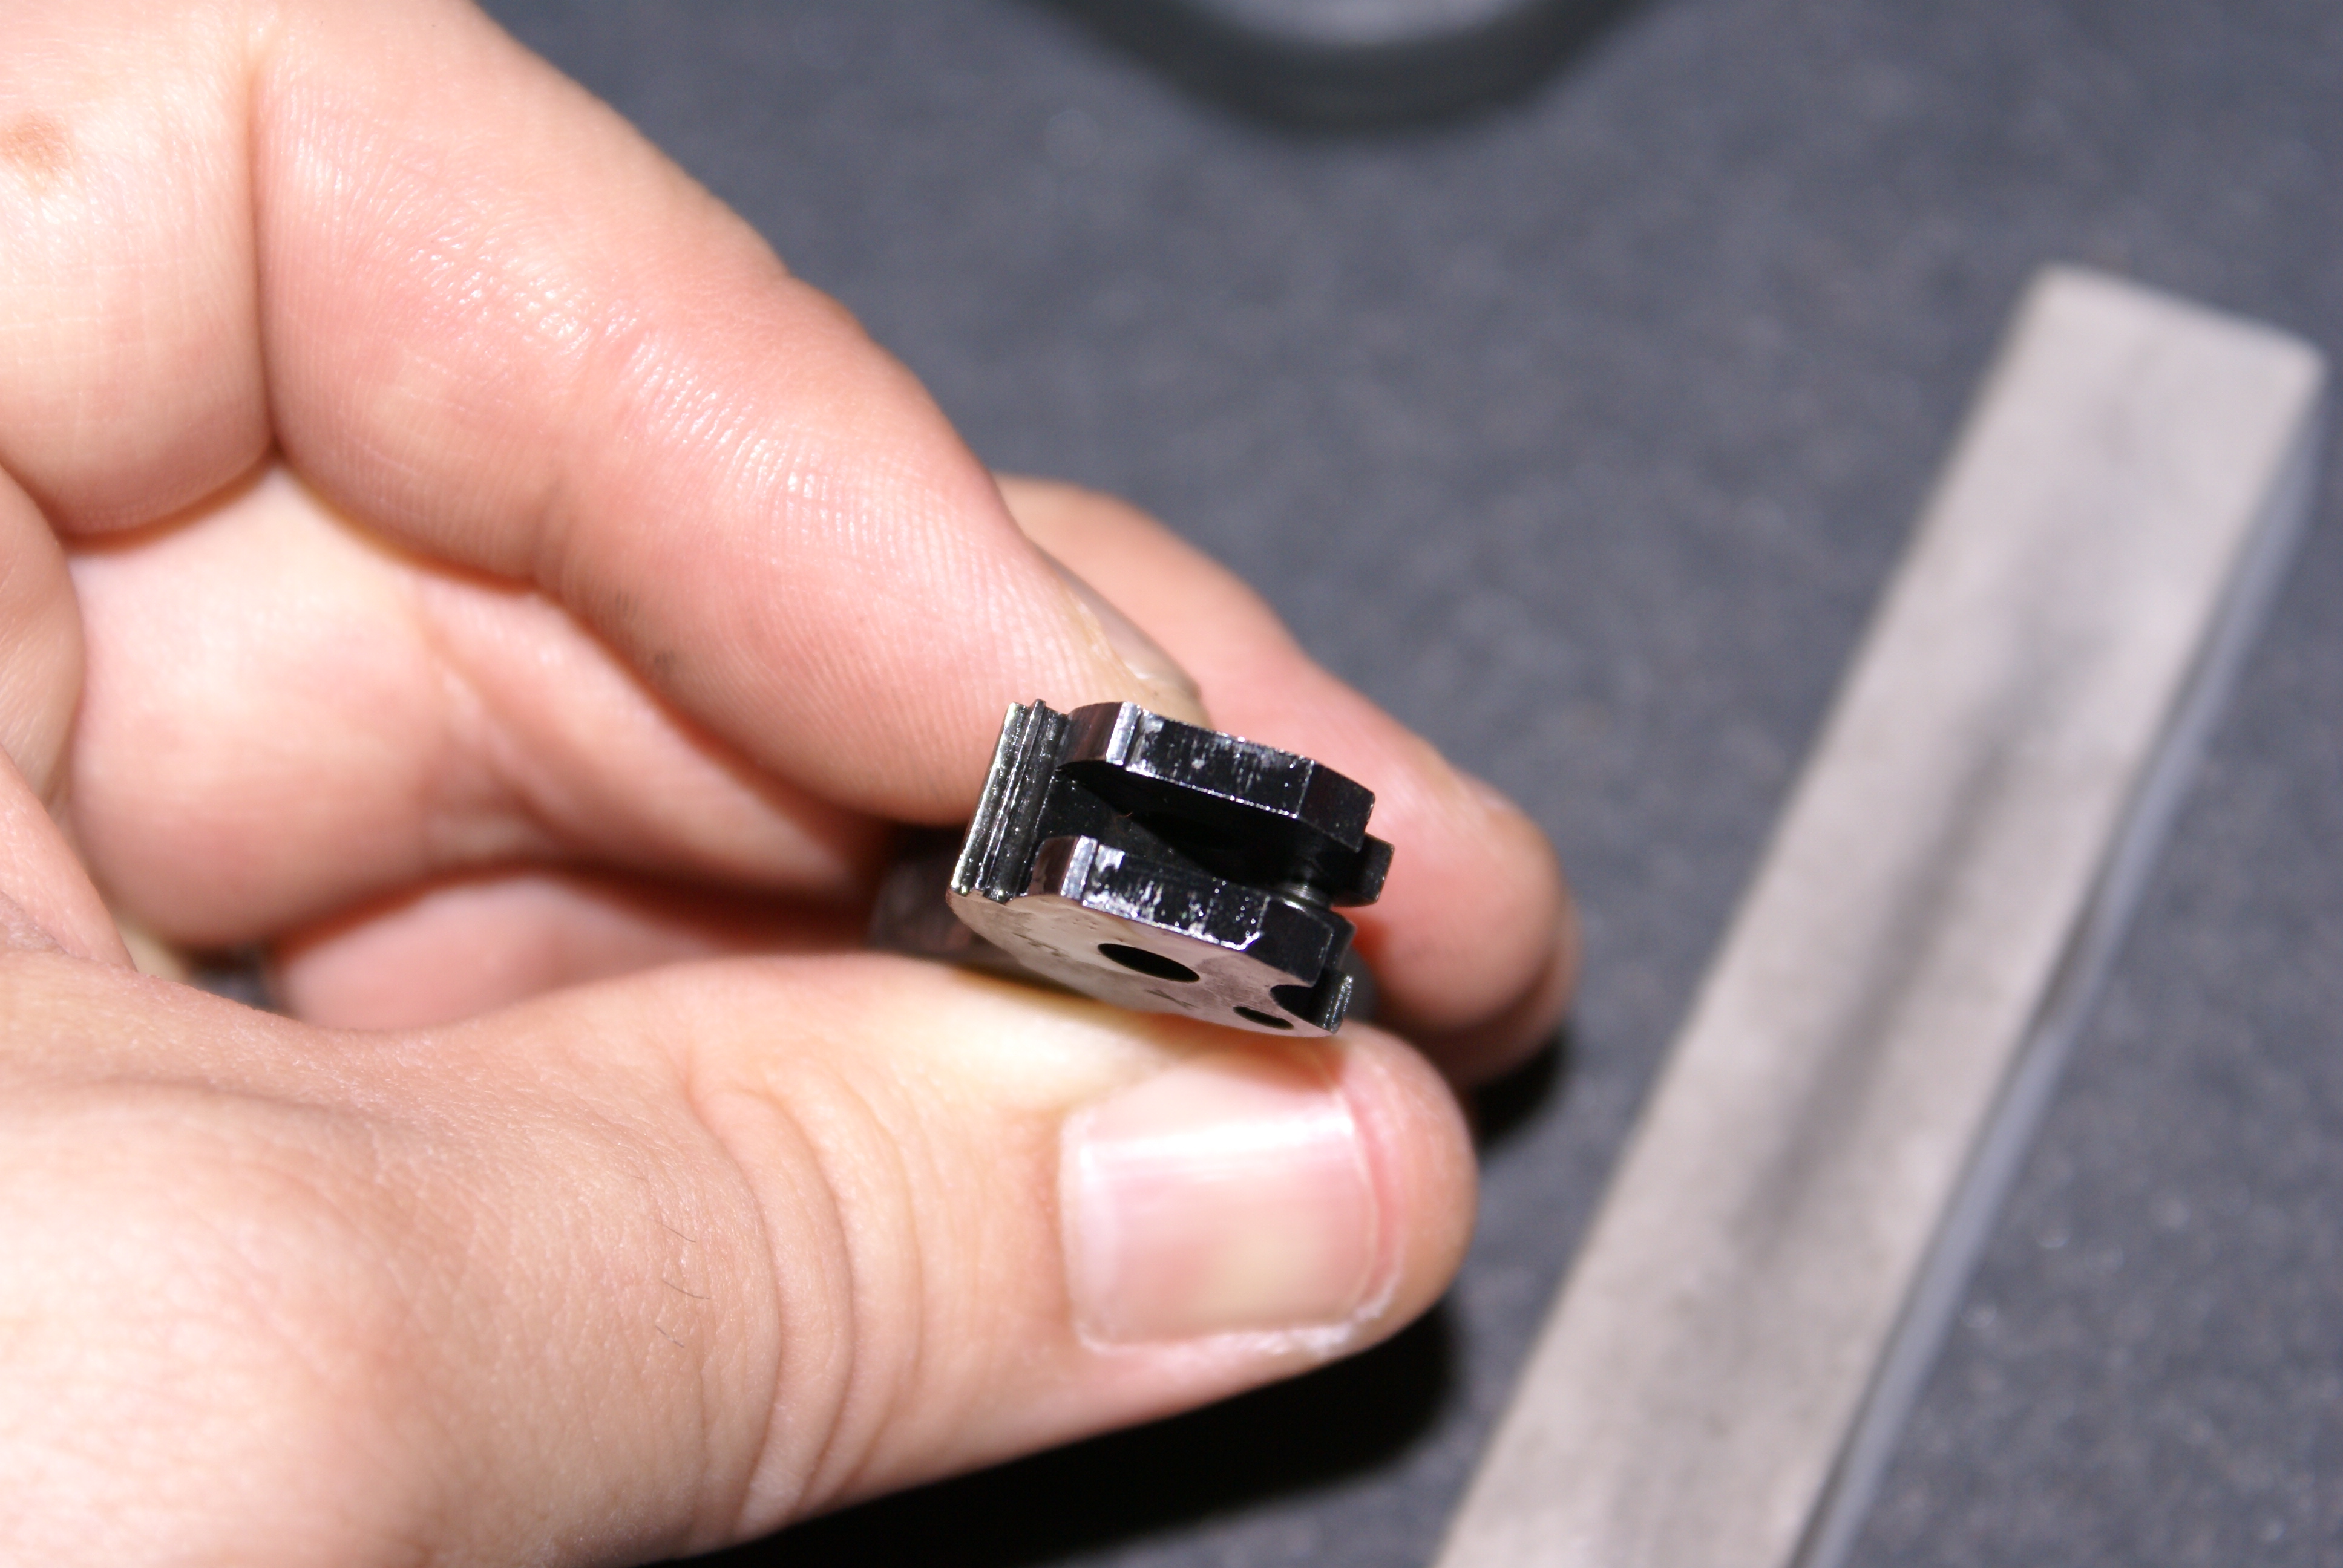
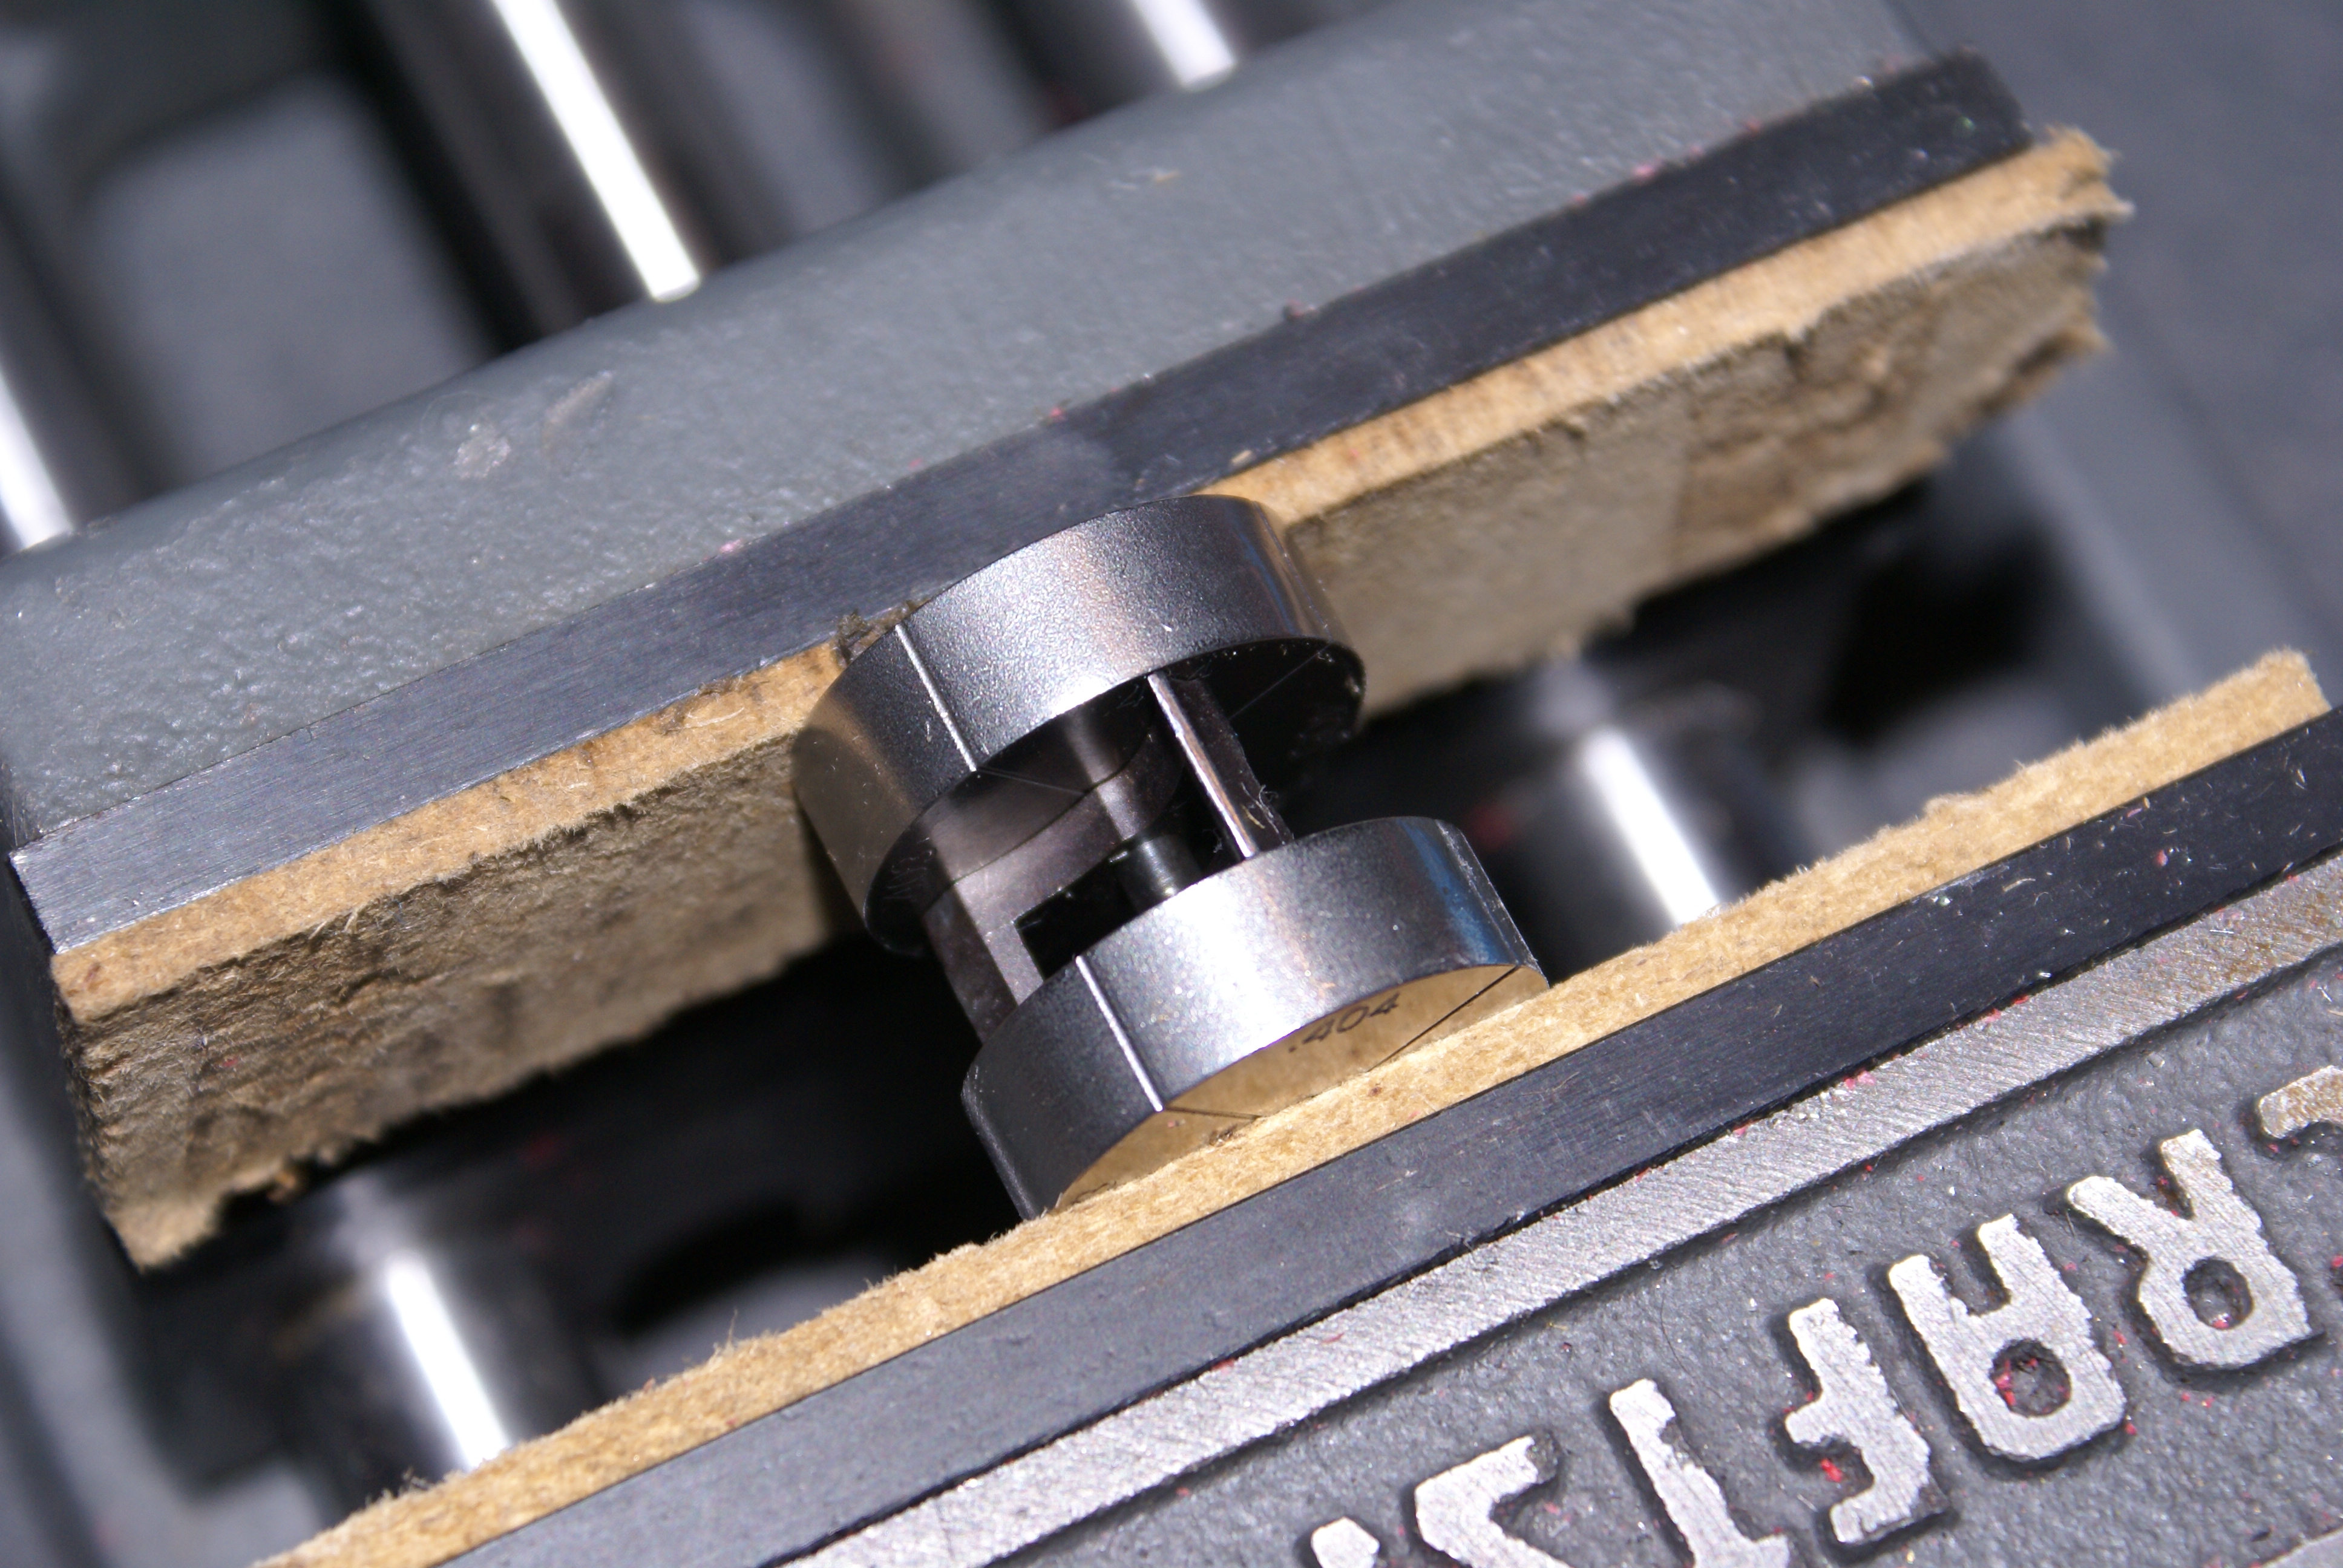
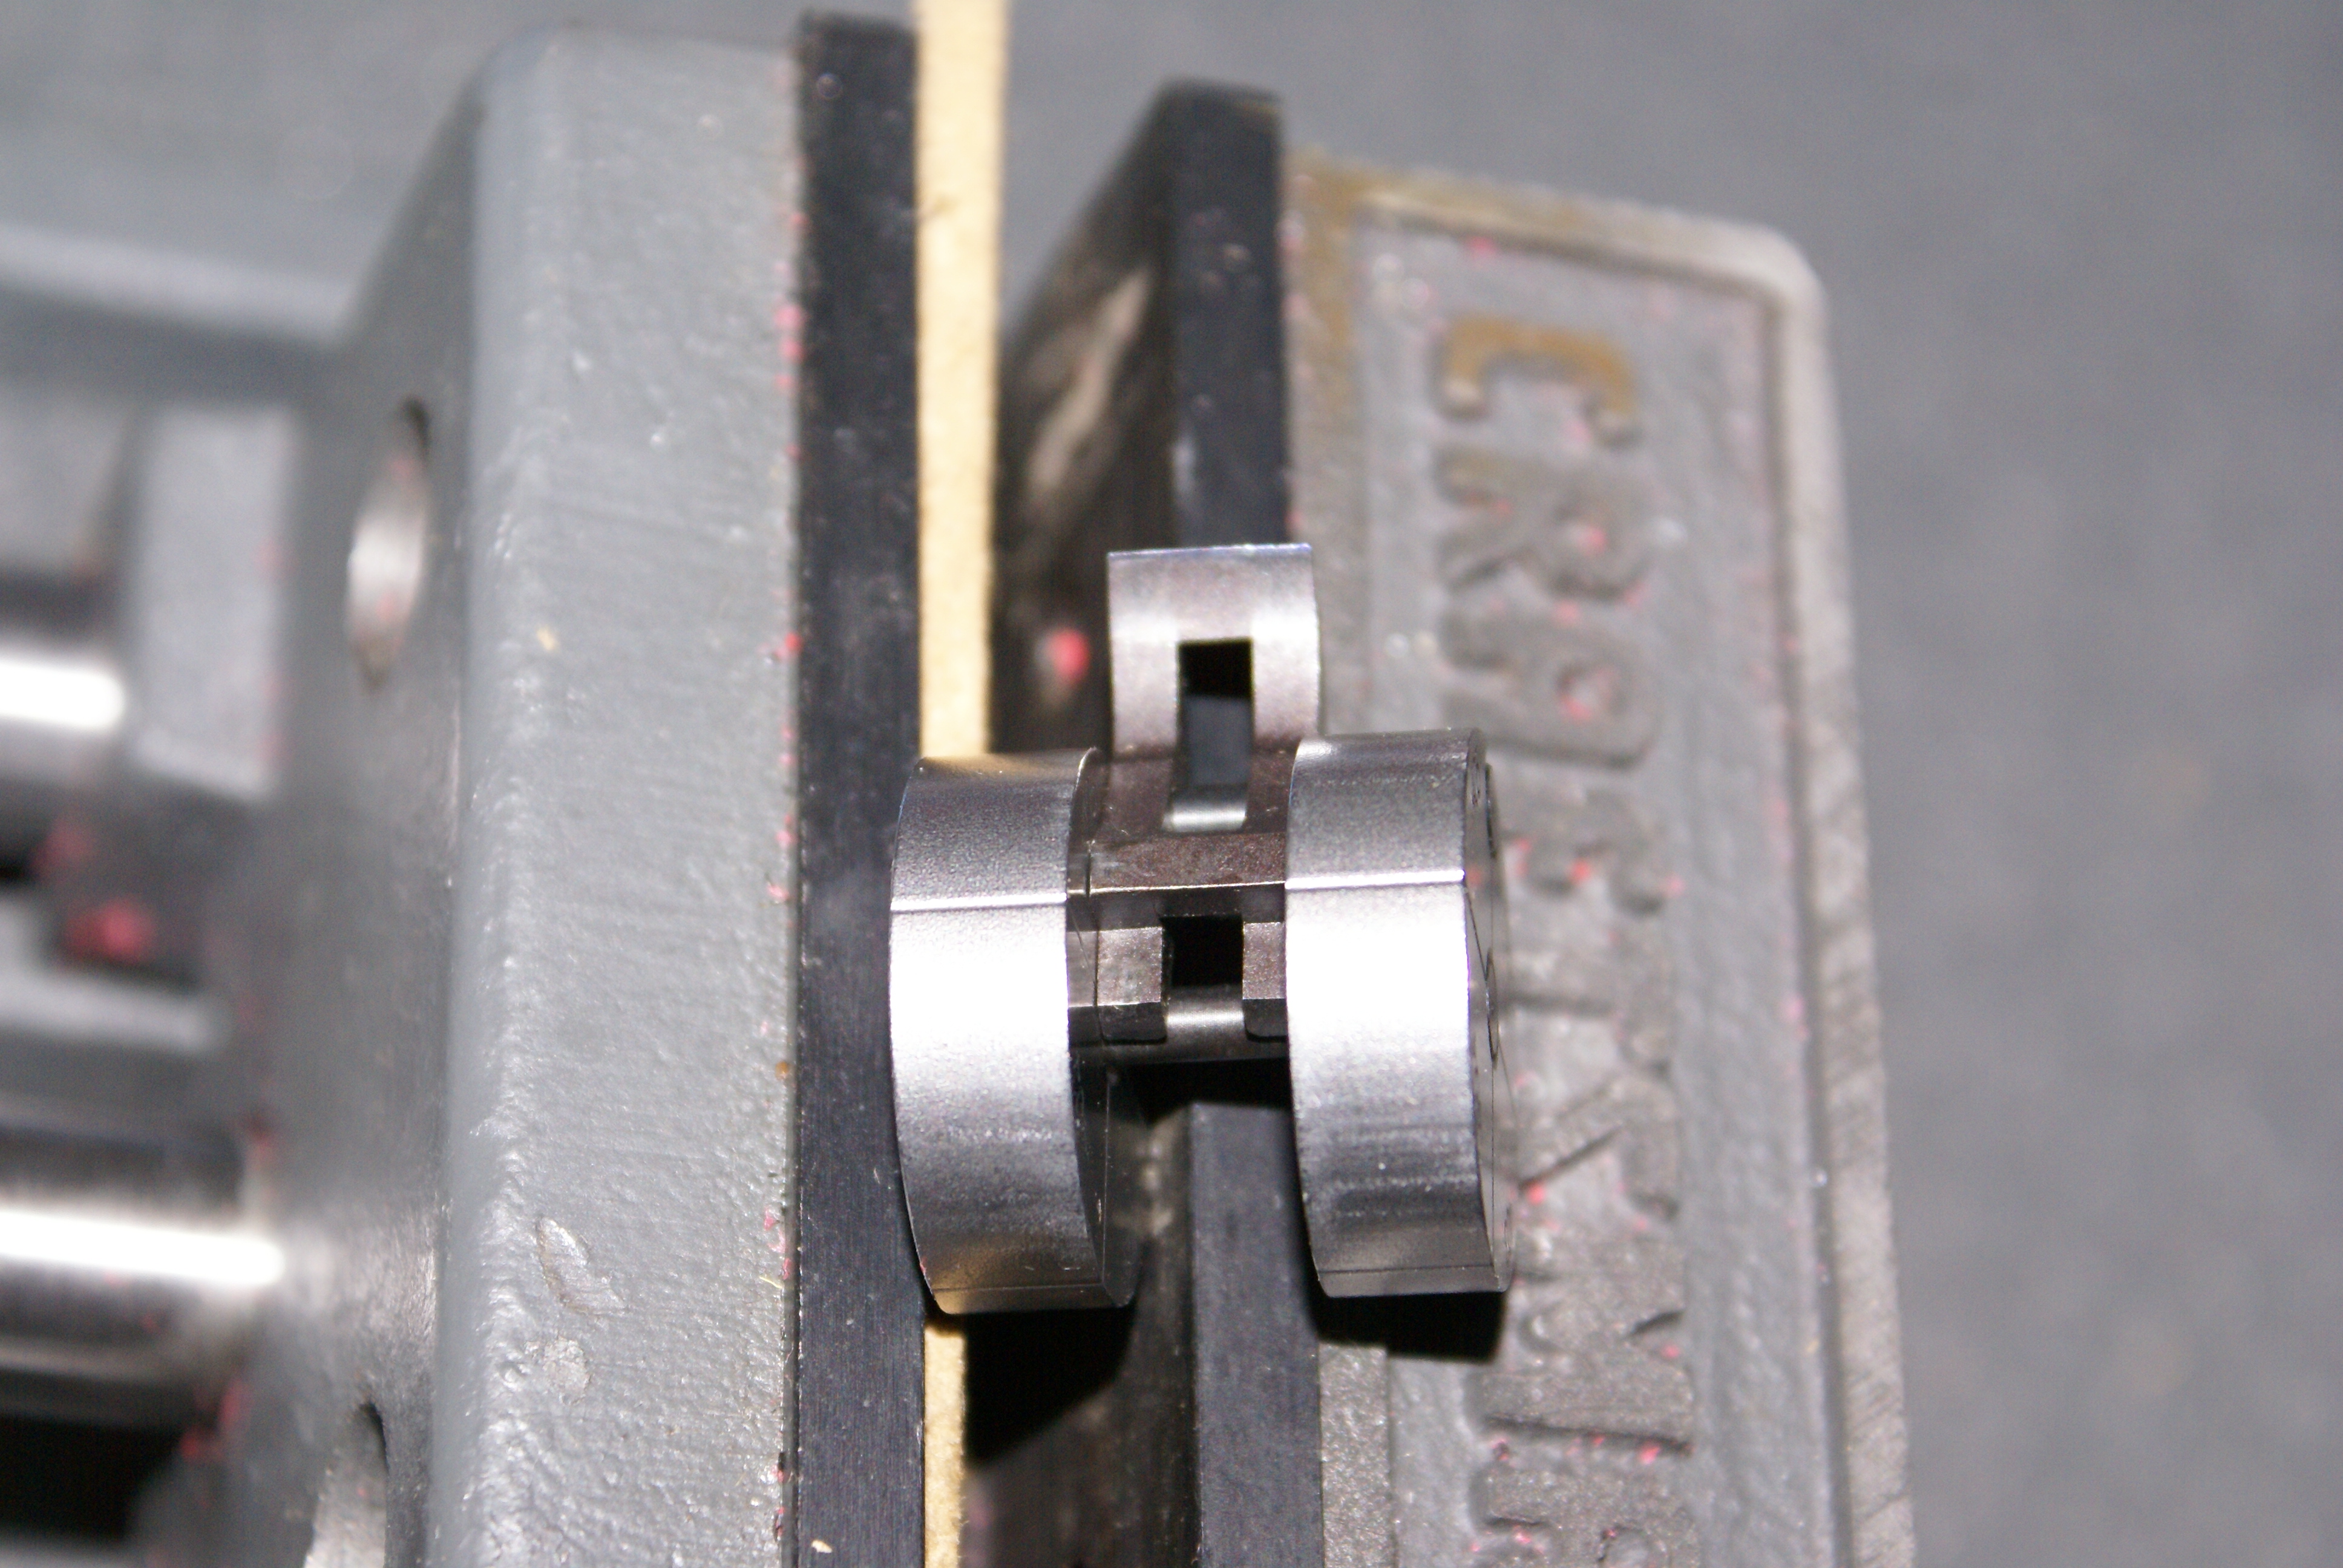
To use this jig, the sear is placed in between the two discs, with matching numbers facing up. A pin is inserted through the middle of the top disc, middle of the sear, and middle of the bottom disc. The second pin is placed through the corresponding holes in the discs, and can be and held ( works well) or secured in a small vice (works better). The sear surface is marked with Dykem fluid or a Sharpie so that progress can be seen. Starting with the tallest radius measurement, the sear’s primary surface is stoned with a hard Arkansas stone following the curve of the jig. Once the surface is visibly prepped (all the marking is stoned away), or resistance is no longer felt, the process is complete. If the surface reaches the absolute radius of the jig and marking still remains, the next lowest setting is used. This works well to ensure that the sear has a squared surface, and is still within correct tolerances. For the secondary surface, the jig is assembled the same way as the primary surface, except for the position of the sear. The secondary angle is stoned by inserting the outer pin through the middle of the sear, and rotating the back of the sear legs against the center pin. This process is done a few light strokes at a time, and constantly checking progress (marking removal or physical fitting in the firearm).


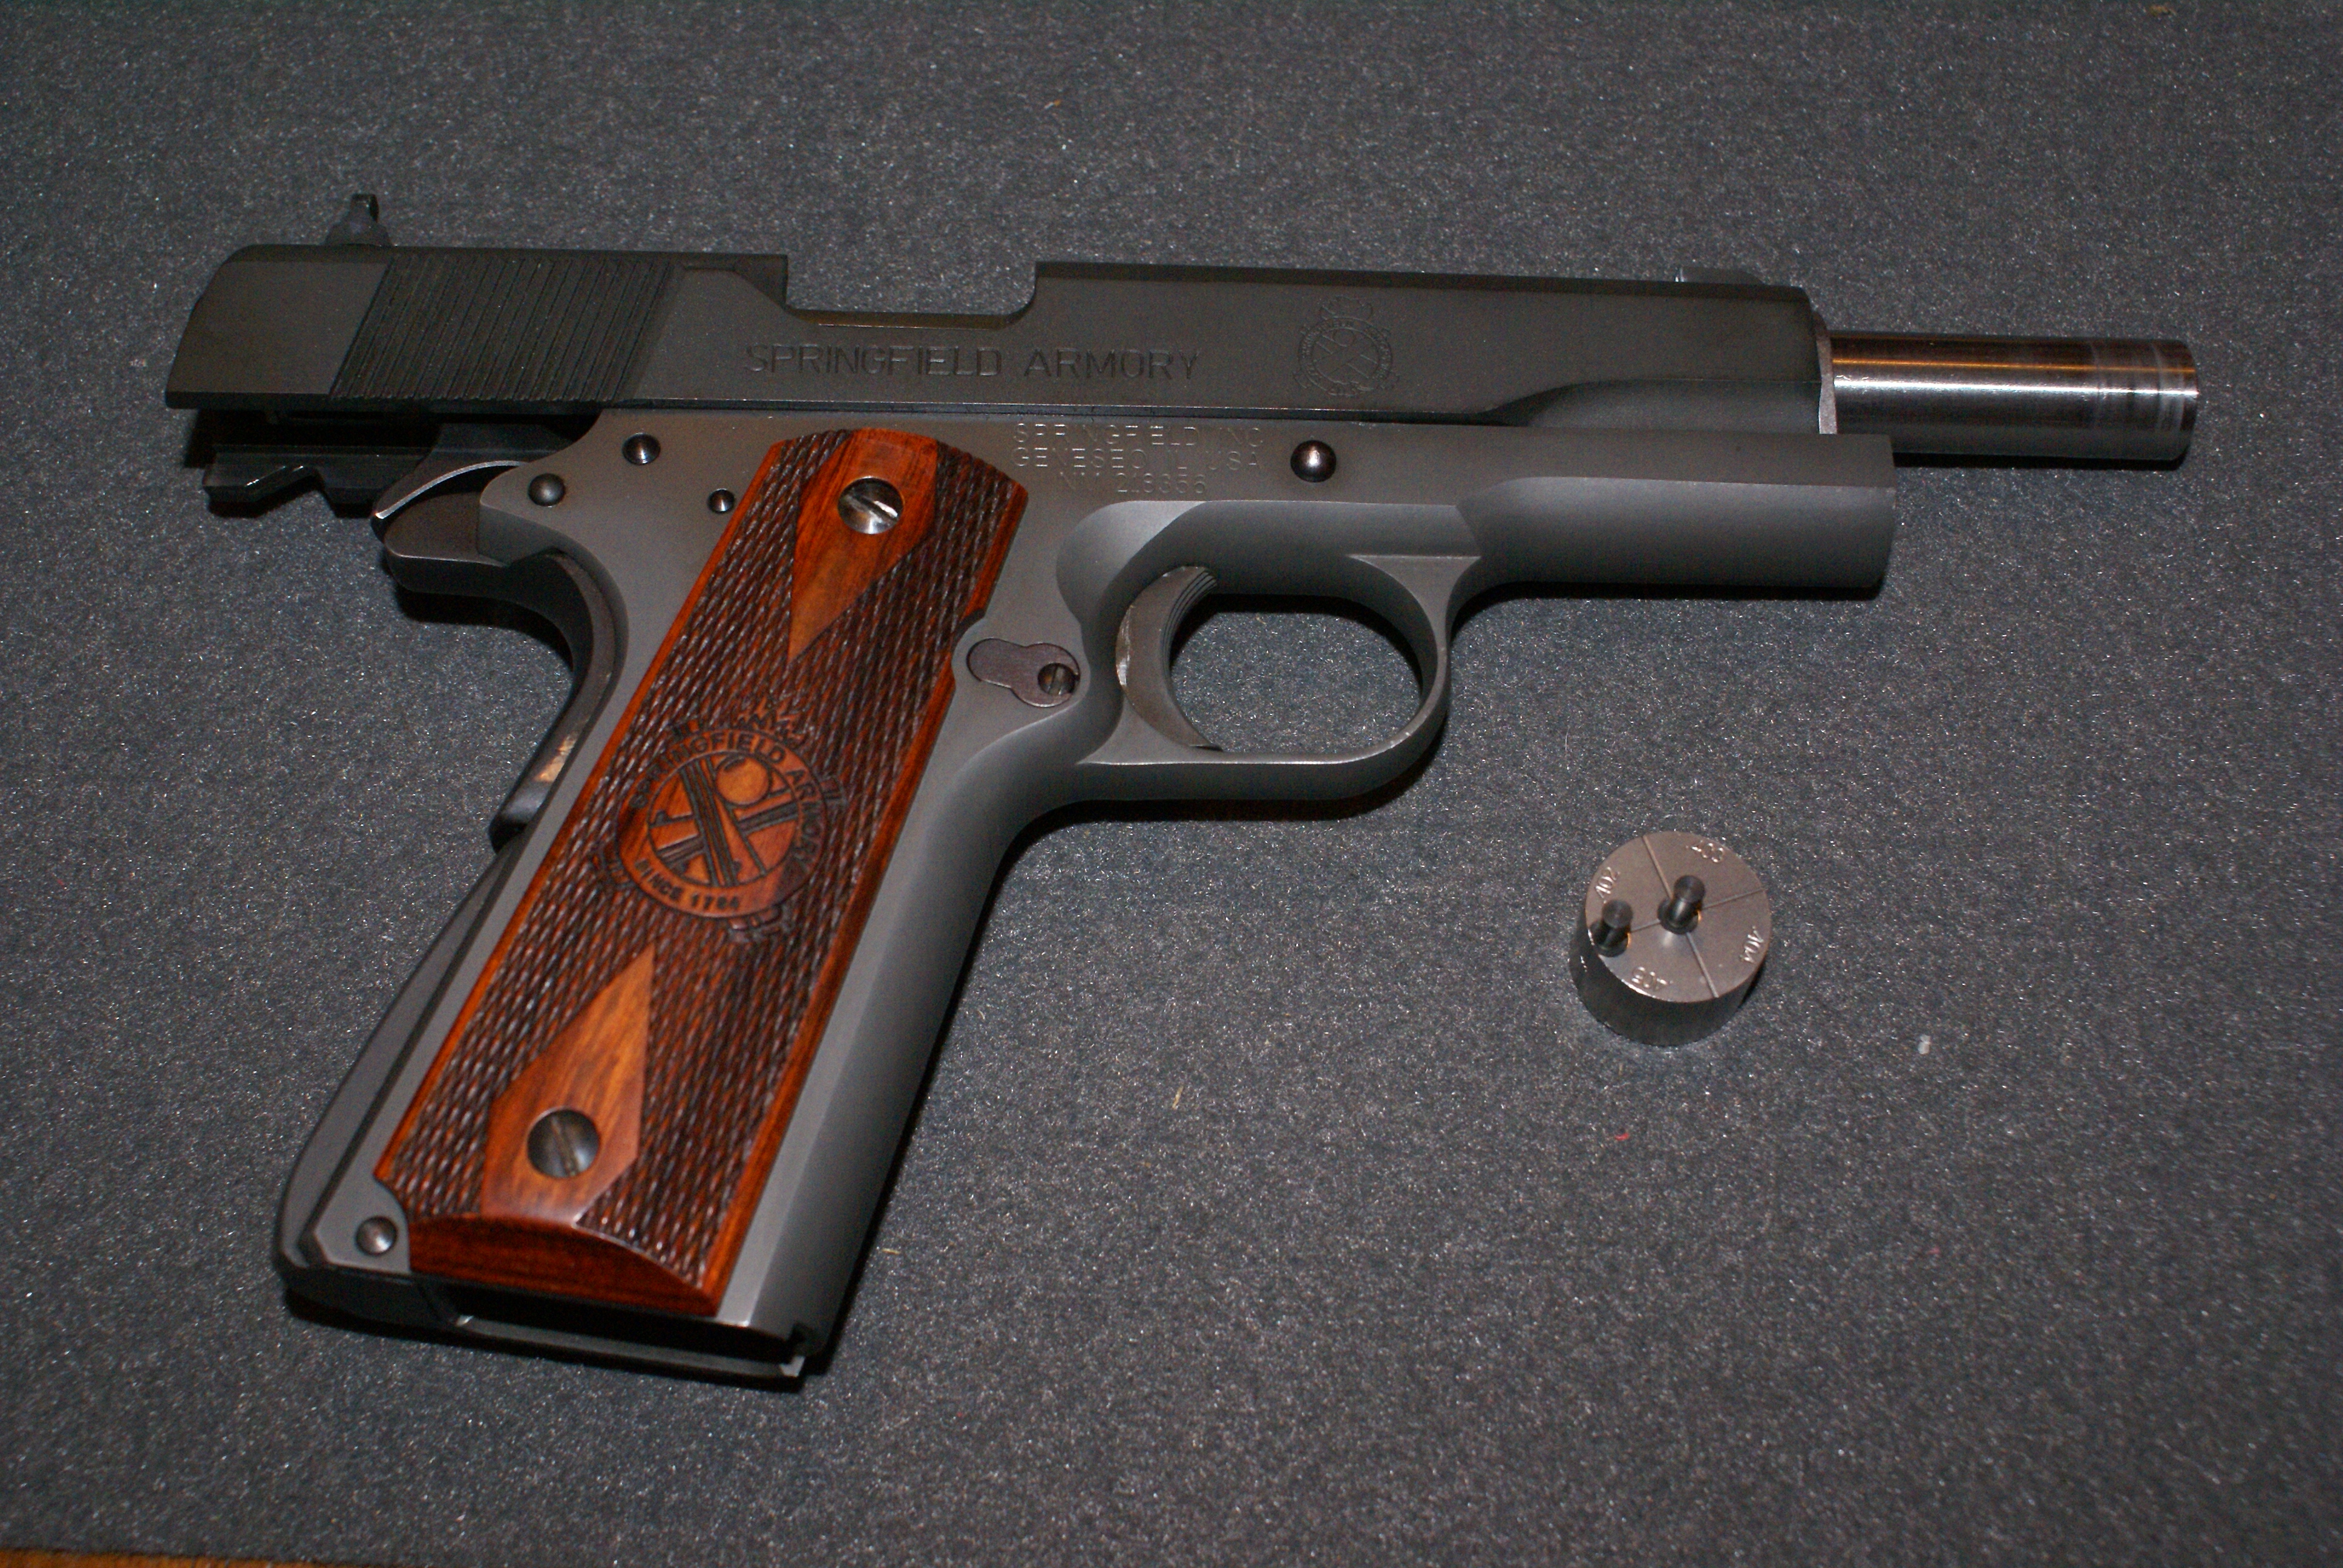
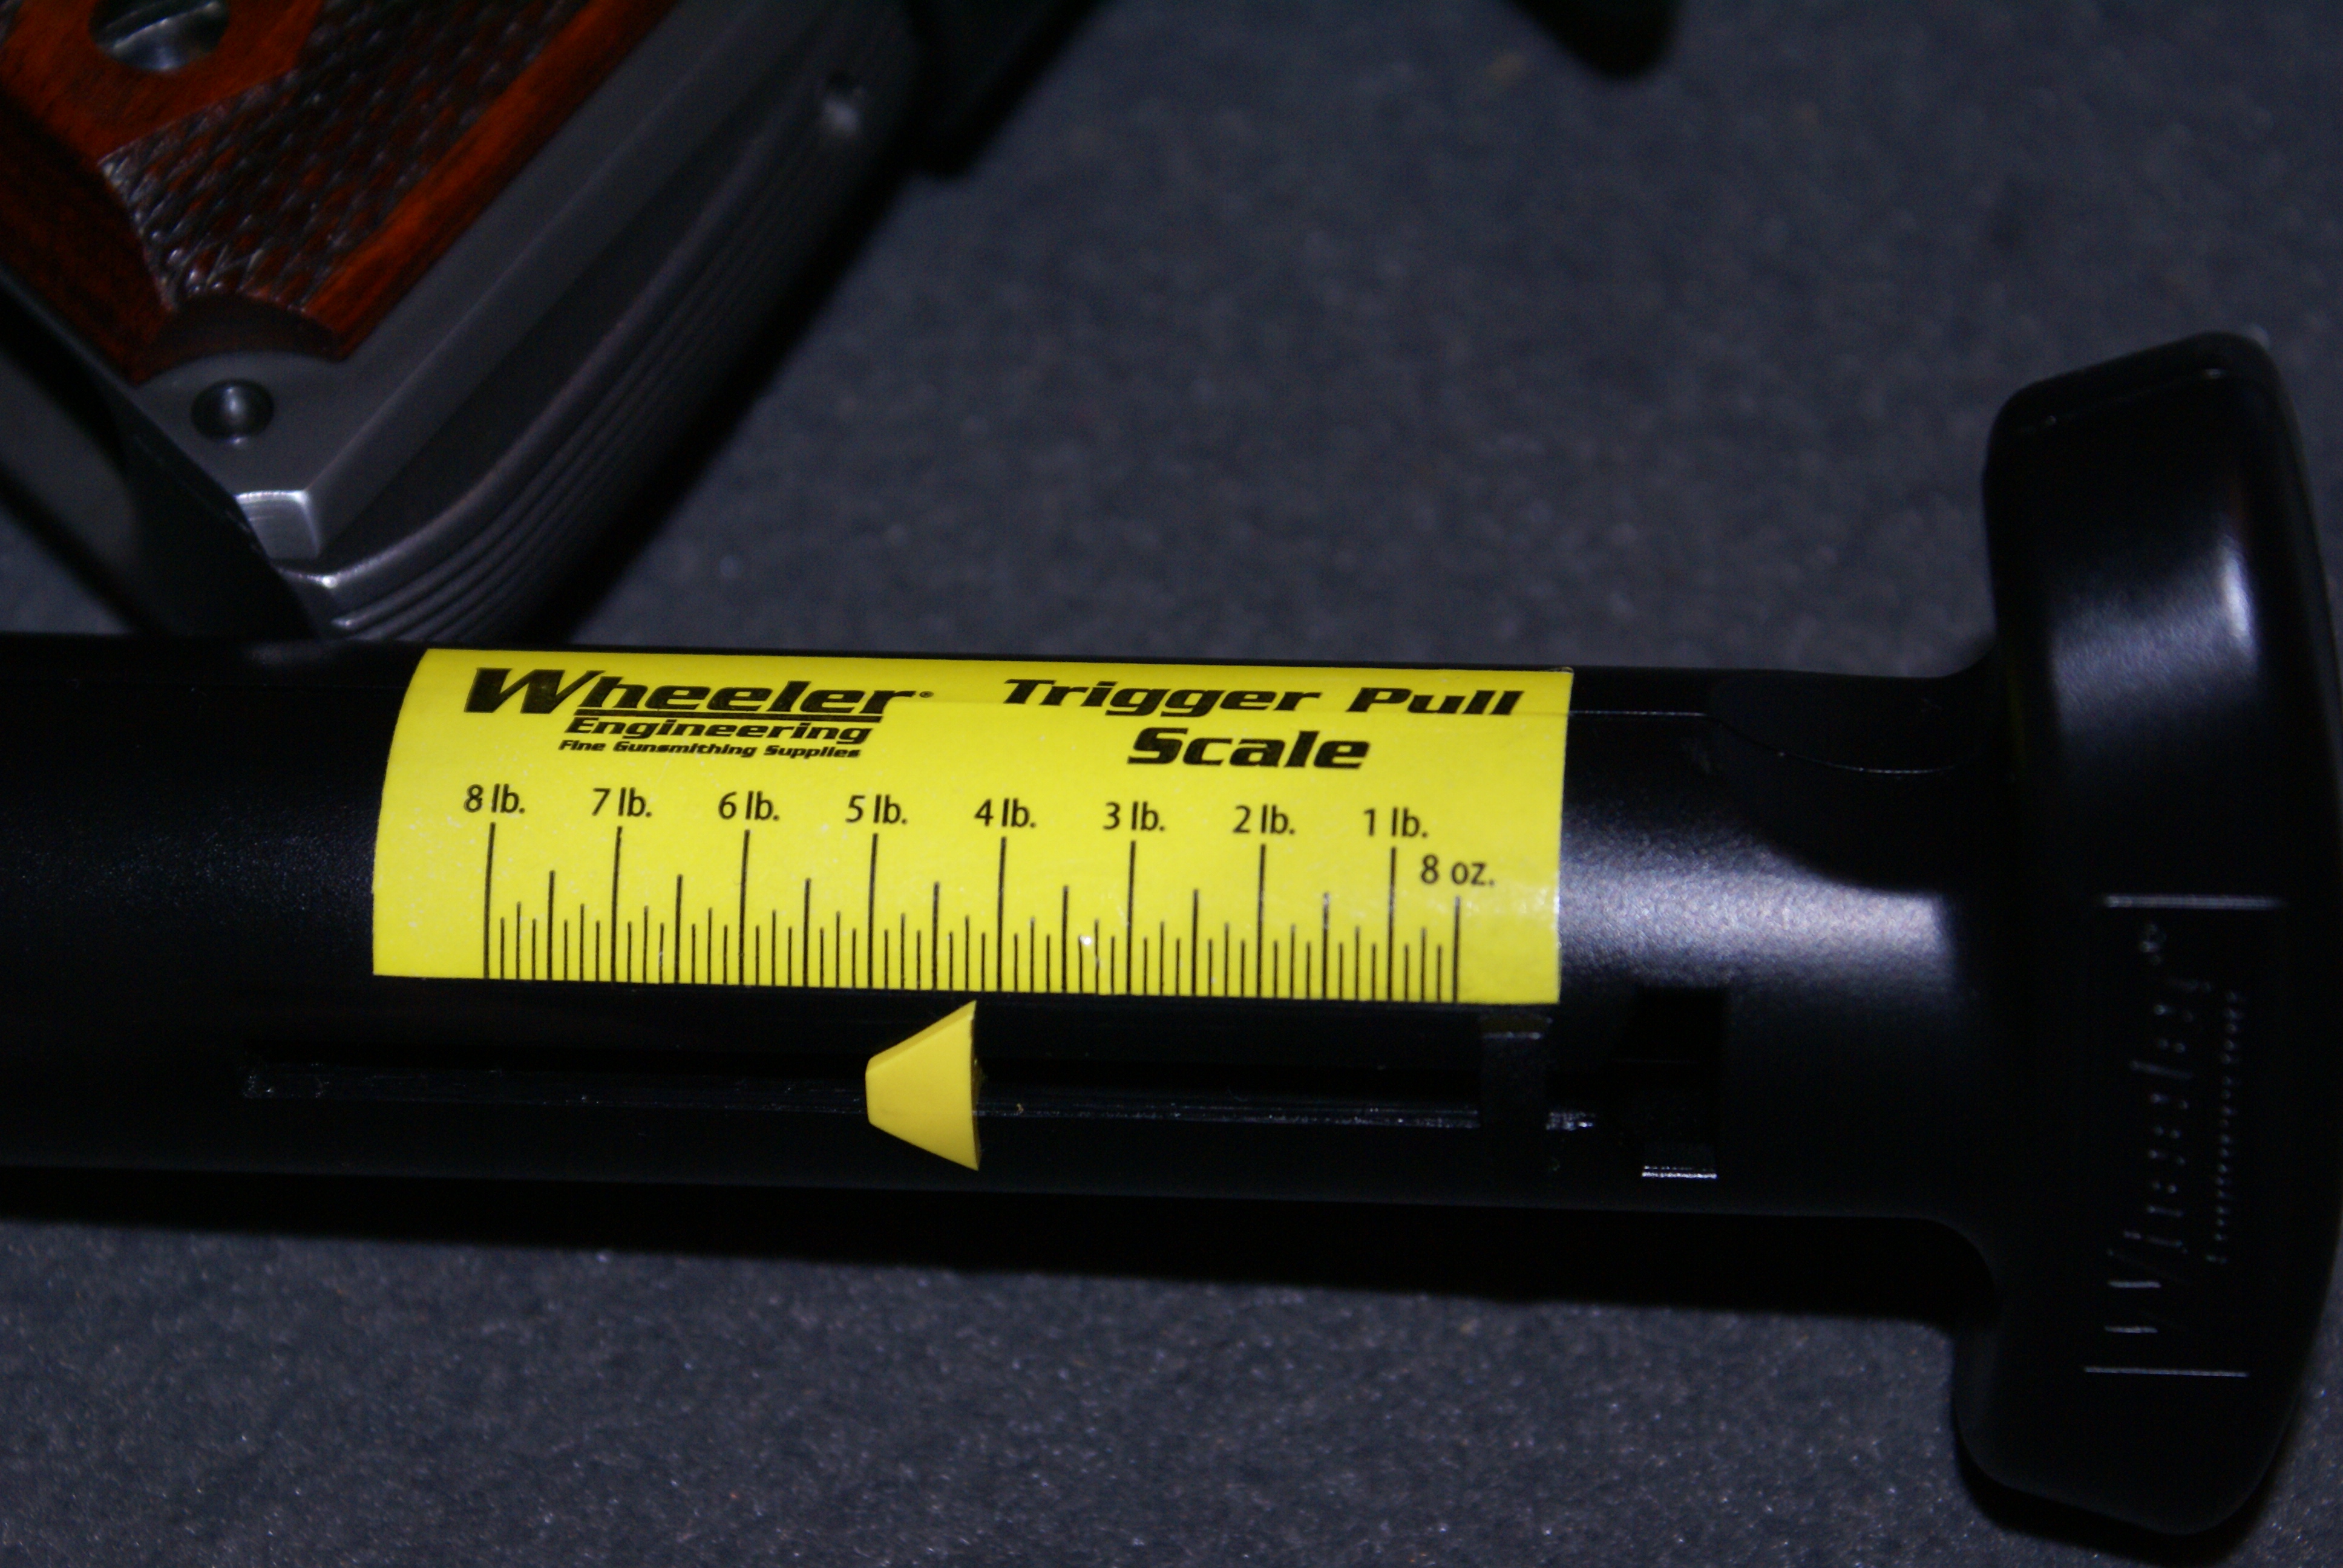
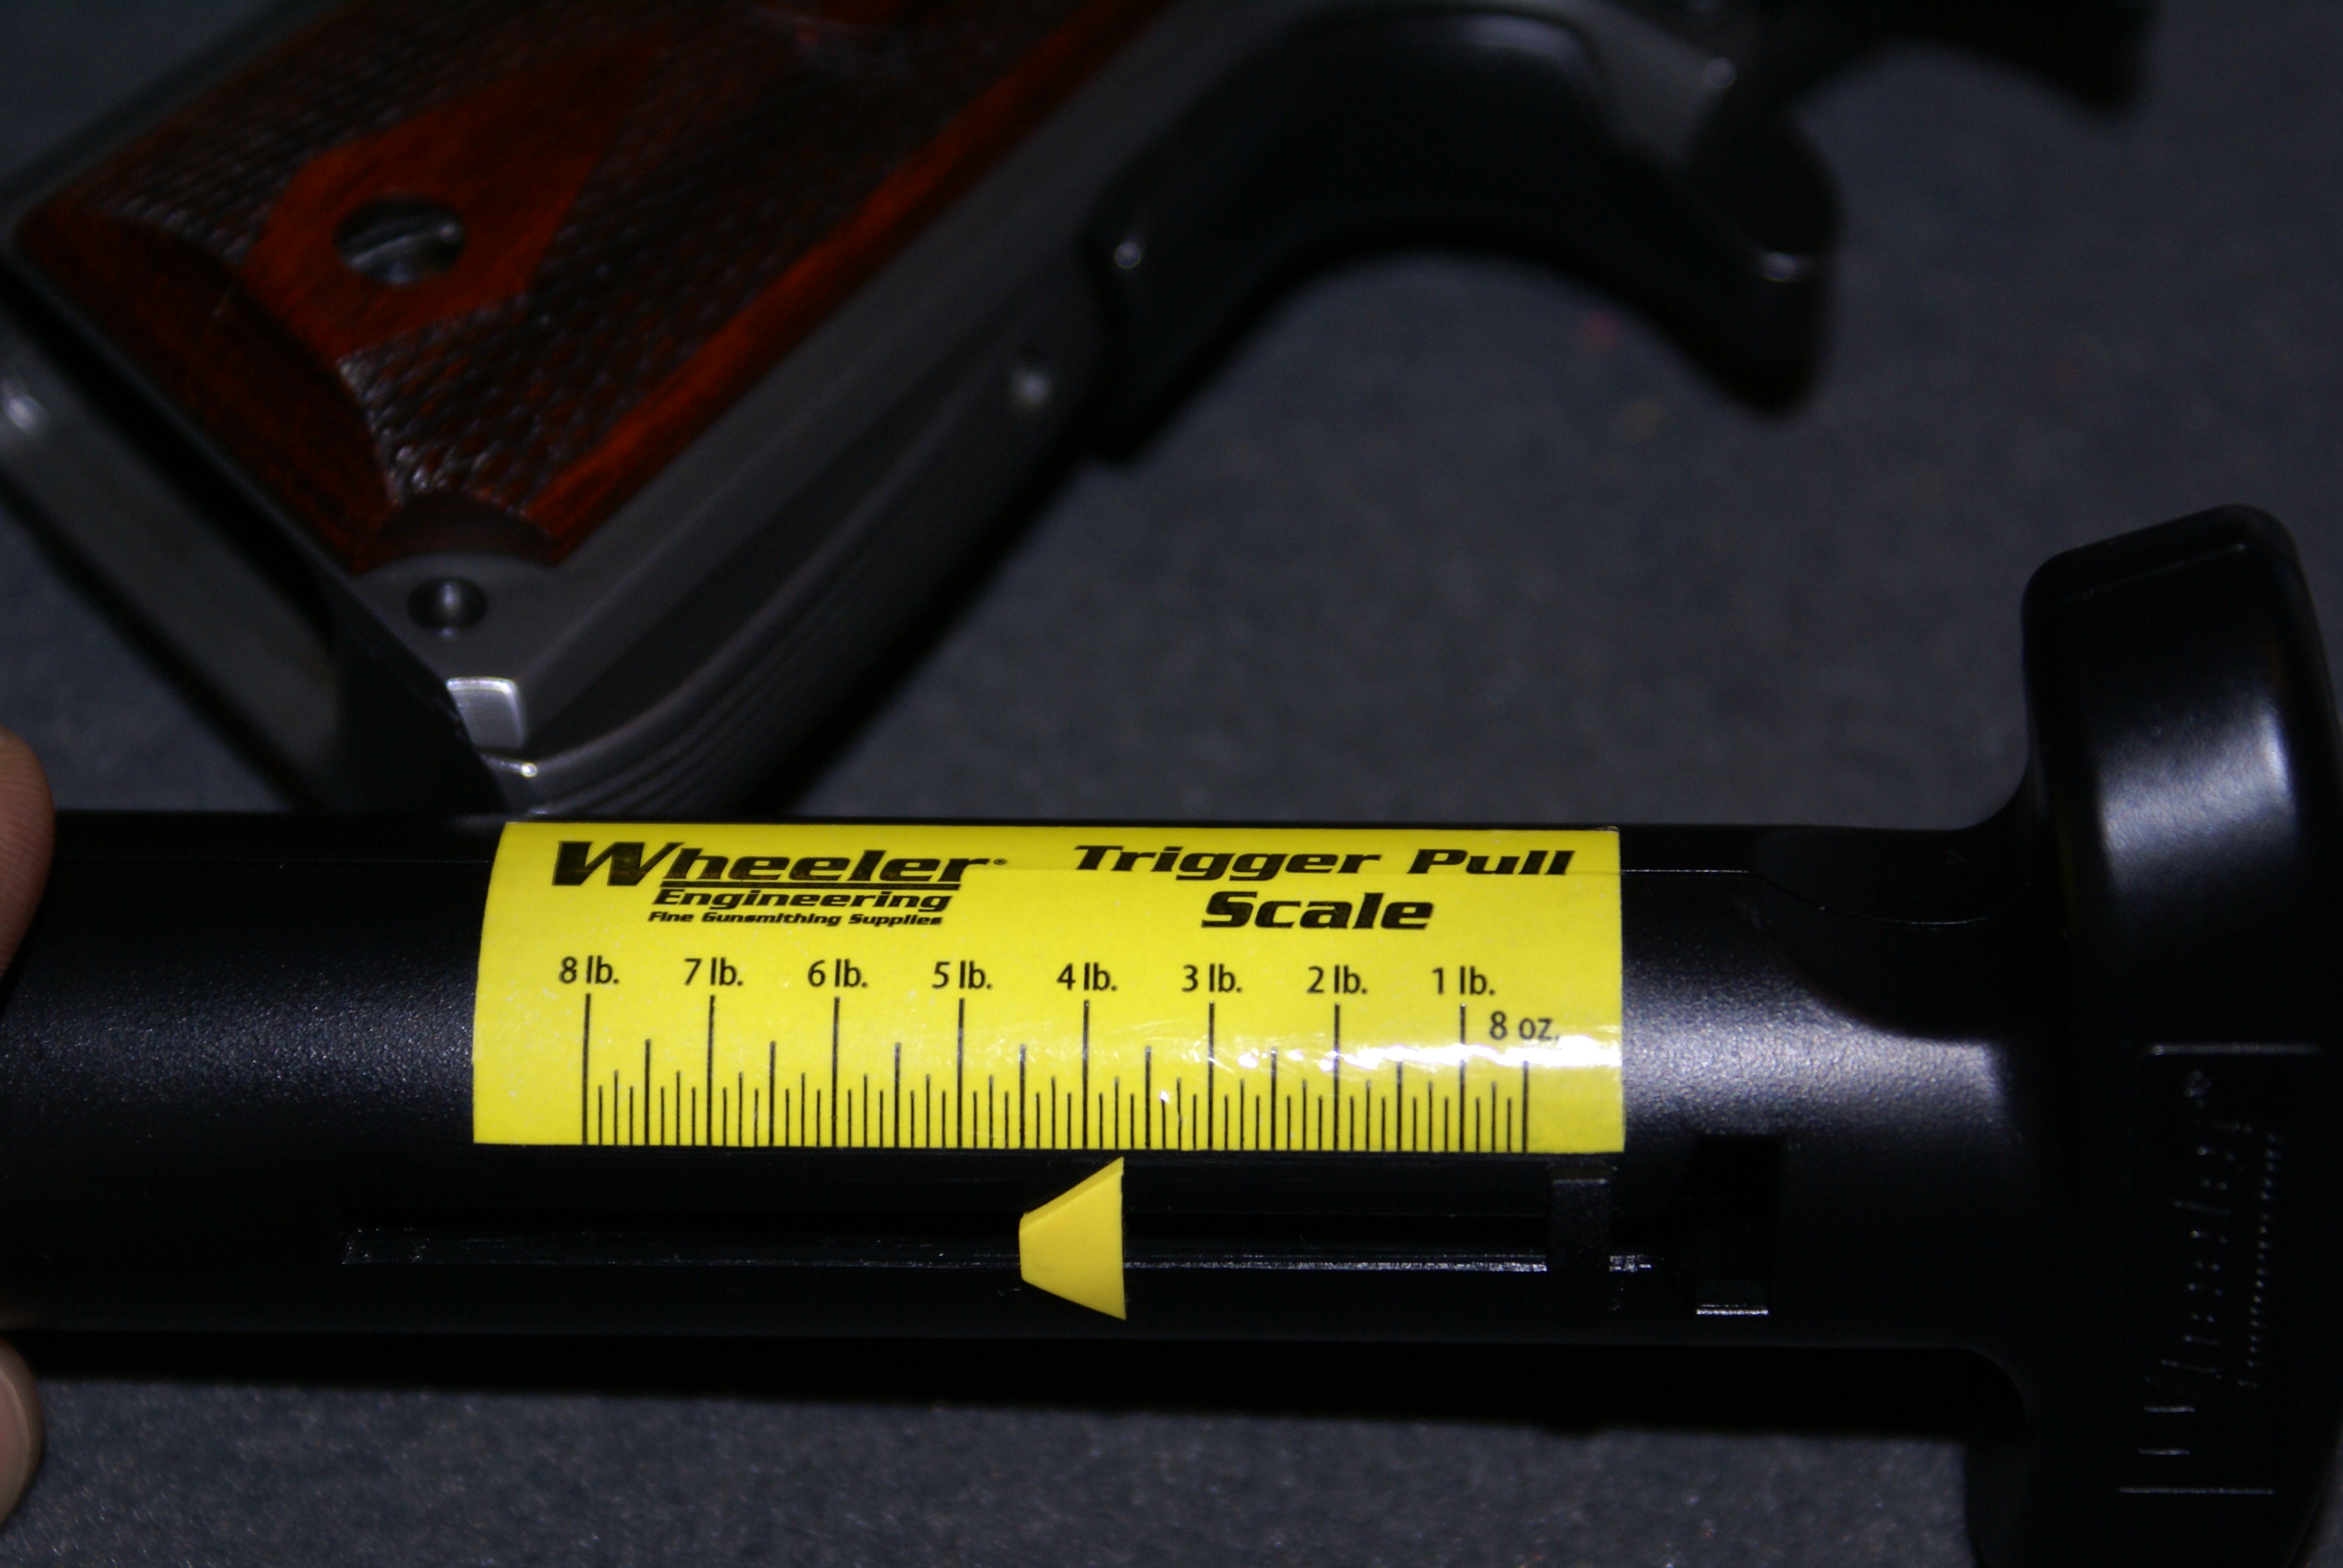
So the instructions were simple enough to follow, but still……A radius on the primary surface….. does it affect safety, such as the issues I had already mentioned? Turns out, the TR Pro Sear Jig works well, and the theory behind its design is solid. By putting a radius on the primary surface, the hammer hooks glide (for lack of a better term) across the rounded sear surface instead of pushing against it until release, as a typical flat surface would do. The feeling of the two processes compared (during the trigger pull) could be described as the true radius having a smooth and consistent feeling until the hammer falls, and a flat surface having a build up of the pressure in the trigger pull required to drop the hammer with a sharp “snap” as the sear pushes against and clears the hammer hooks. Both of course sharing the characteristic of very little to zero take-up. This theory was tested and confirmed using “low end” Rock Island Armory, Kimber, and Springfield Armory 1911s. During the tests, close attention was payed as to not adjust any springs, as this would have skewed the results. The average change in pull weight after prepping the sear surfaces with the TR Pro Sear Jig was six oz., and the overall feel of the trigger pull and hammer response improved as previously mentioned.
After having this tool in my possession for almost a year now, I can say that I prefer this jig over others on the market. The design and theory are sound, and provide excellent results while keeping the surface within safe dimensional tolerances. Durability is excellent, as the discs are made from a heat-treated and hardened steel. With the price tag of $119.95, I can see how one would go with a less expensive jig. However, what I can tell you is this; if you are looking to seriously invest in a tool that guarantees results safely, the TR Pro Sear Jig is a top contender. In my opinion, this jig is a one stop shop item that is worth the price.
Thanks for reading,
-Rhody
You must be logged in to post a comment.